
TREIBTRAVEL BLOG


Wassaic Imprints Edition "Osaka Castle"


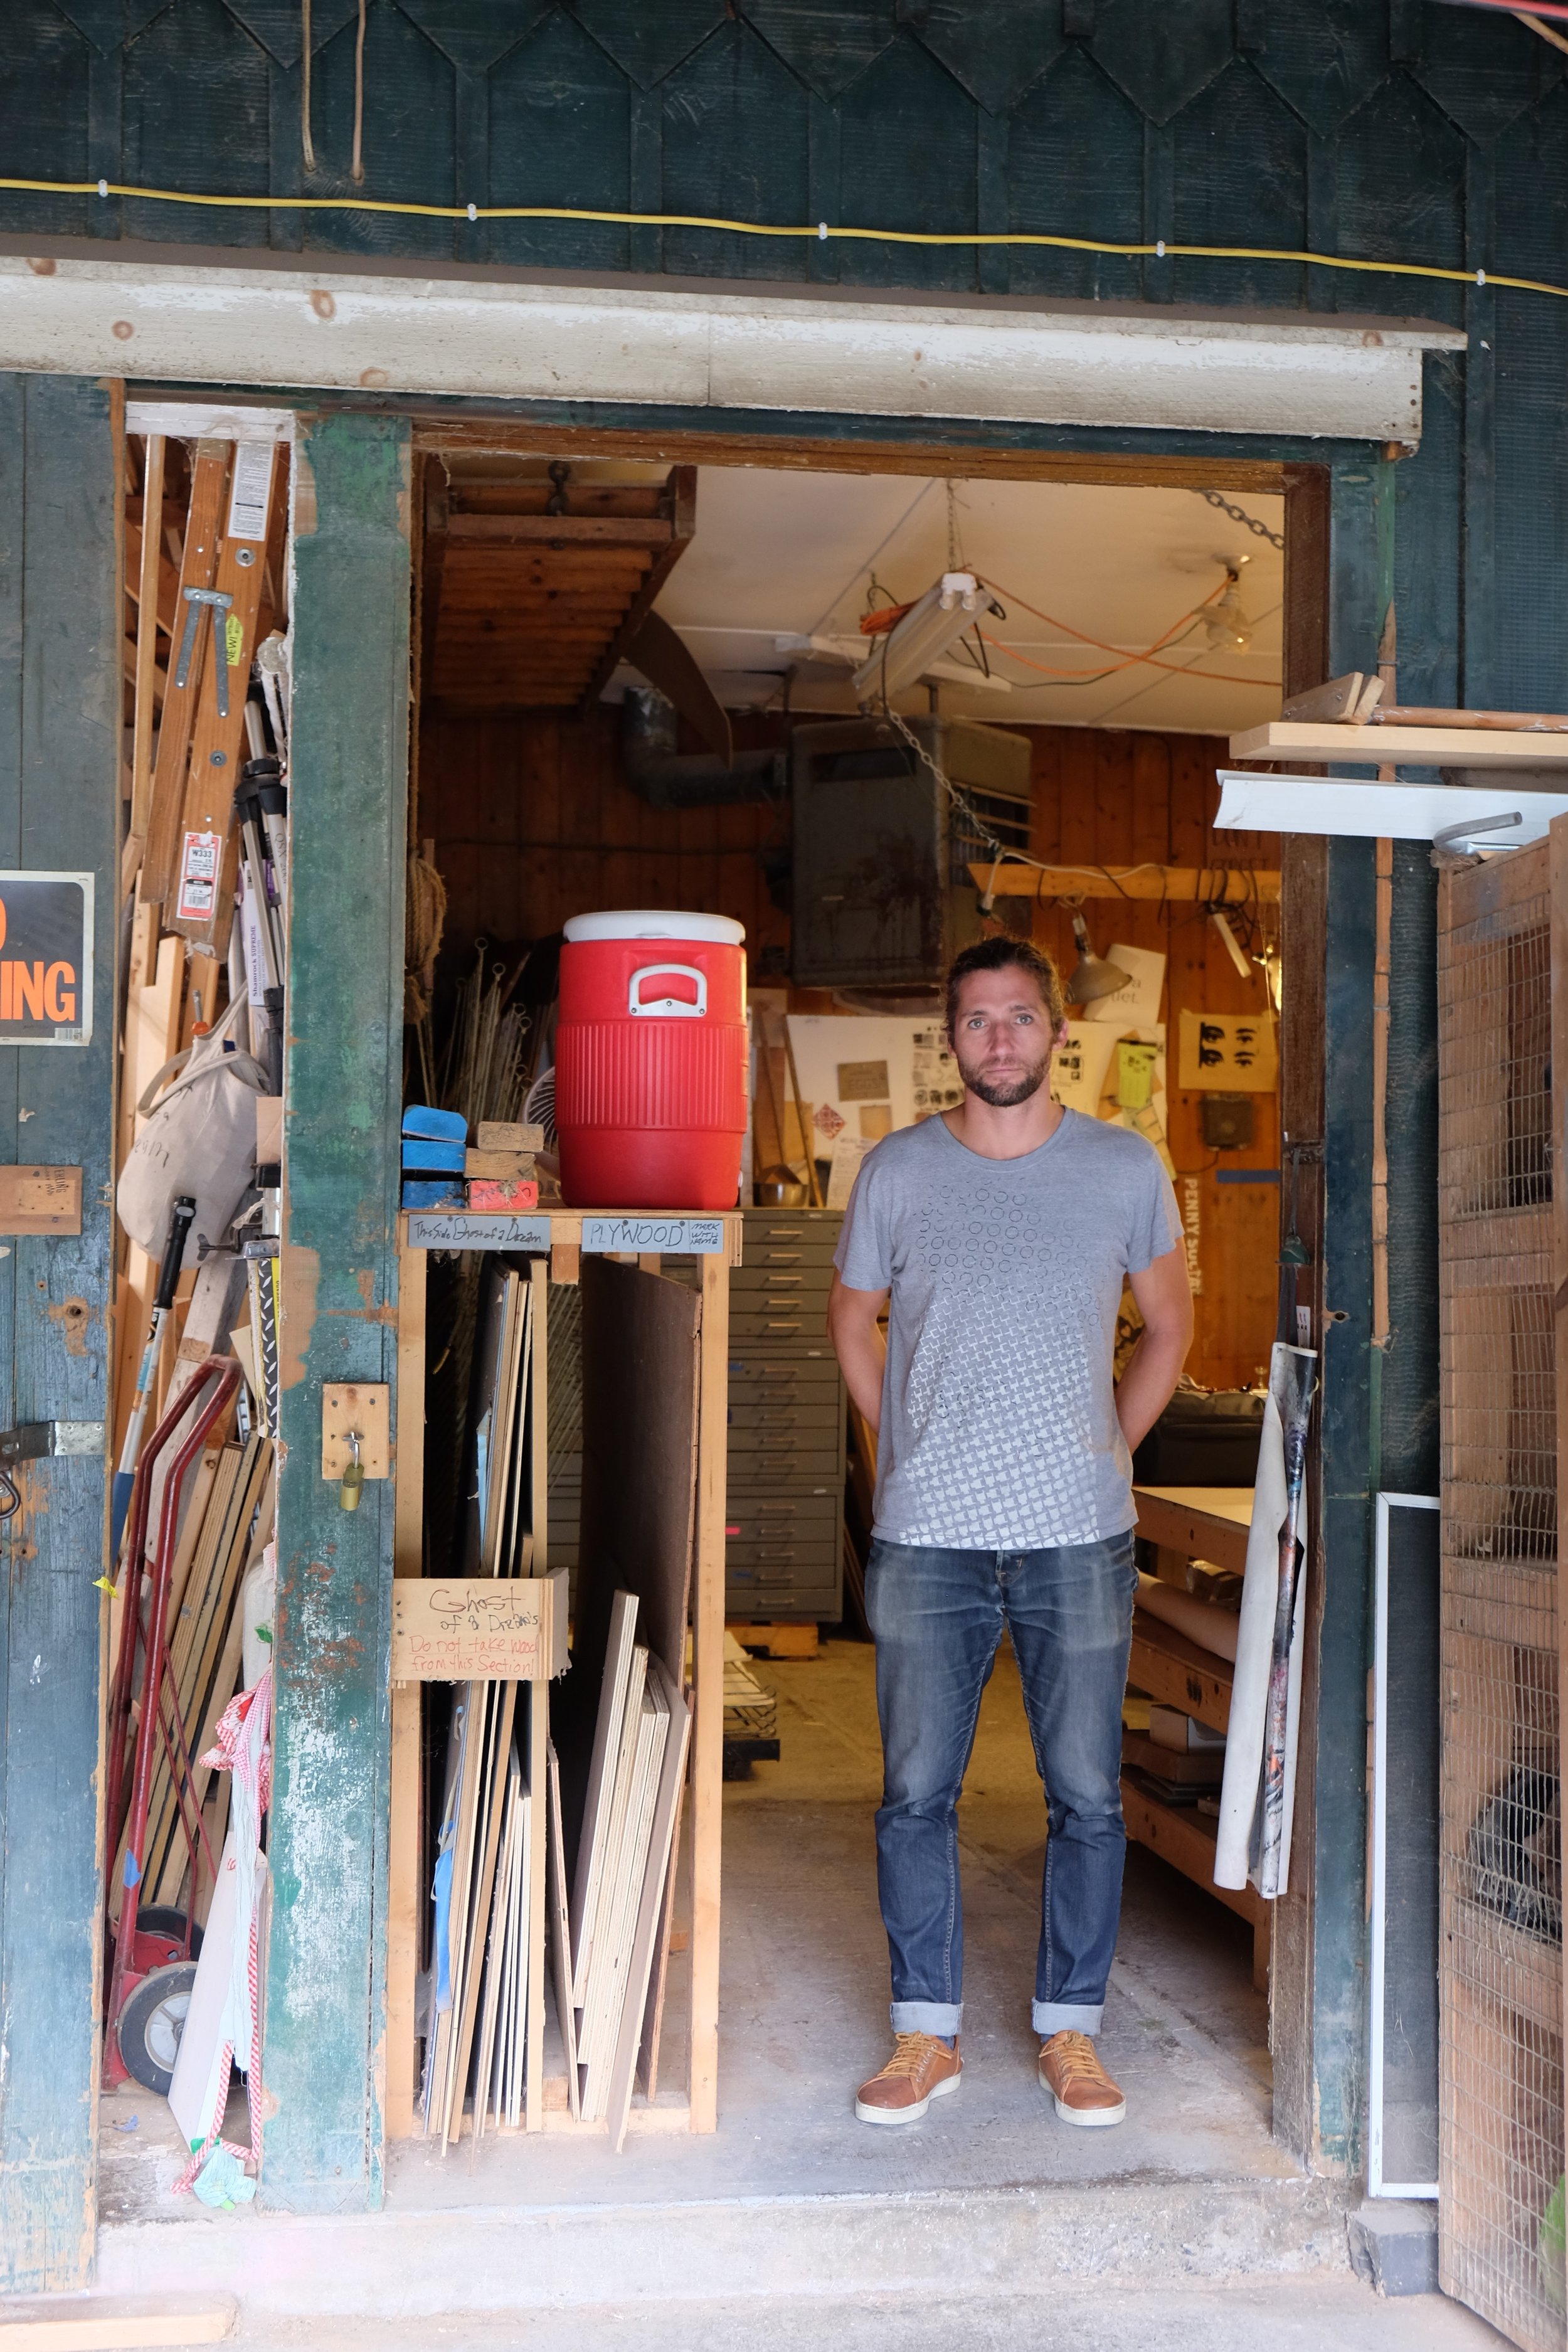
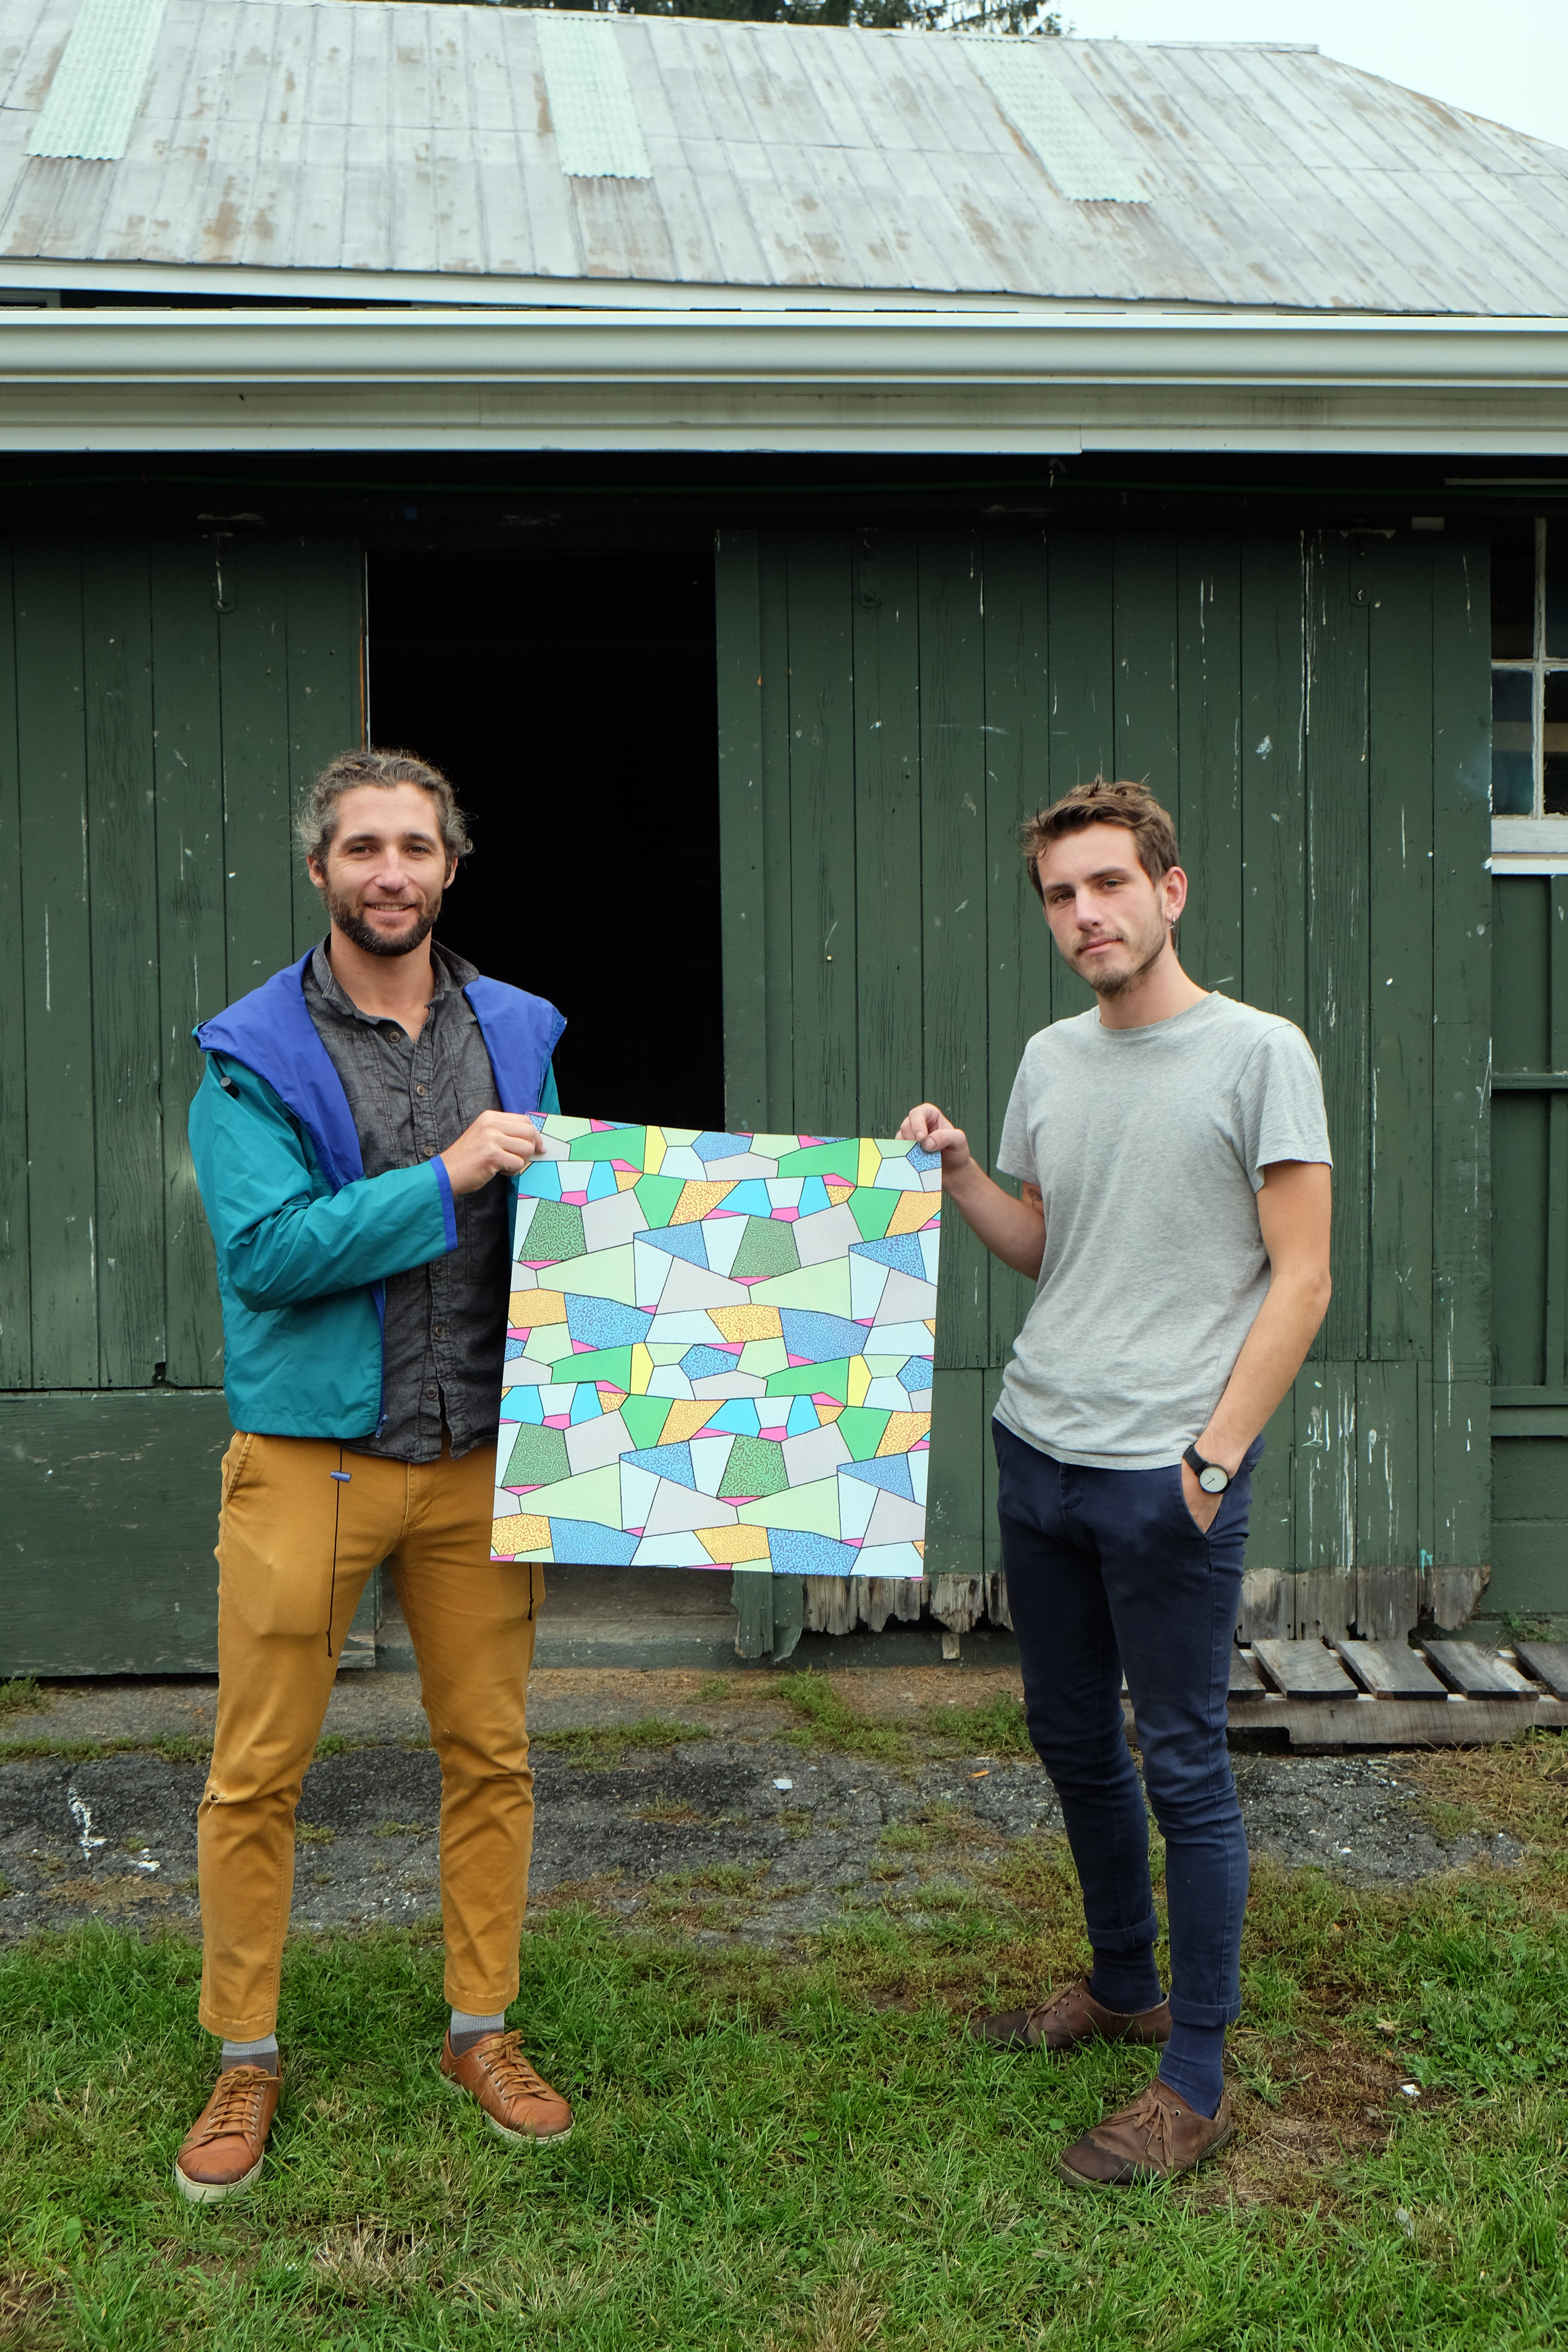
From September 24th-28th Treibdesign was invited to participate in the Wassaic Editions program. Kaspar Heinrici oversaw the silkscreen print production based on inspiration from the last year of travel. Ali documented the process with the Fujifilm XT-10 and her great eye (all photos are by Alexandra Filippelli). We were assisted by the visiting fellow Zack Ingram whose expertise and diligence made this edition a success! We have 21 of the 26 prints for sale on our website HERE!

First Timers

Ali hiding in the top floor installation by Ghost of a Dream @ghostofadreamart
I grew up familiar with the silkscreen process and I have produced patterns my whole life in my sketchbook, but I never put the theory to practice and produced an edition of prints on paper. Ali has studied printmaking on an academic level and we have both experimented with t-shirt printing, with basic one color printing techniques using stencils or screen resists. We were excited to produce our own edition with an experienced printer. We wanted to see what the possibilities would be at the Wassaic Project, we had no idea what the studio would be like, what resources there would be and how I would translate my concept into a 4 color print. Zack Ingram, the printing fellow, had reassured me before we arrived (after I sent him a six page .pdf of concepts) that I should wait to see what the studio had printed in the past before I made decisions on what direction to take with my print. This was sound advice, so Ali and I spent our first day adjusting to the speed of Wassaic, strolling through town to the various buildings, feeding the goats, touring the iconic Maxon Mills exhibition space and talking about print making.
Day one: Working it out
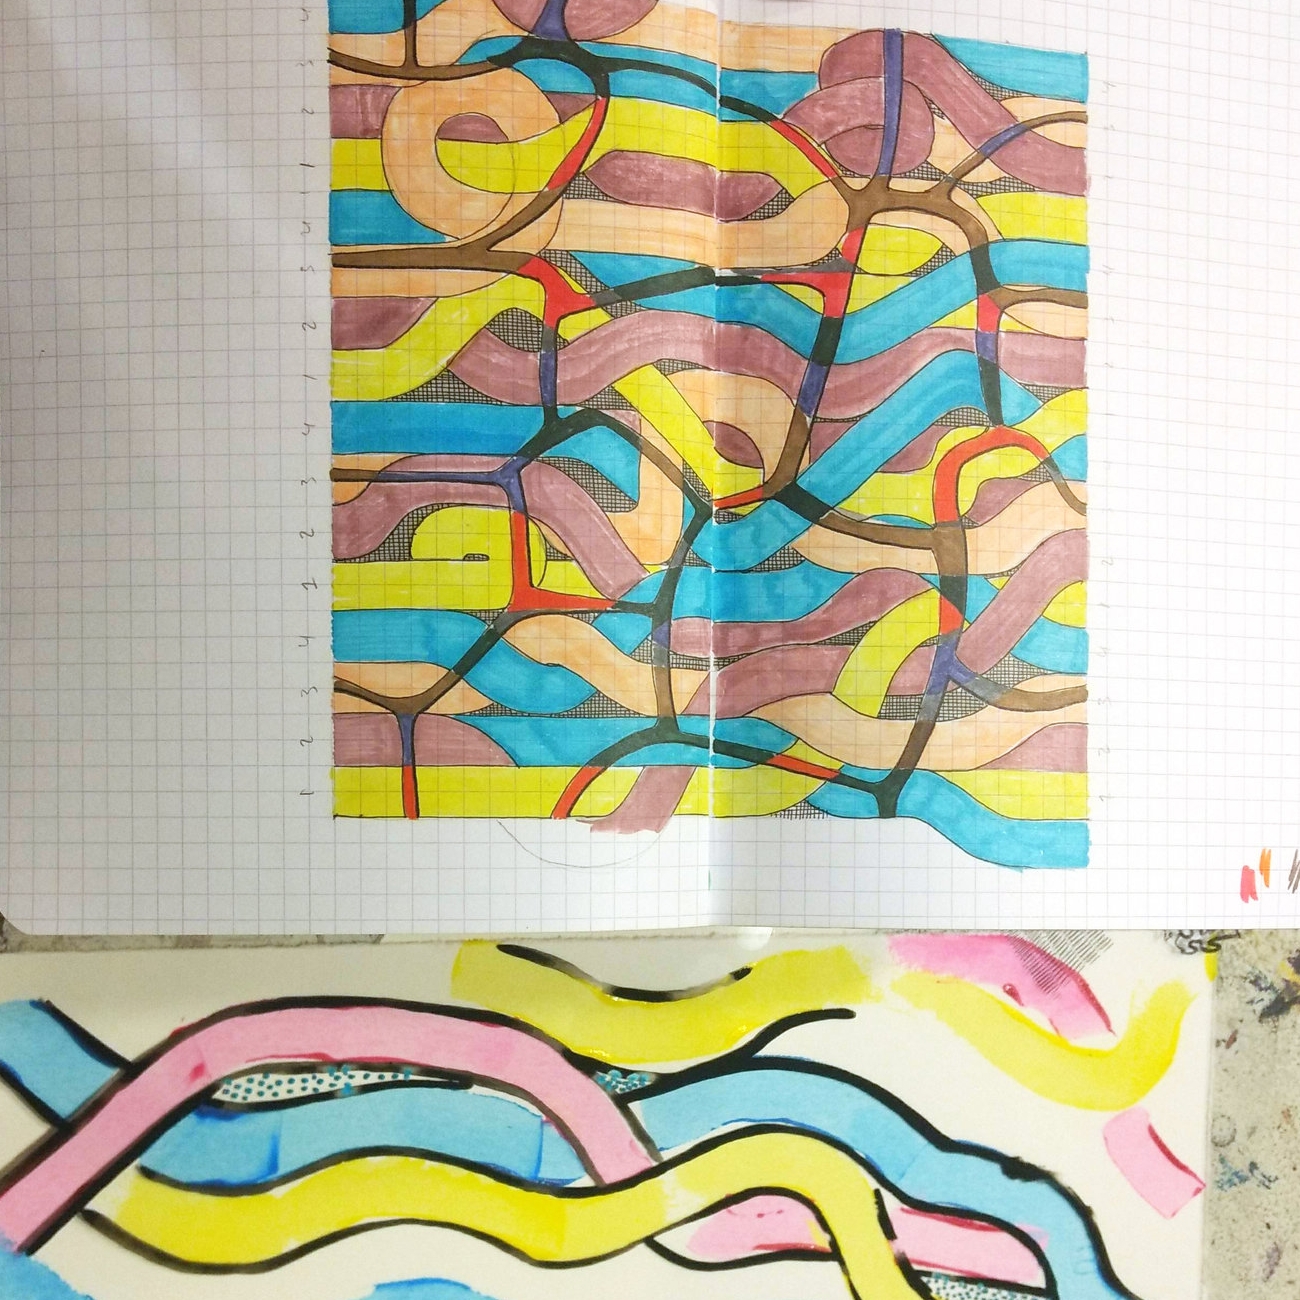
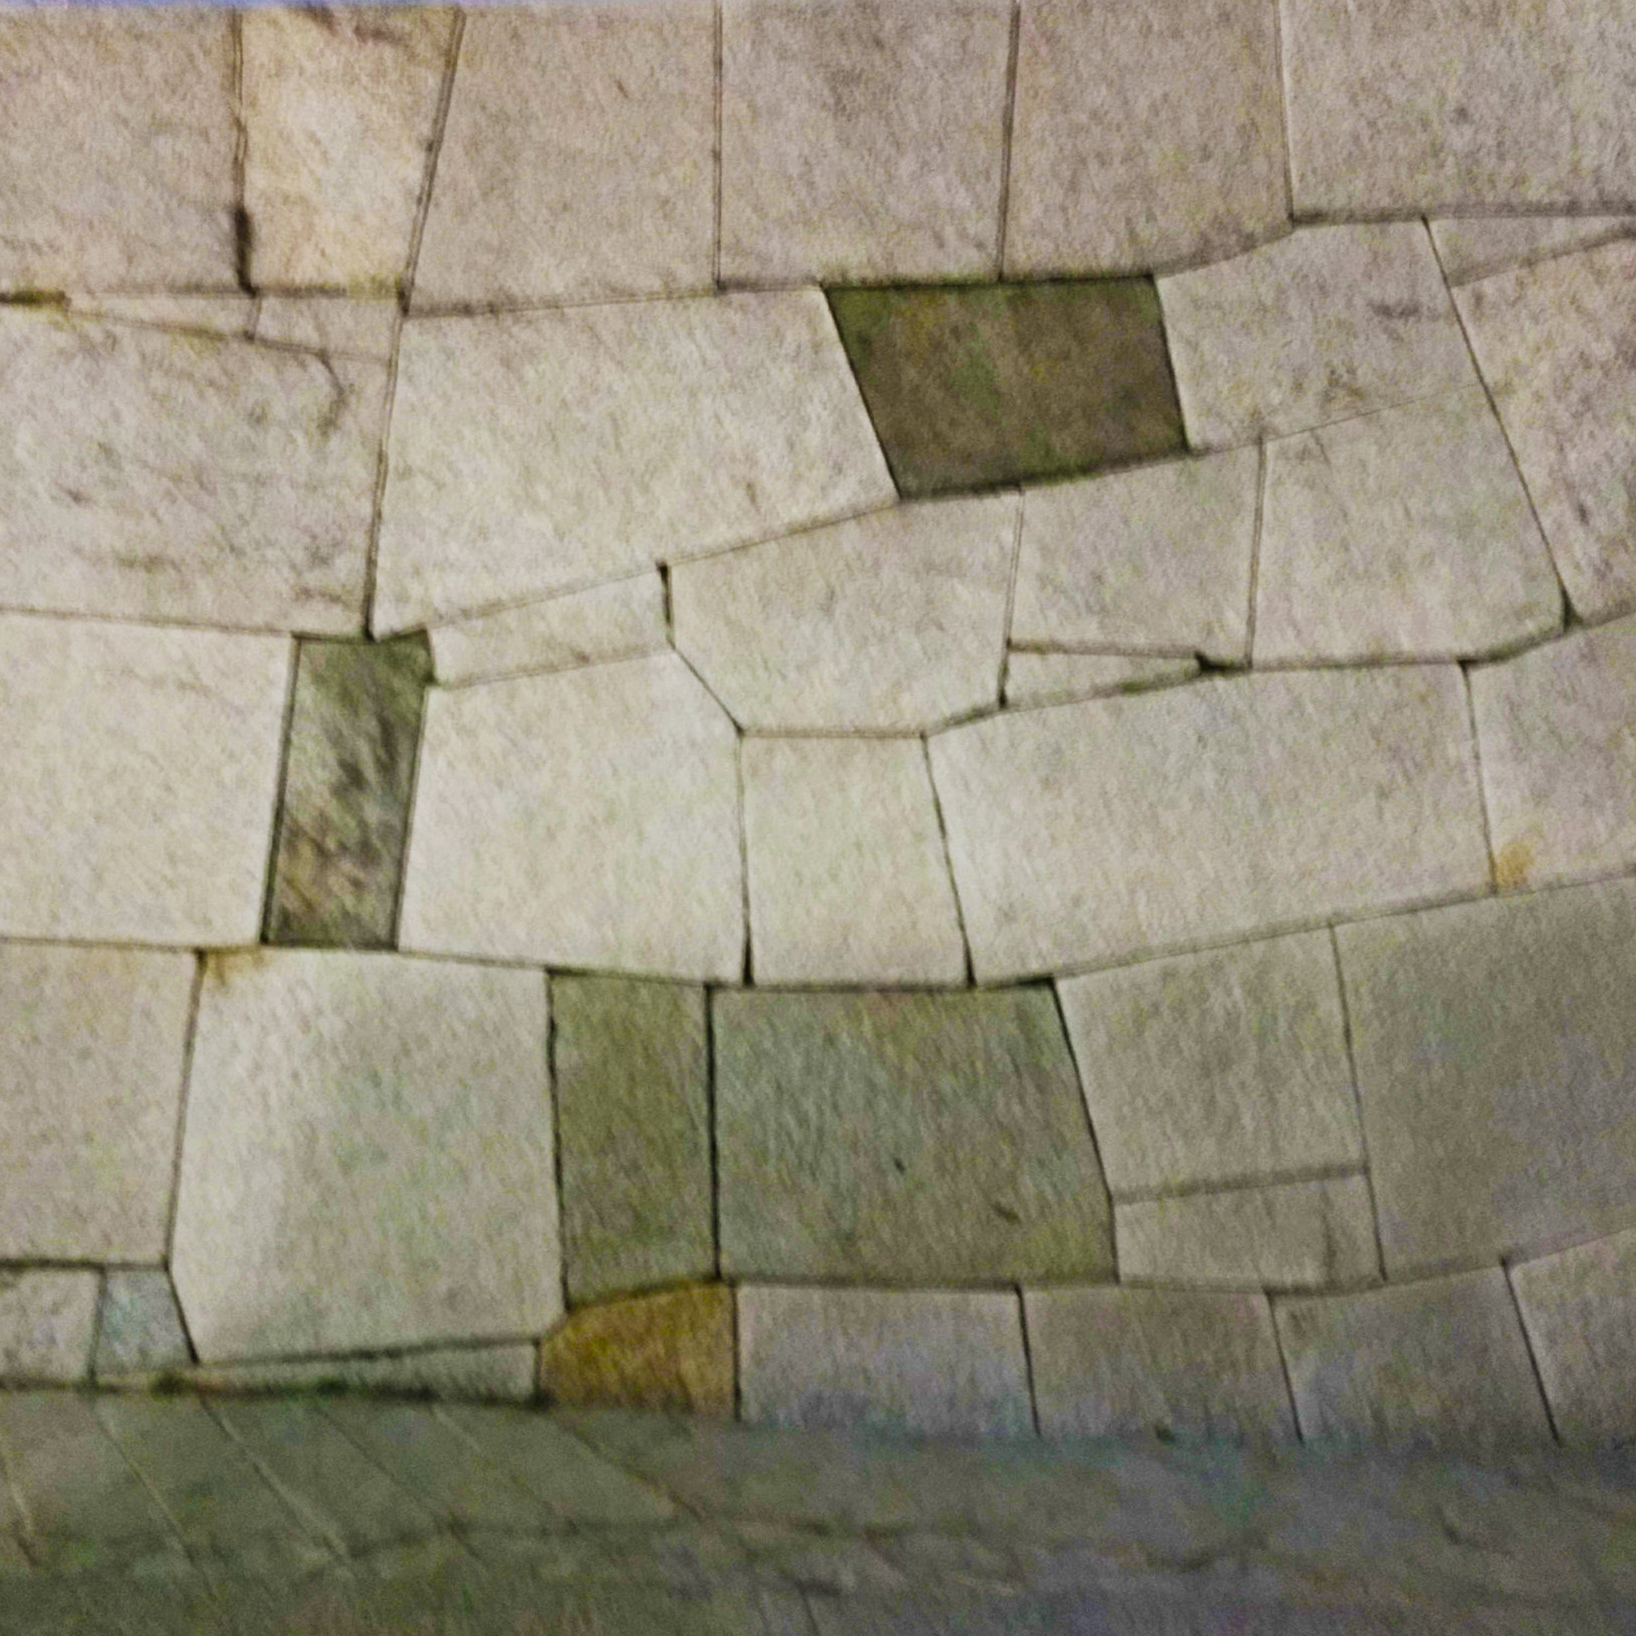
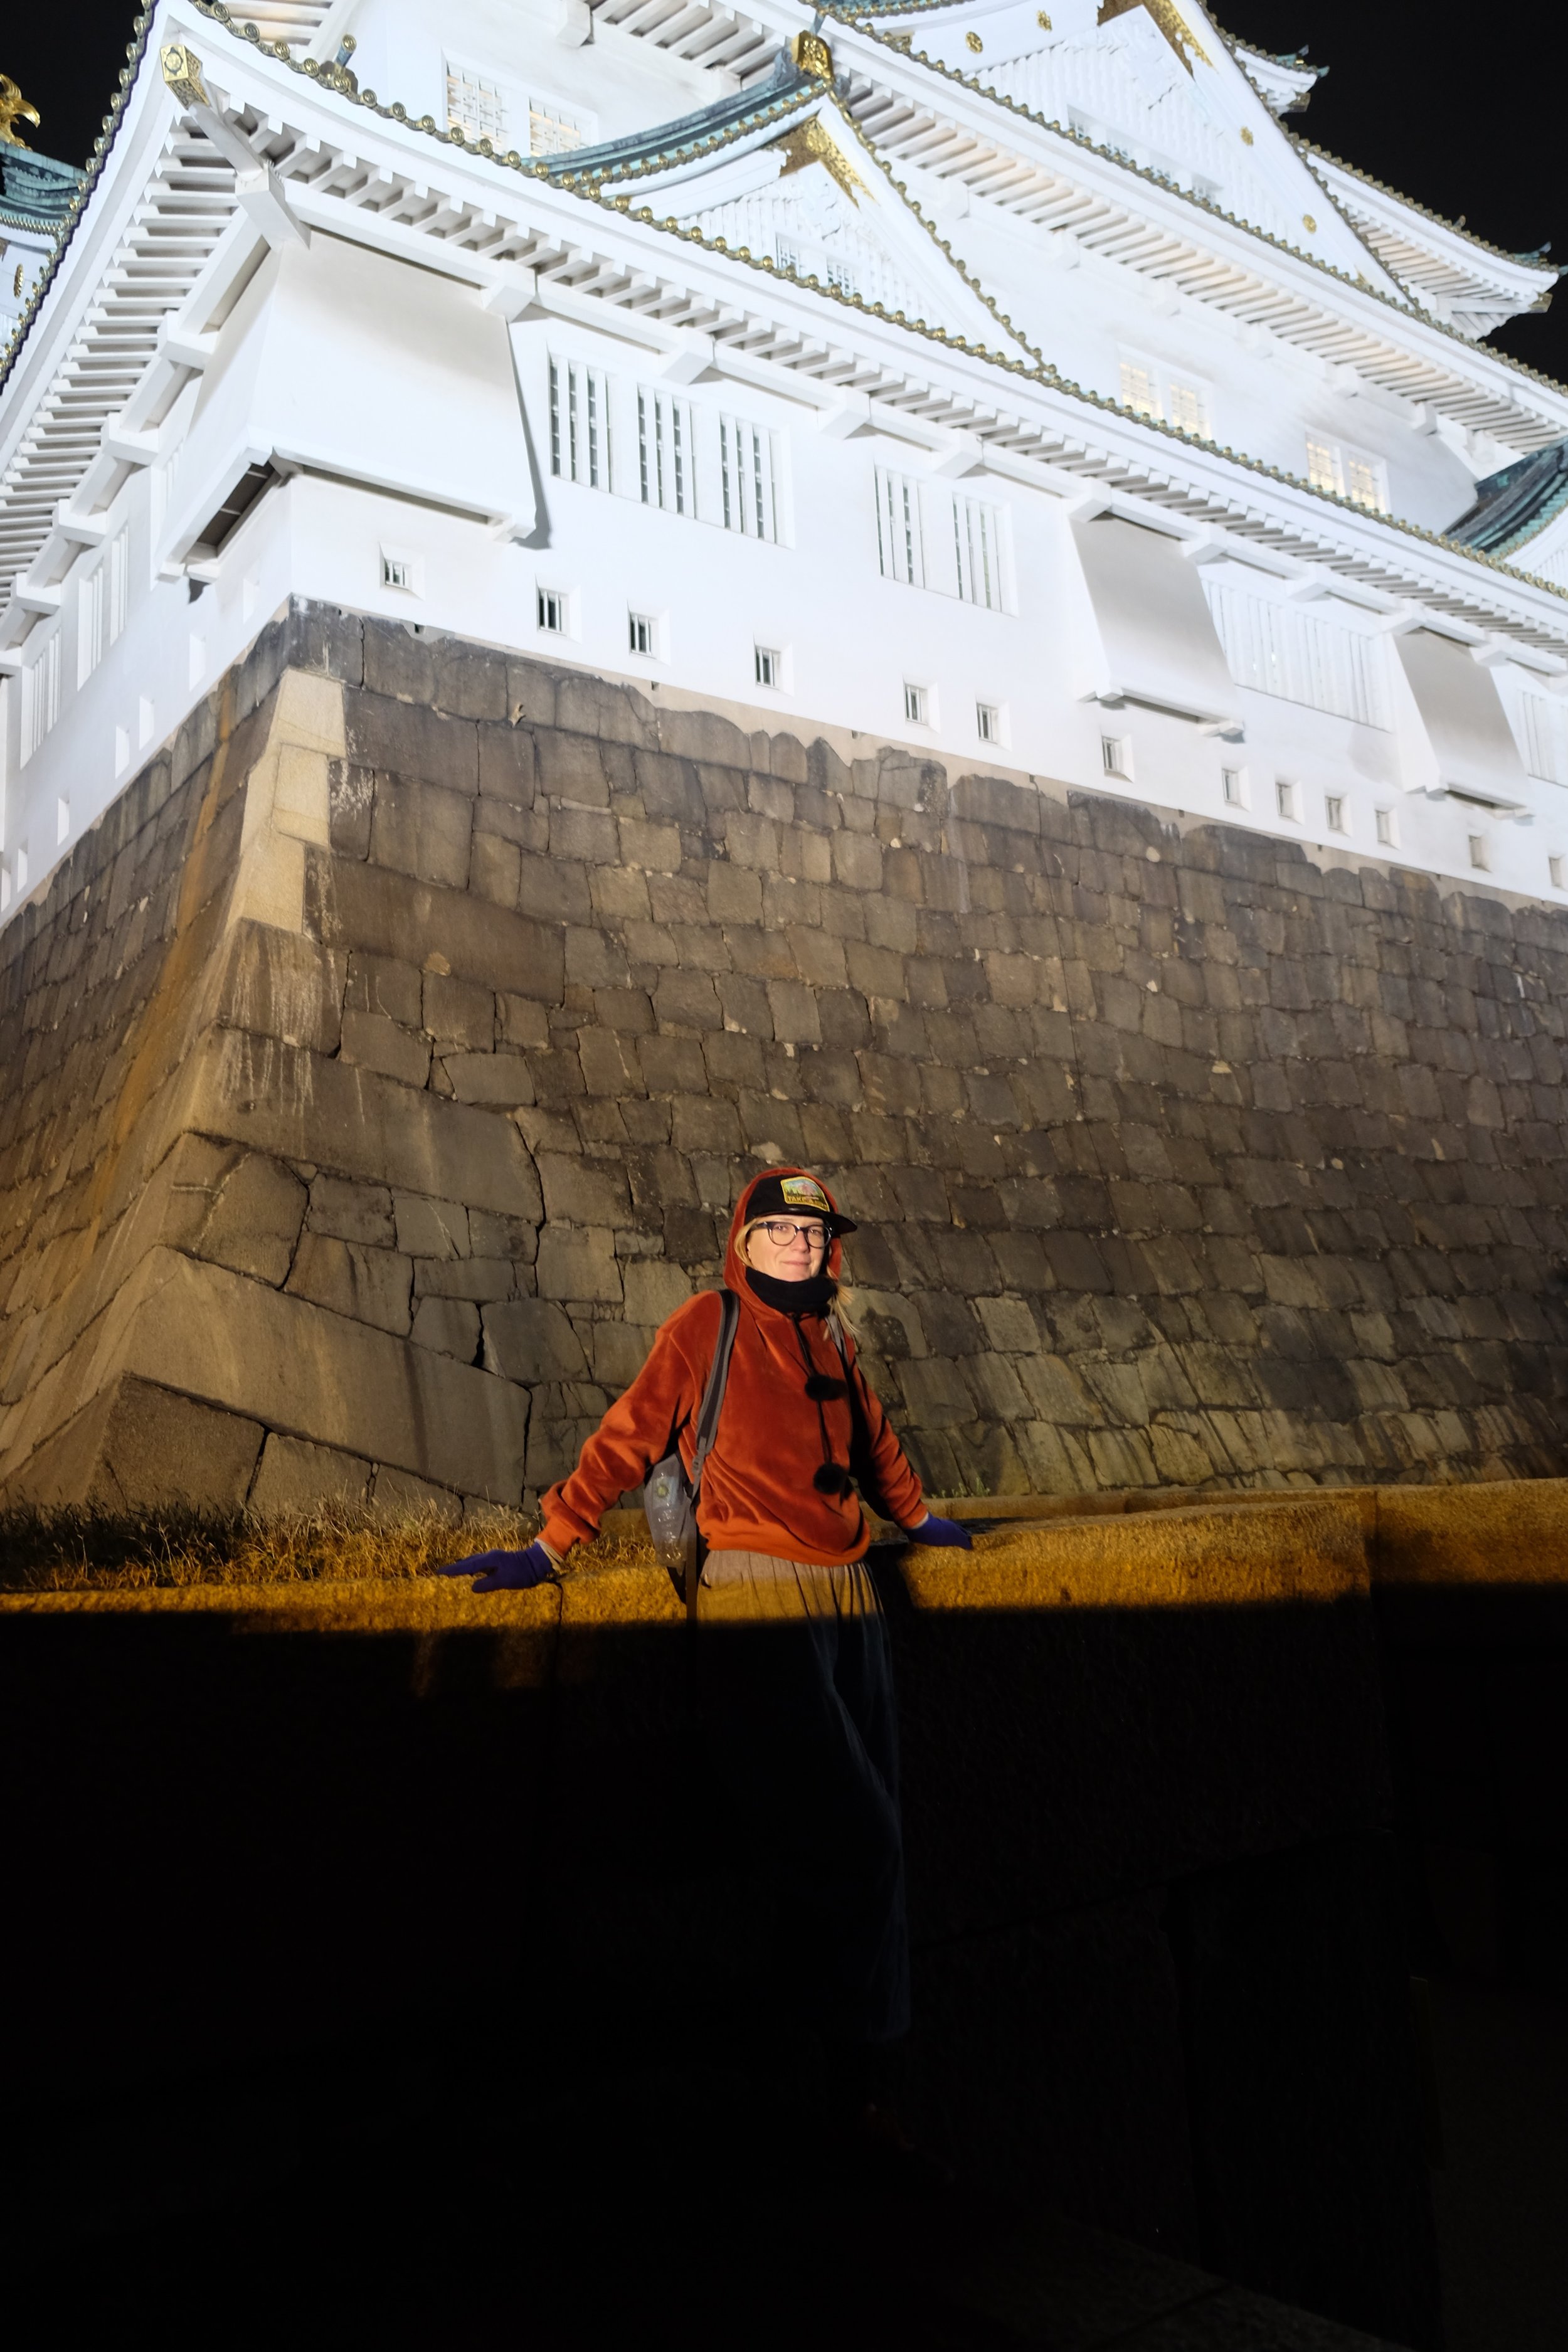
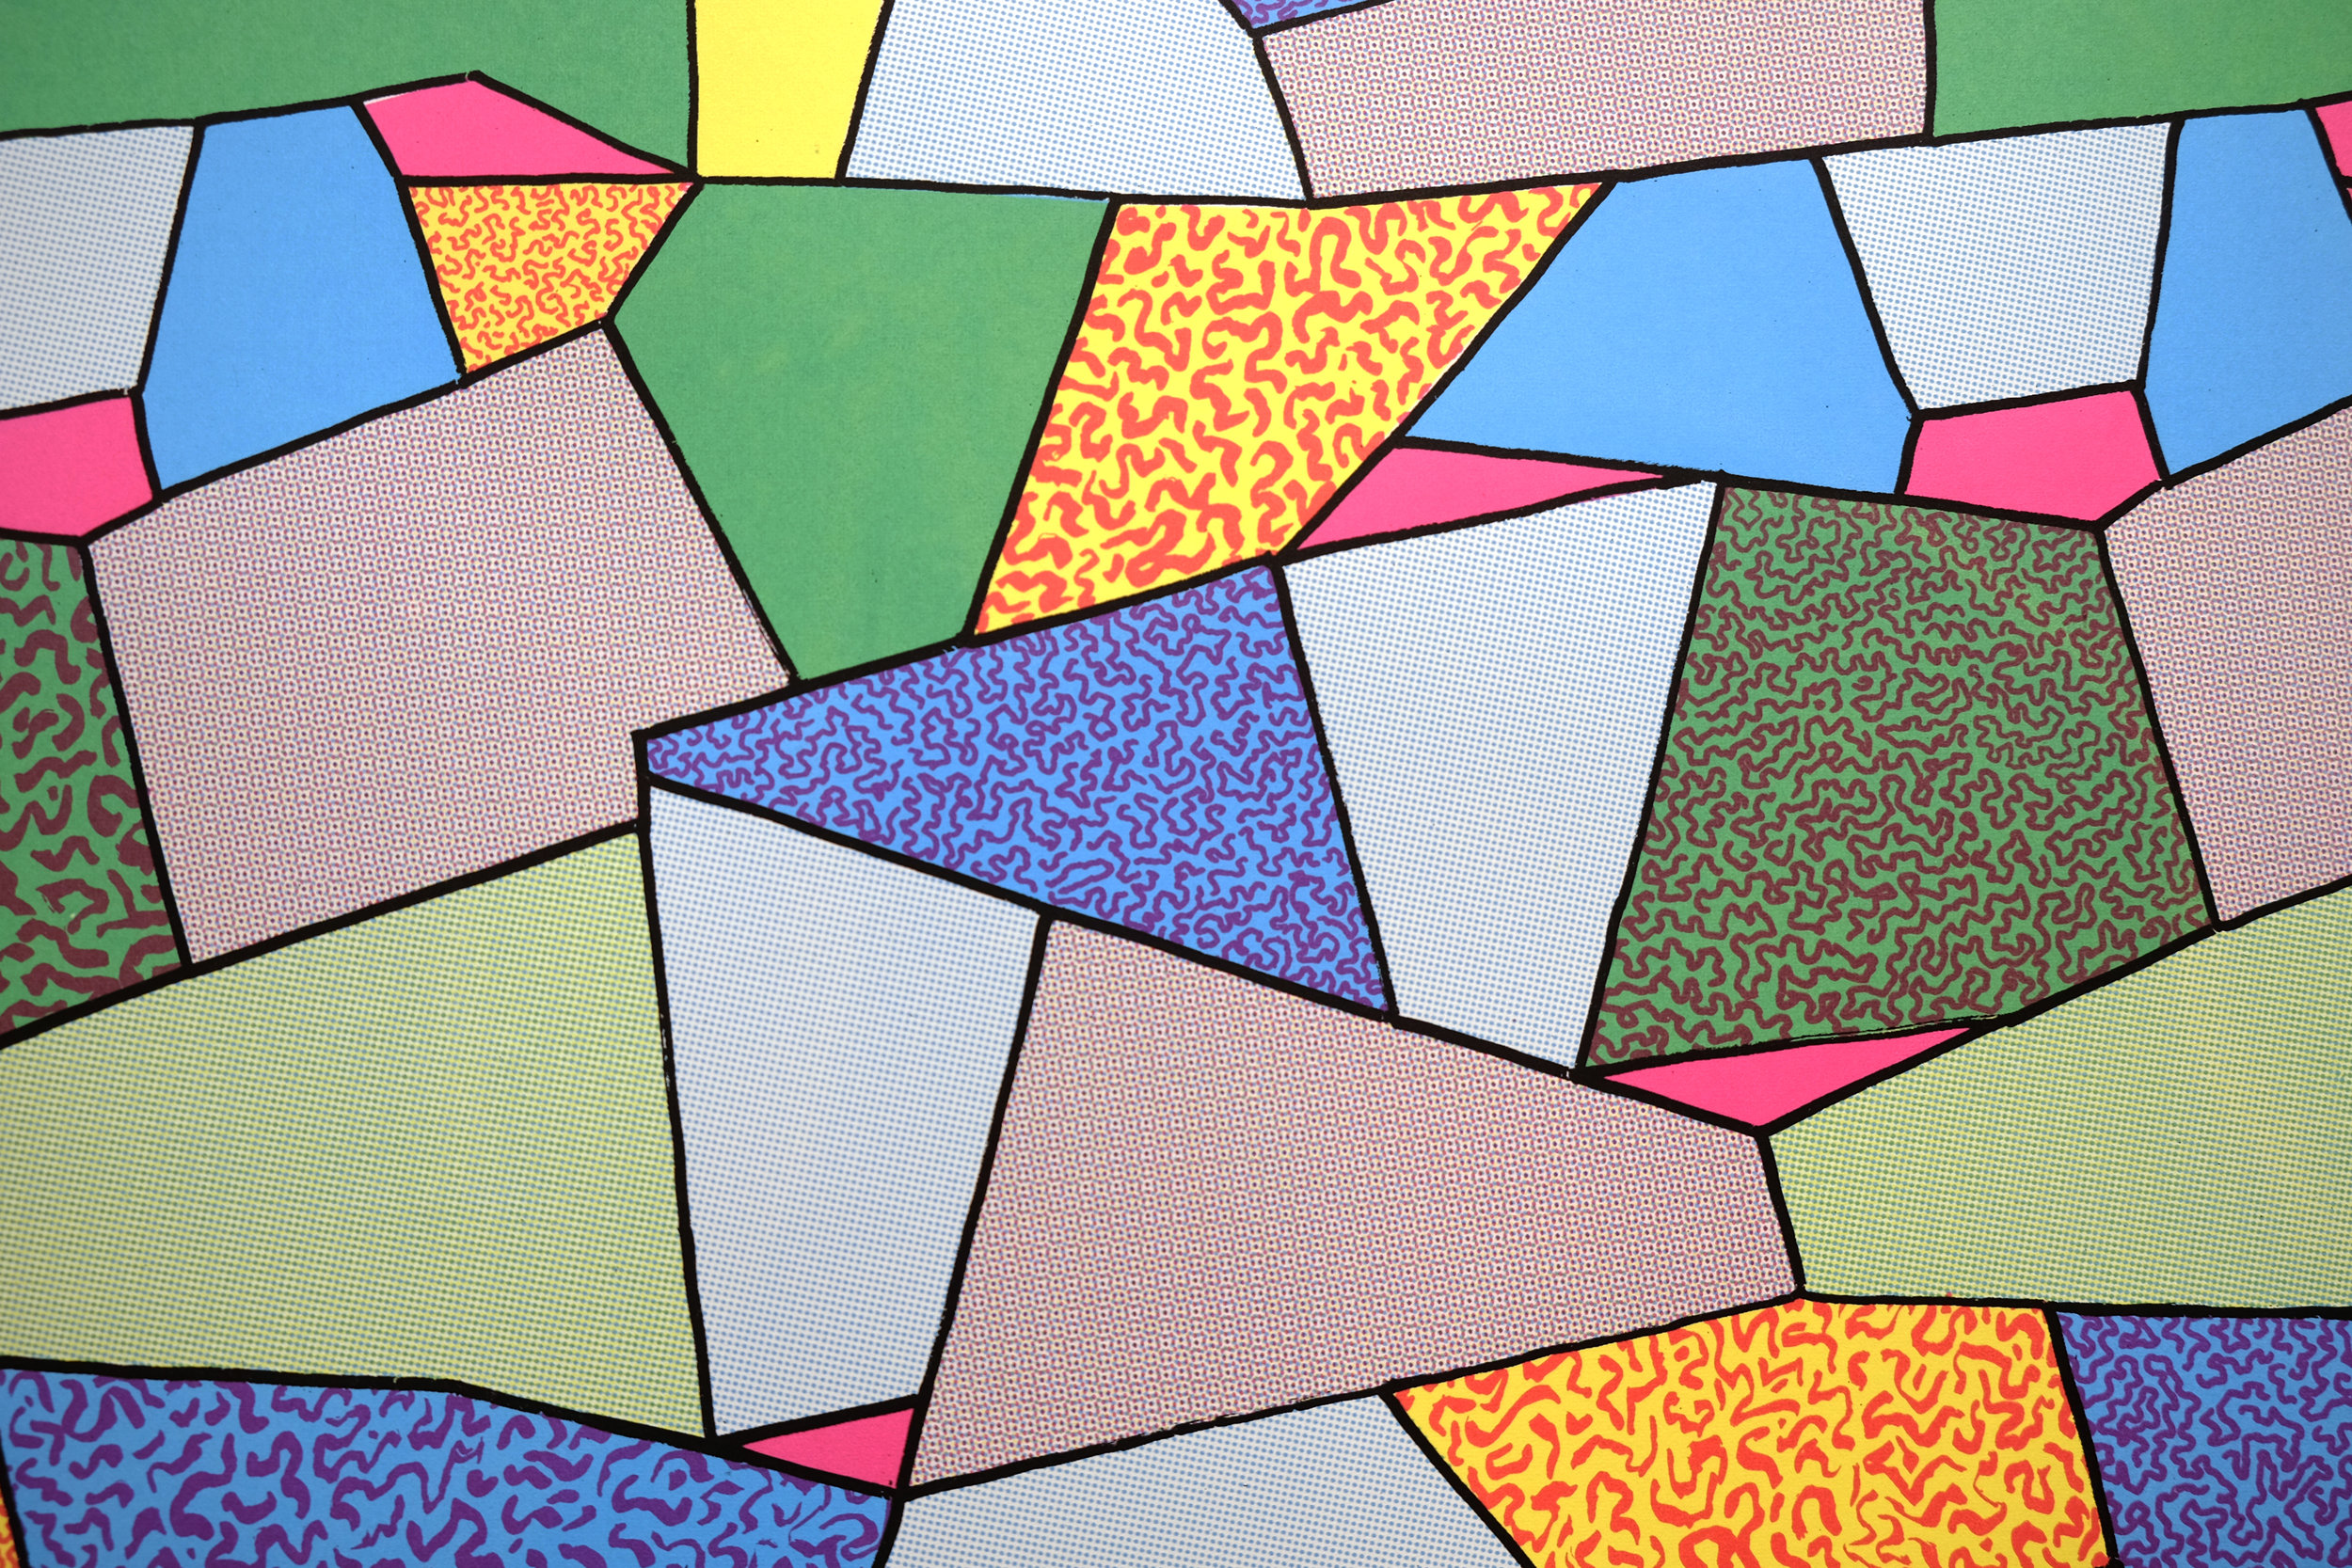
Zack showed us the studio and reviewed some of his recent projects with us. Many of them utilized a technique of doing four color CMYK halftone to produce photographic quality images. I like my work to have an evidence trail that one can follow like an archeologist. Wanting to take full advantage of the techniques at hand to produce the widest range of colors we could meant attempting to combine a color halftone technique generated from the computer, hand painting, drawing and overlapping solid color fields. This would yield the precision of a computer, the variation of a human hand and an array of secondary and tertiary colors that would belie the fact that we used only 4 process colors to make the print. If one looks closely they should be able to discern each technique and thought process, but the result should be a vividly colored repeating pattern that blurs the lines between computer, human, and industrial production. This was my plan, but this was only day one. I had to do a lot of experimentation to figure out which of my sketches would yield the best result. Ultimately after experimenting with several ideas I settled on the “Osaka Castle Wall” design because it would allow for the most use of hand techniques to create the textures that darkened some of the stones in the wall. We visited Osaka on our fifteen month Treibtravel tour which you can learn more about on our travel blog posts.
Day two: Color separations
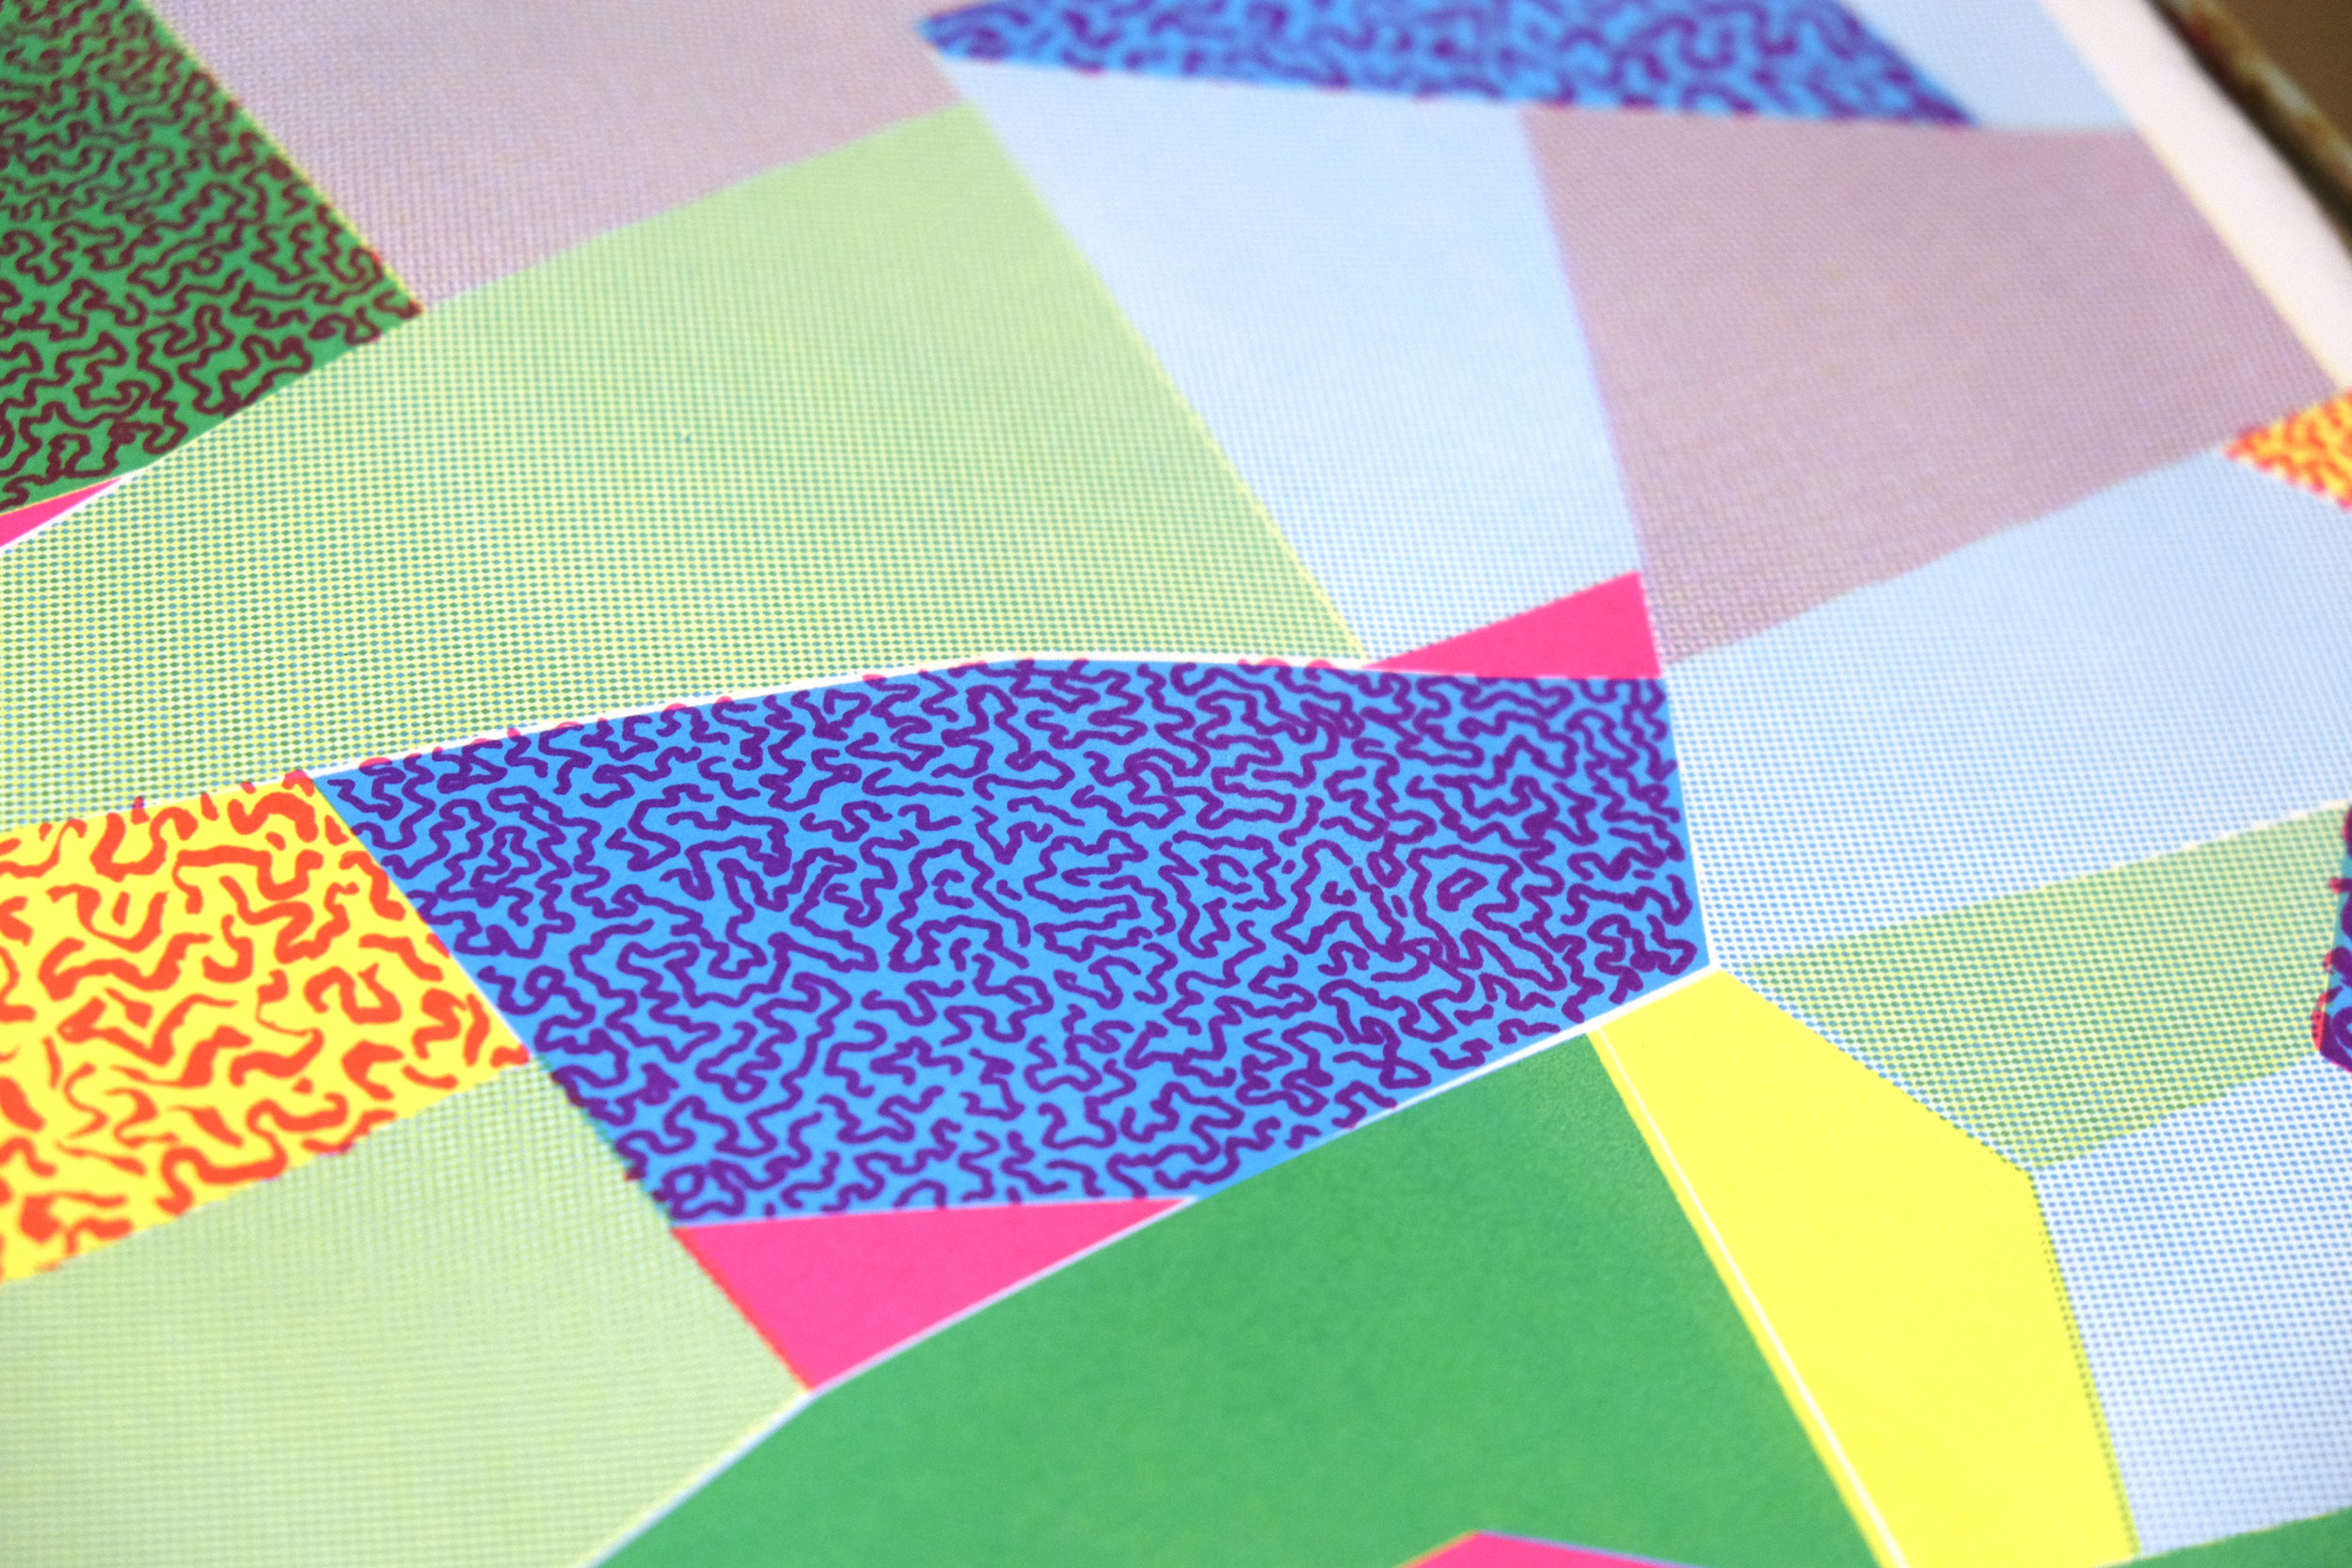
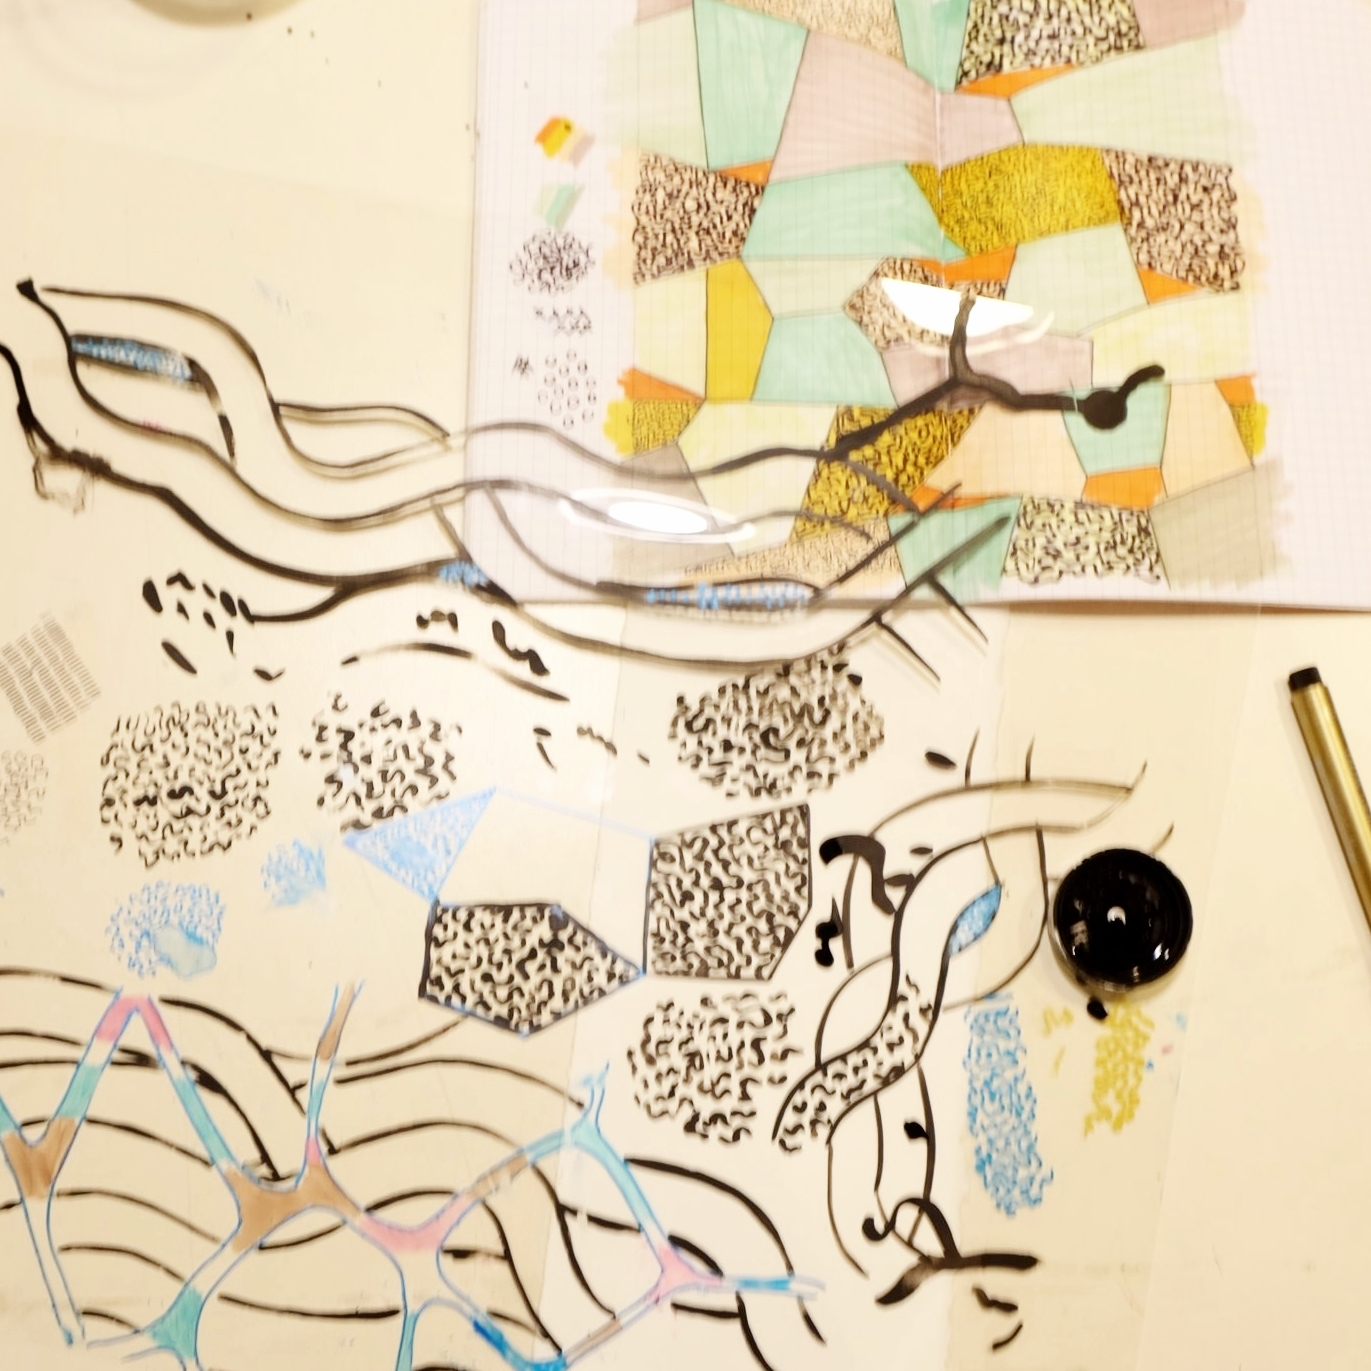
By the end of day two the goal was to have my color separations finished, which meant deciding the order we would print the colors and producing the film positives that would be used to expose the photo emulsion on the screens. I separated out the different color channels so you can see them here below.
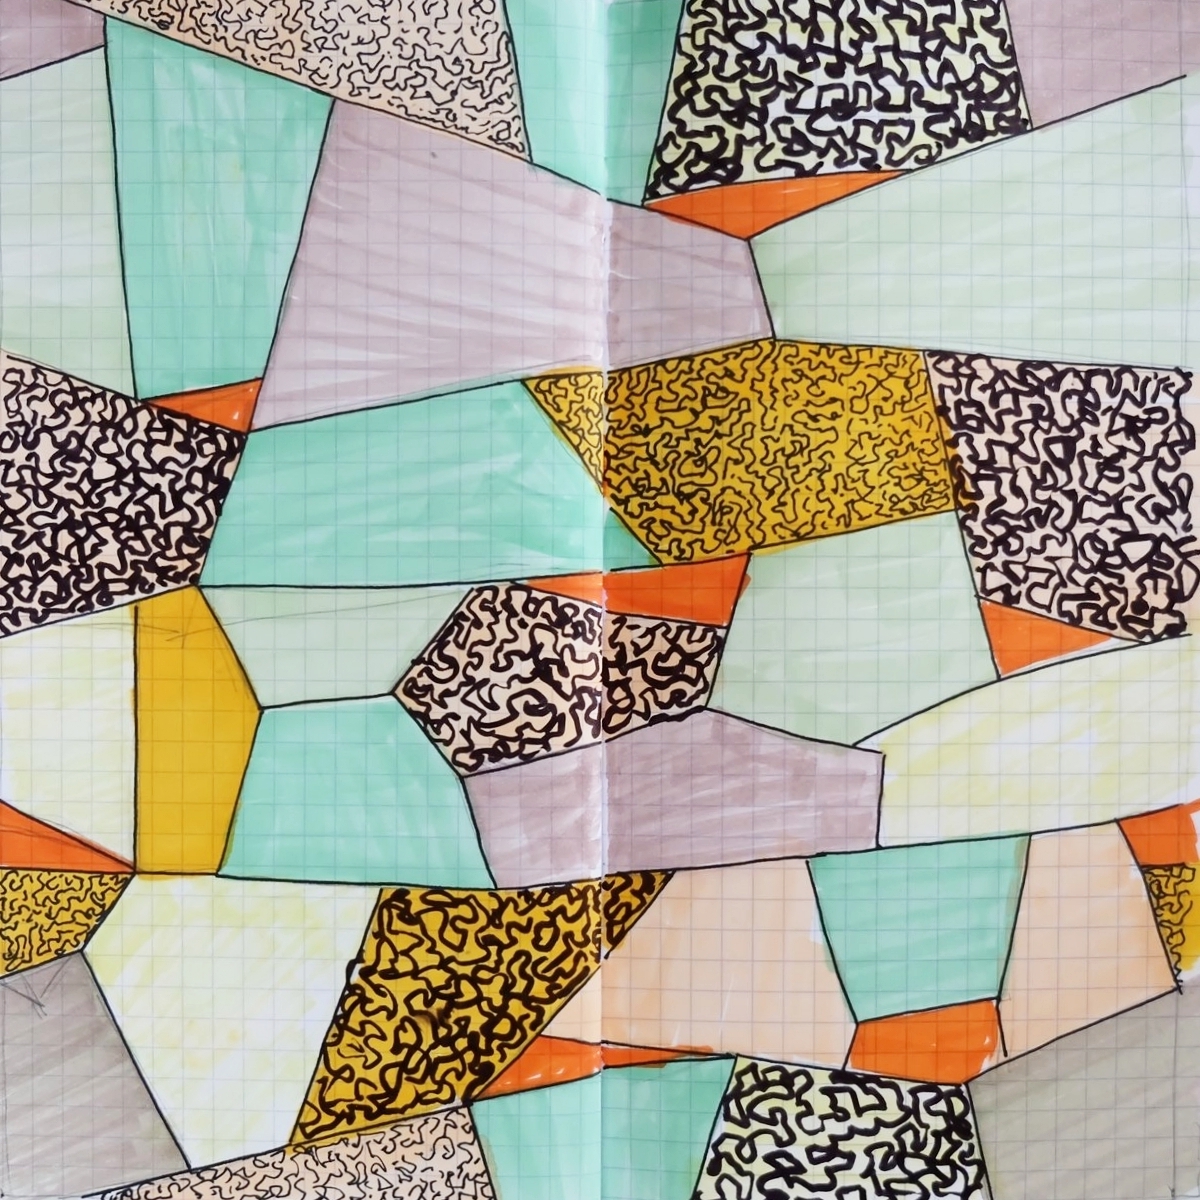


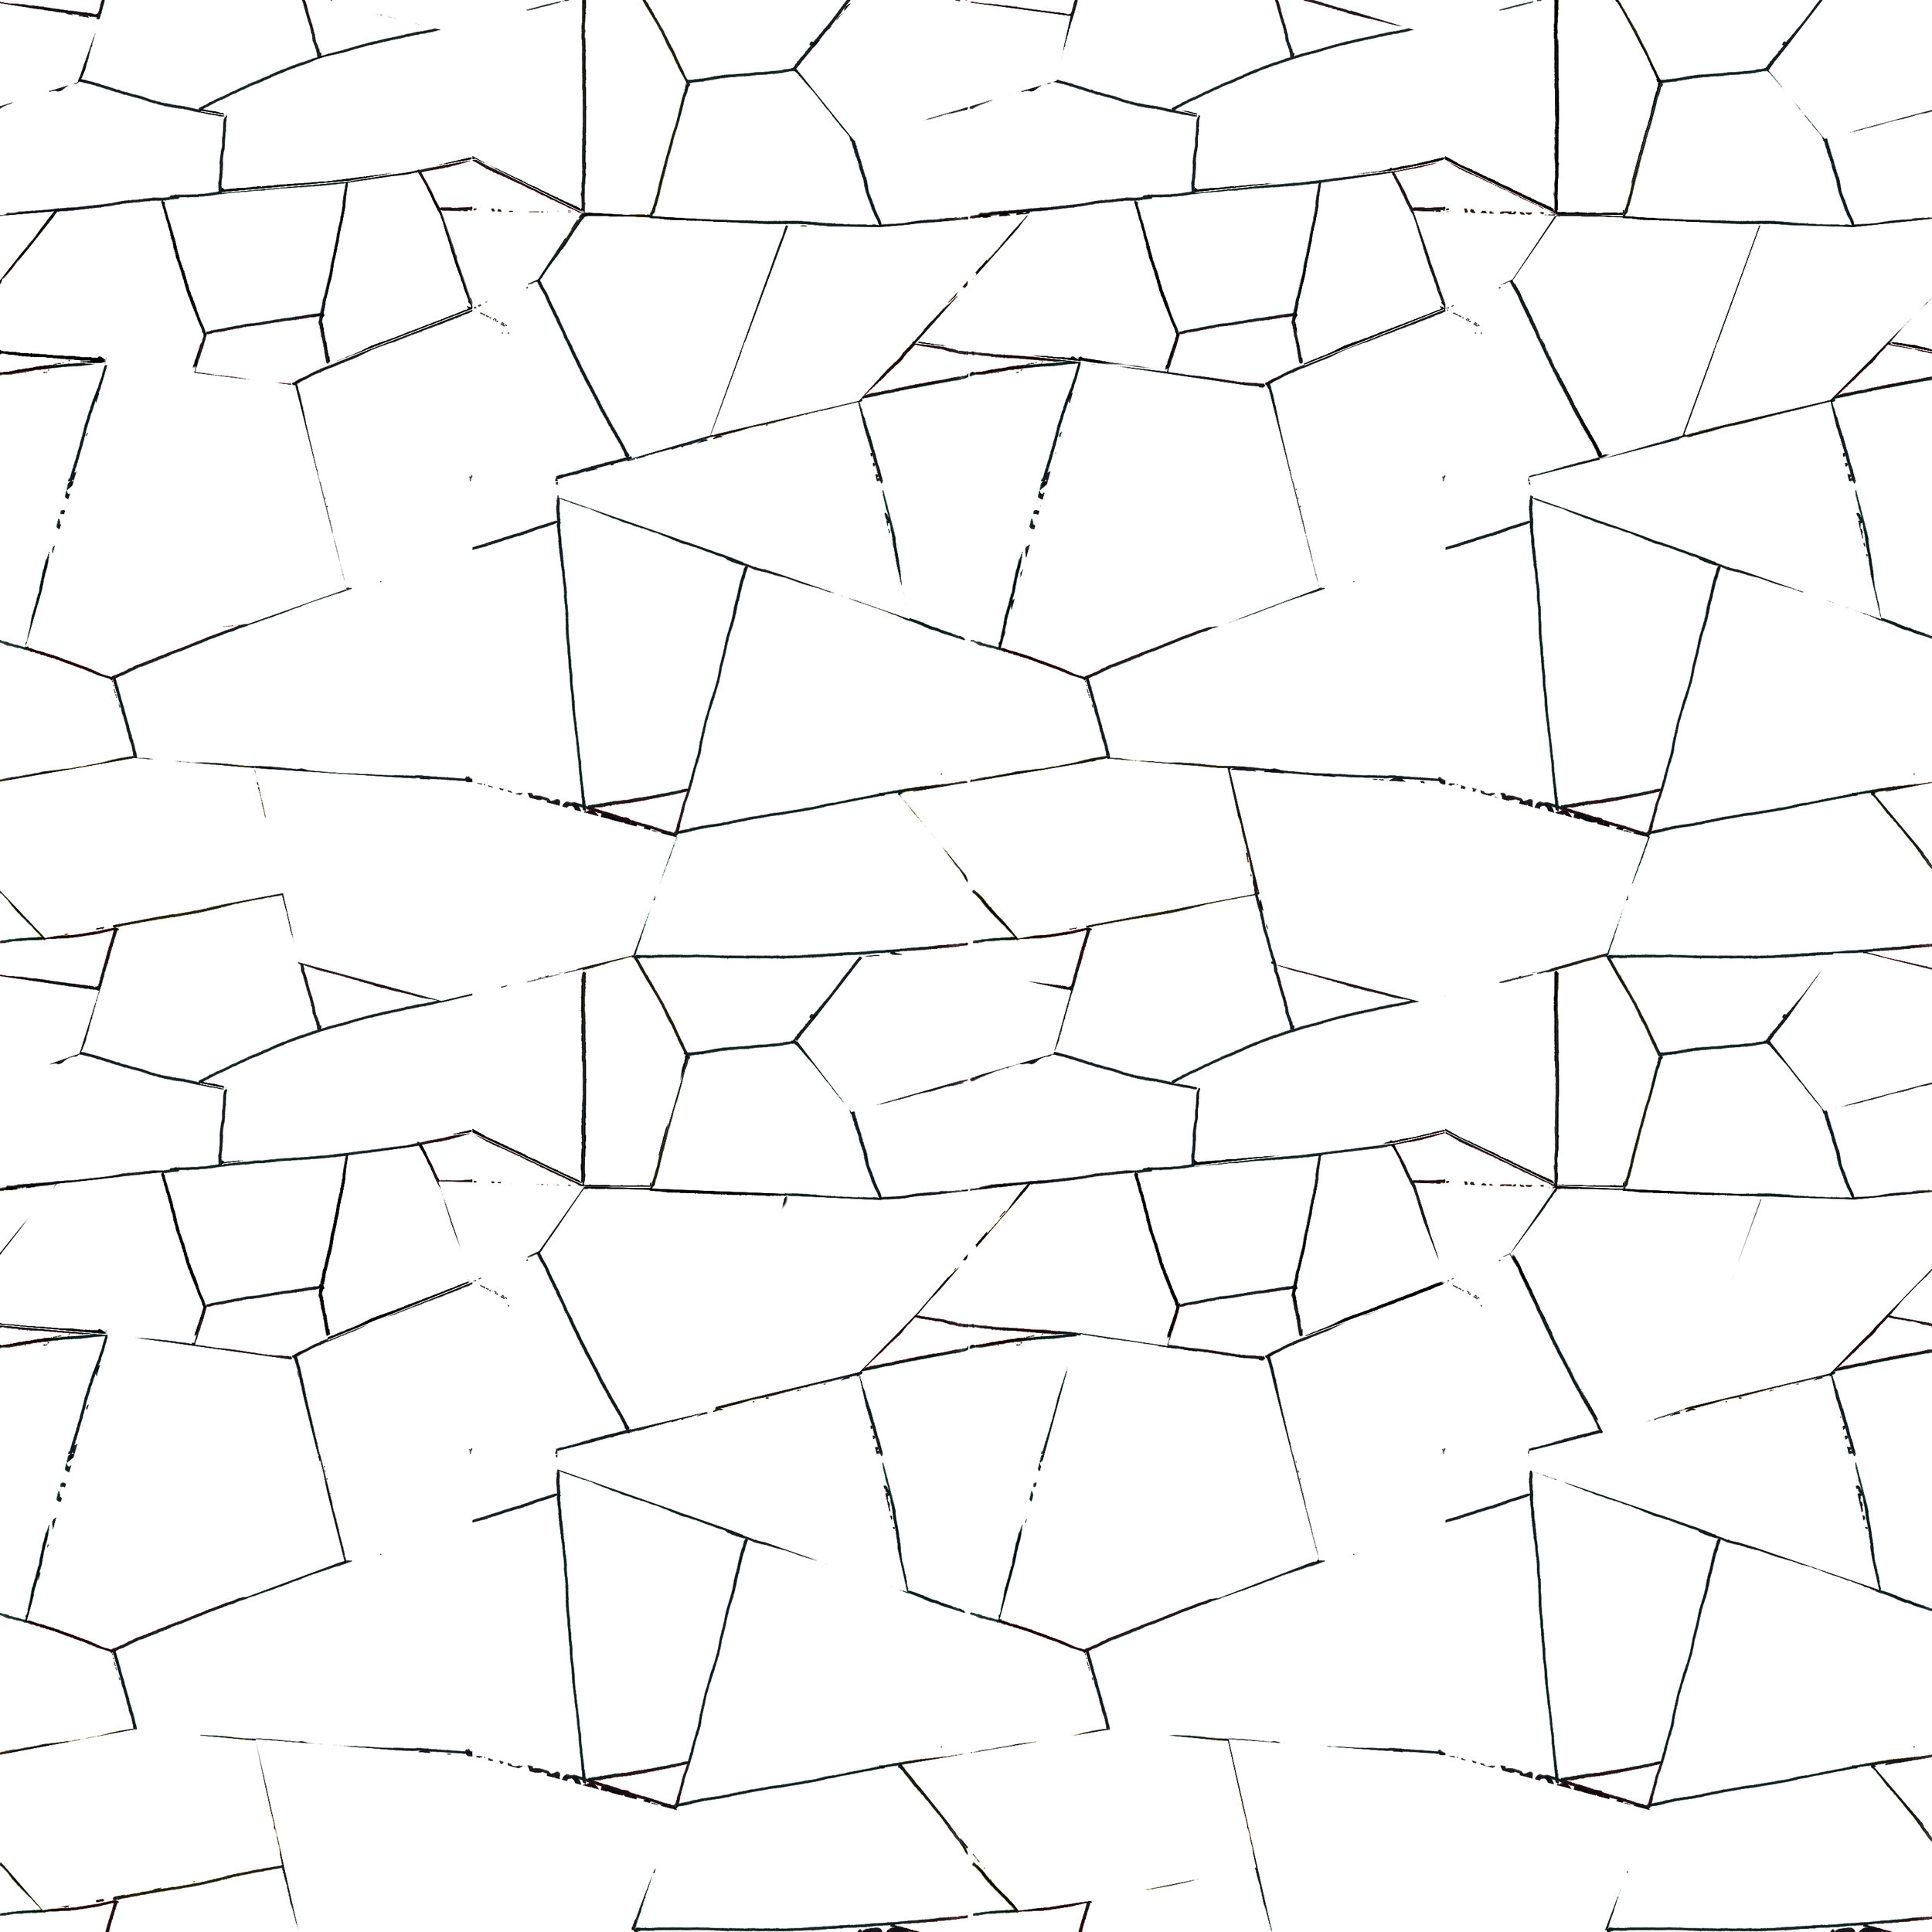

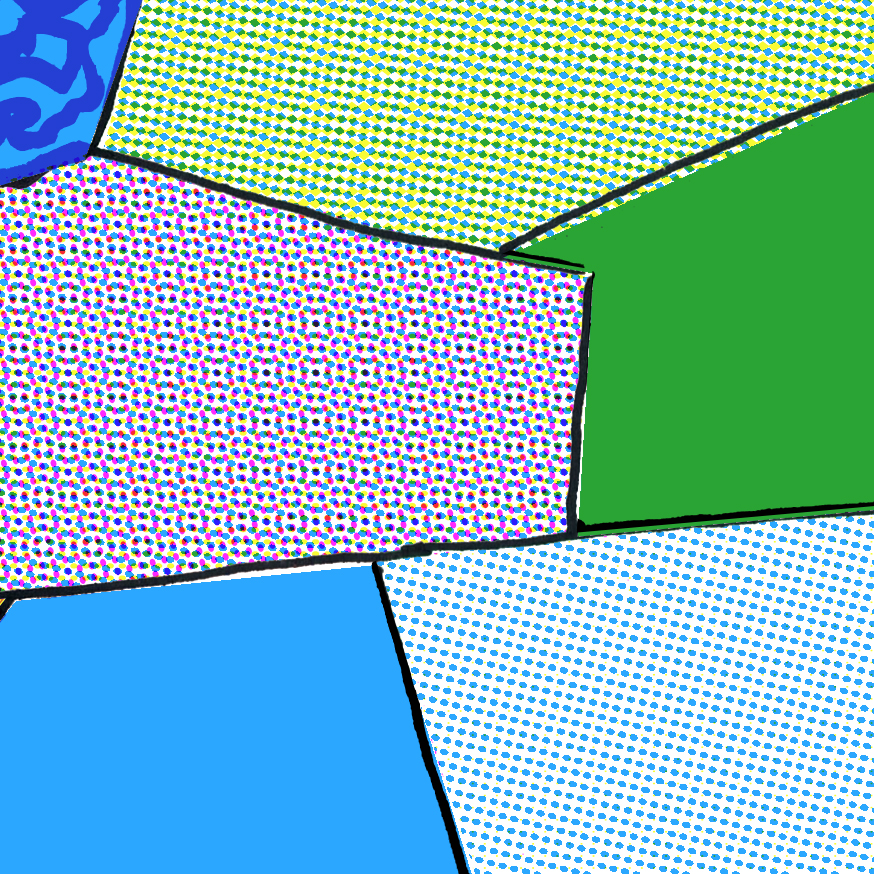
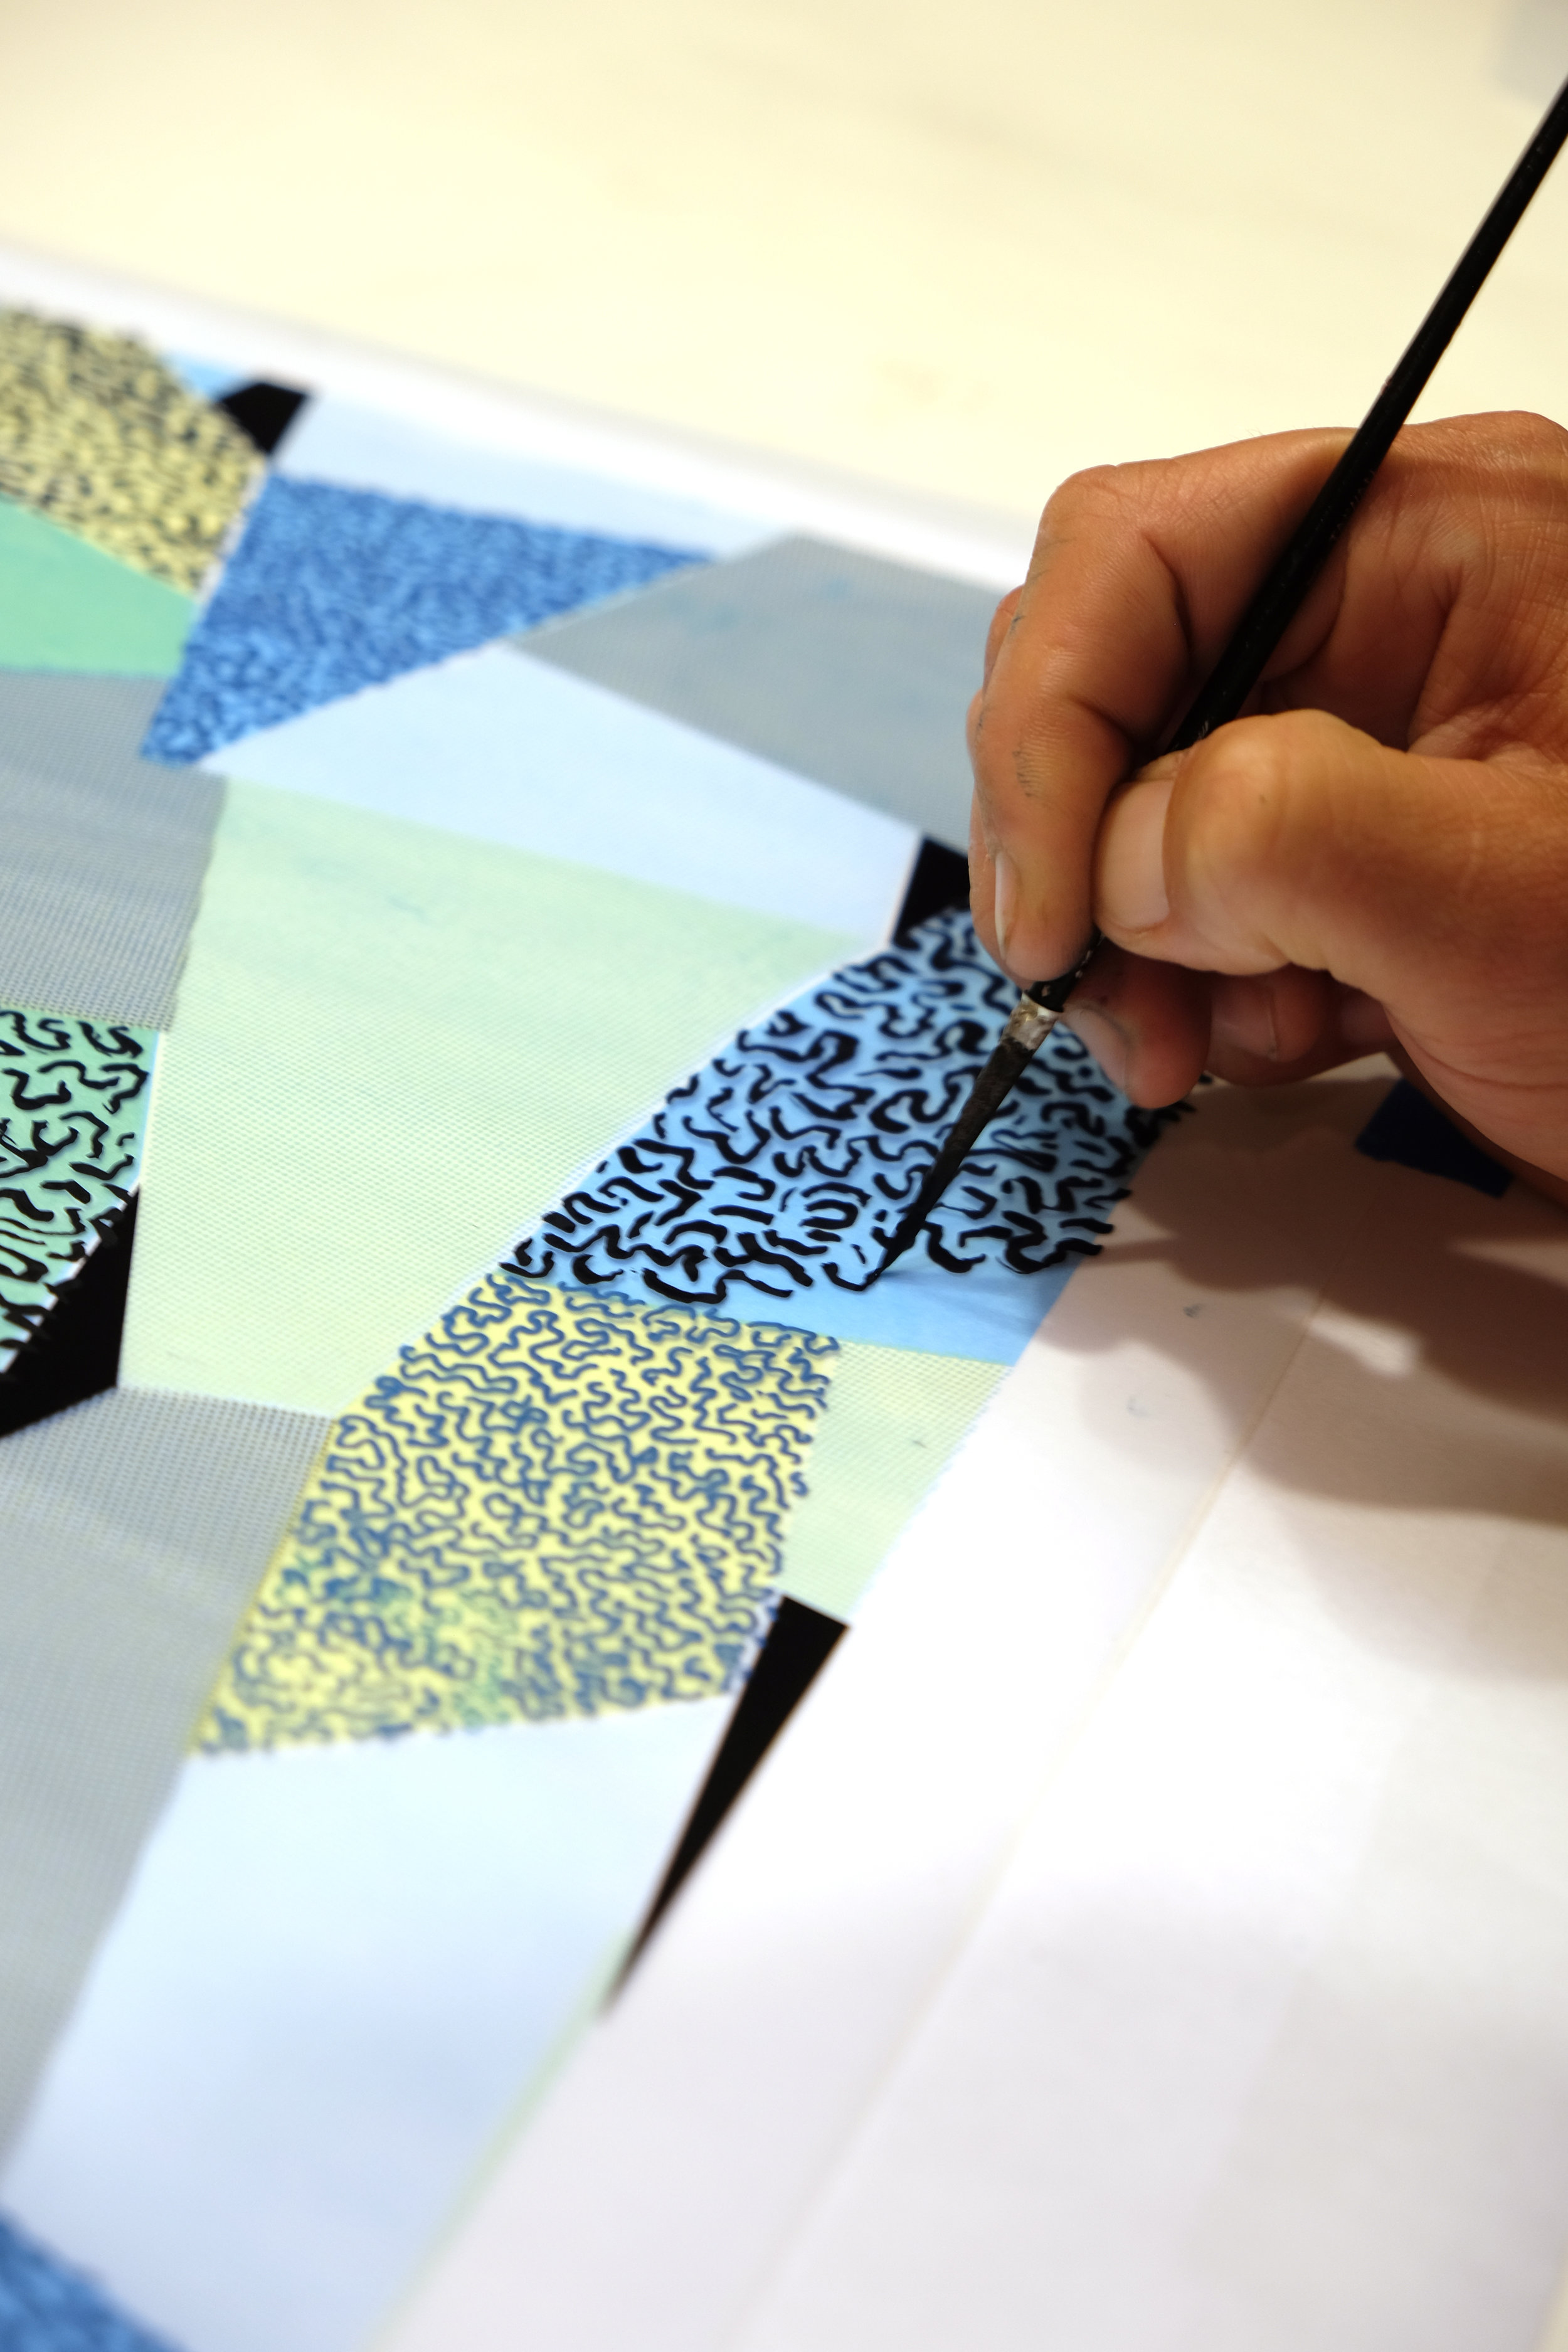
In CMYK printing (Cyan, Magenta, Yellow, Key) you can produce a range of colors using a halftone technique. To the immediate upper right shows a detail of how these small dots of yellow, cyan and magenta combine creating the illusion of different hues. In this case I chose a larger dot size to make the printing easier and to make it visually obvious that this technique was being used so that it adds to the texture of the print rather than fading into the background. The magenta film would be augmented with hand painting using a metallic pen and india ink with a brush to create the textures you see in some of the yellow, green and cyan areas. Finally the key (black) color film would be produced entirely by hand with a metallic pen. The order of printing would typically be yellow, magenta, cyan, key, but I chose to order them yellow, cyan, magenta and then key to let the magenta lay closer to the top and have more emphasis. To the immediate upper left is a composite of the layers multiplied together in photoshop to get a sense of what the final would look like with the overlapping transparent effects of the inks. I used this as a reference when we were printing for color adjustments and registration.
Day three: yellow
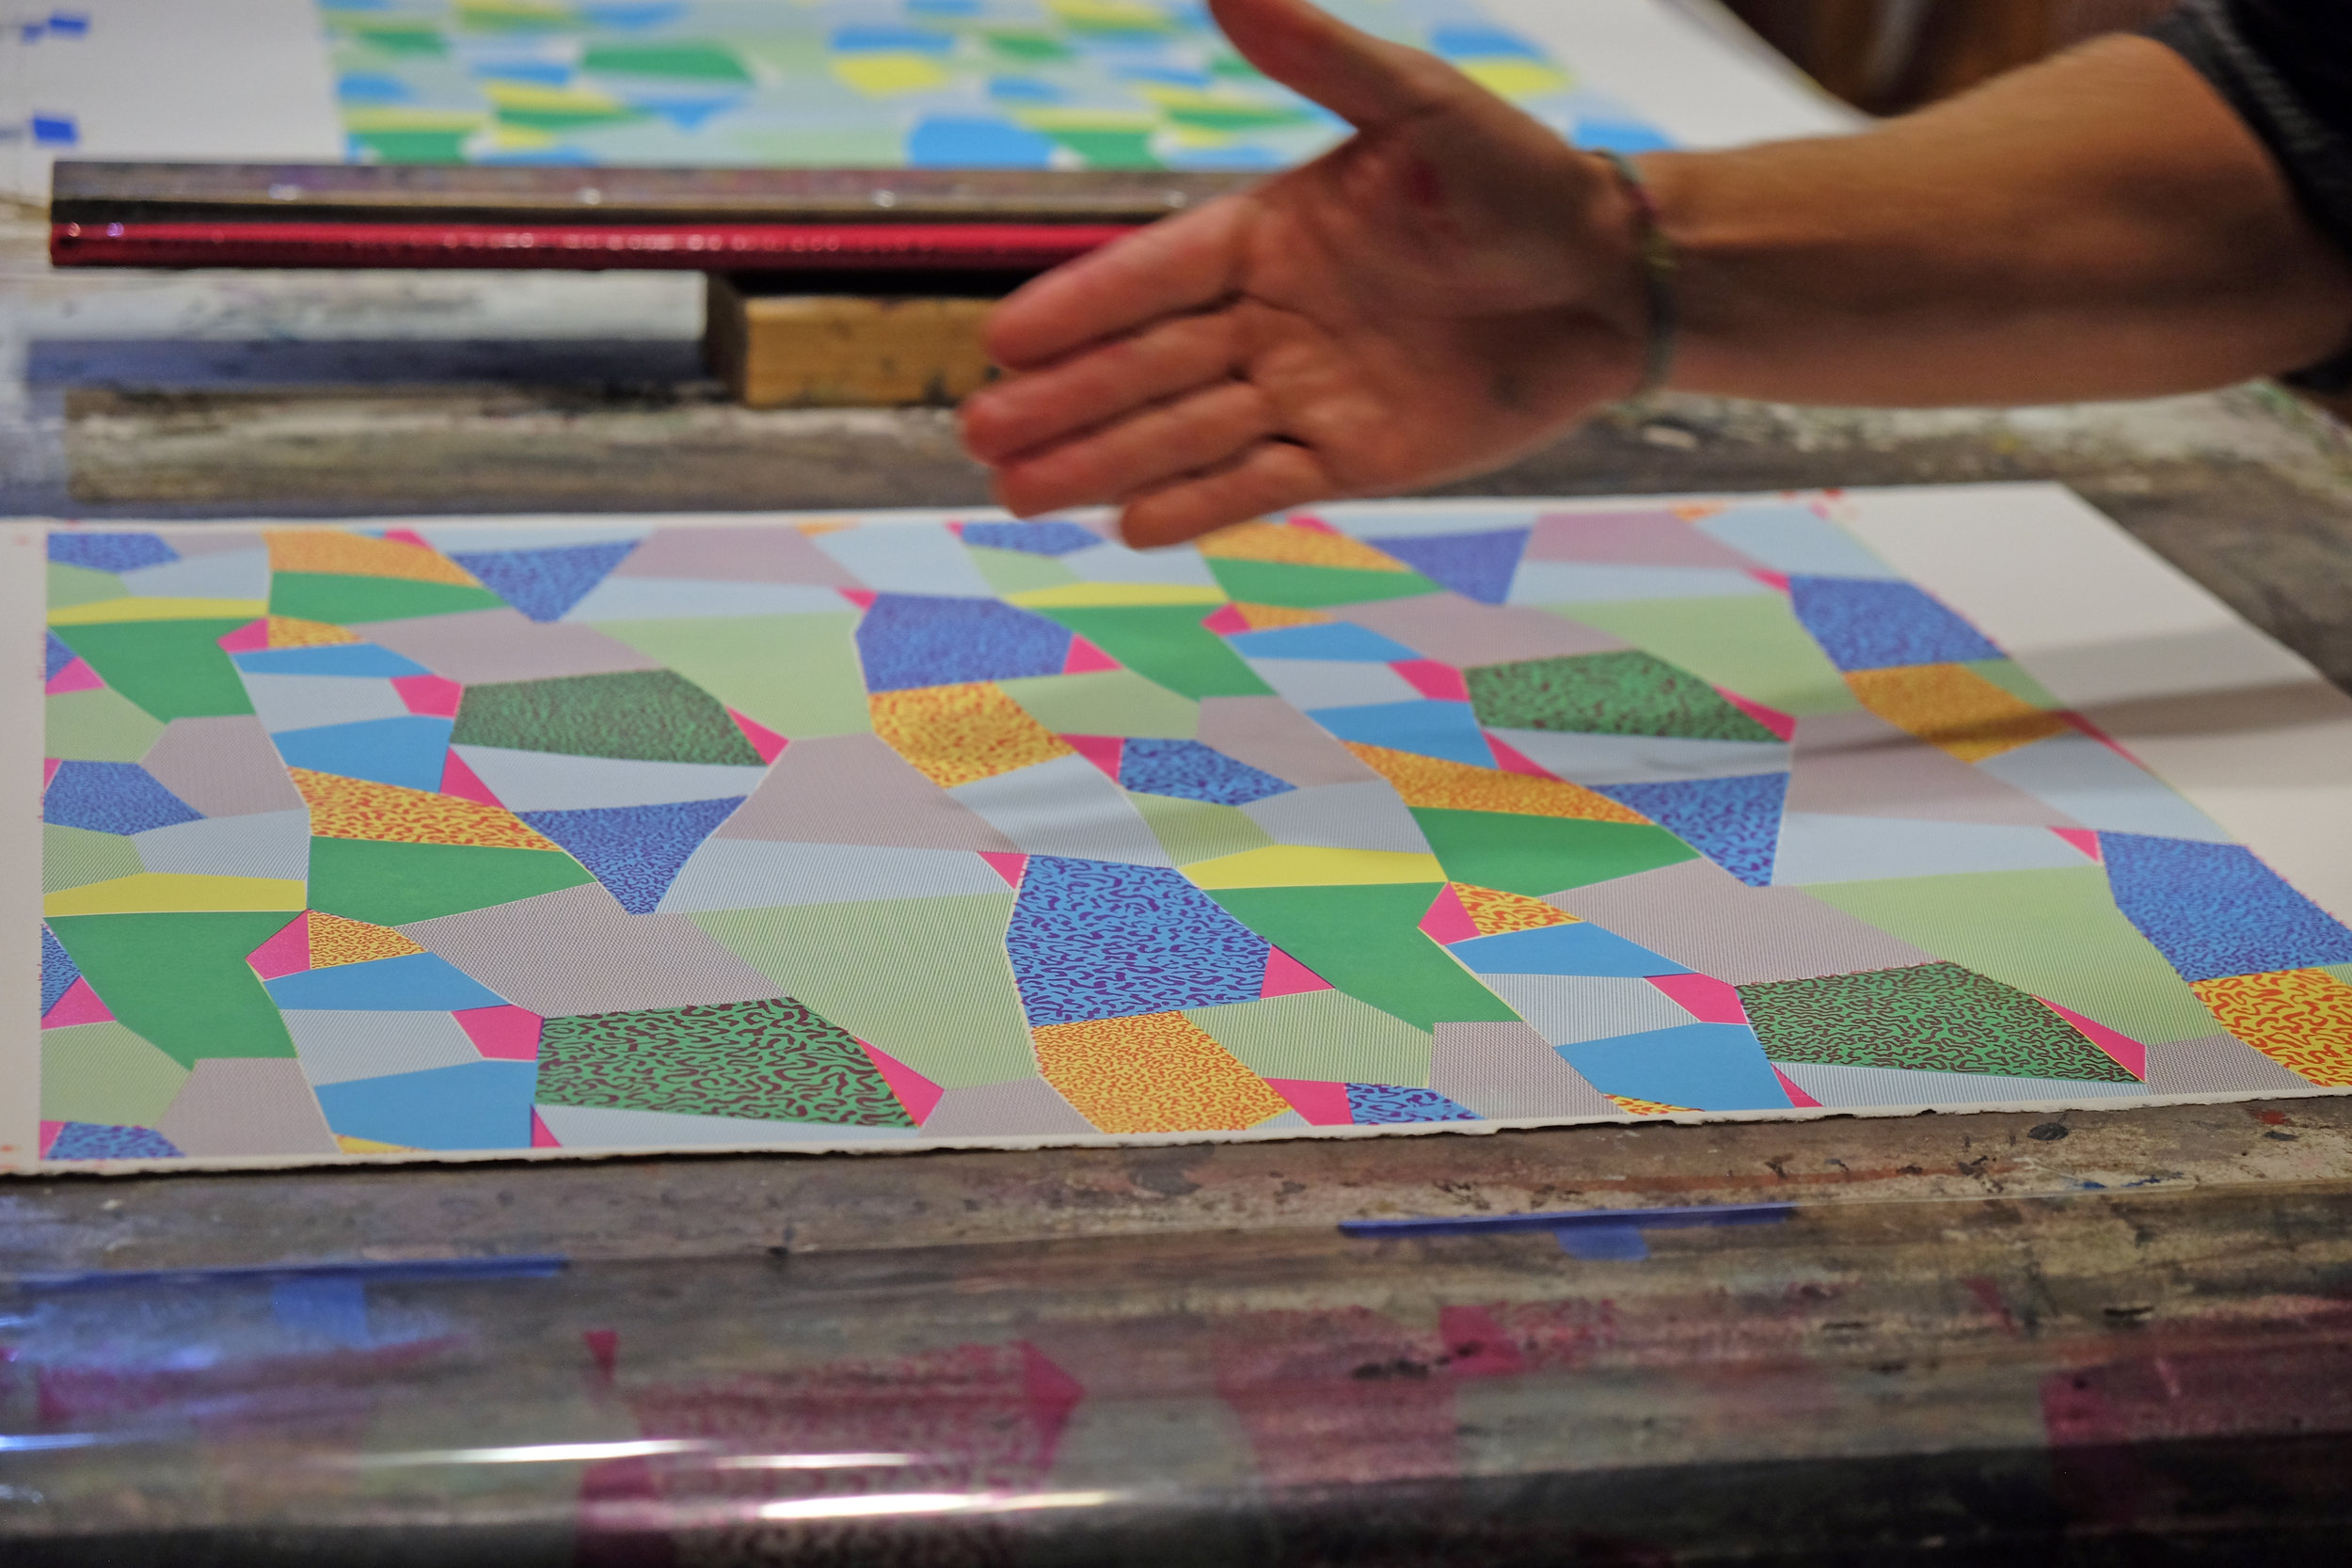
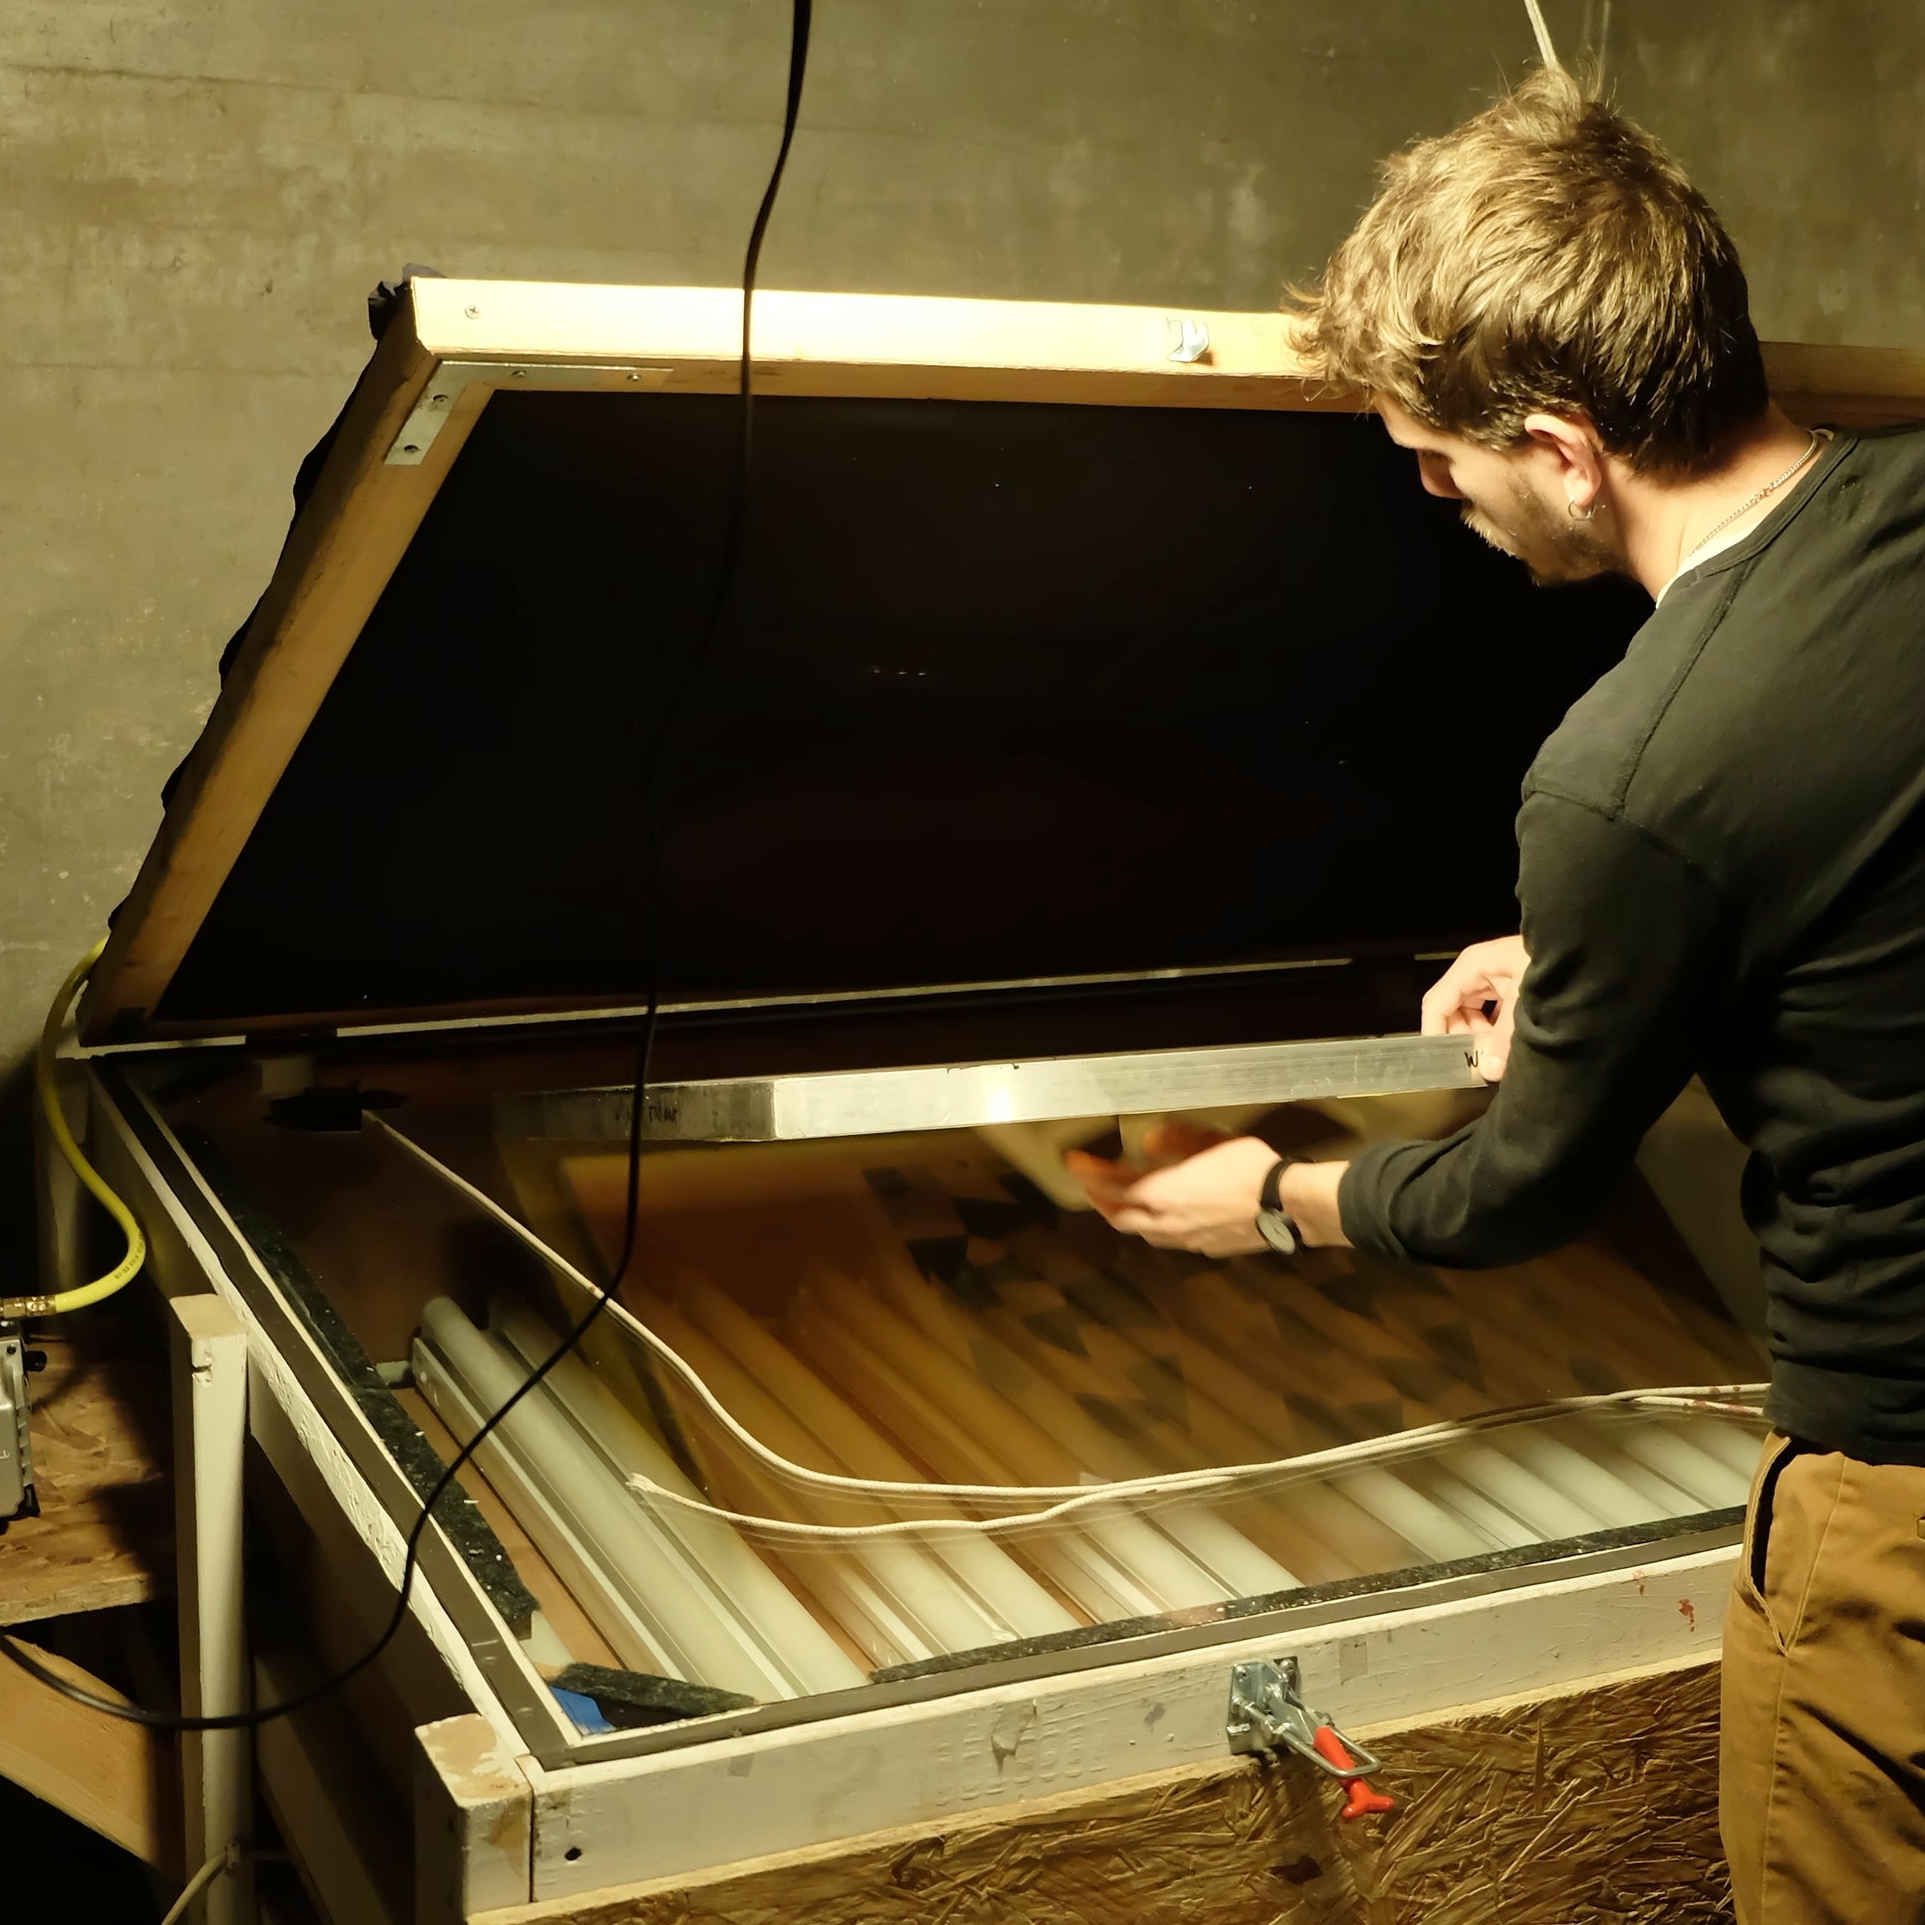
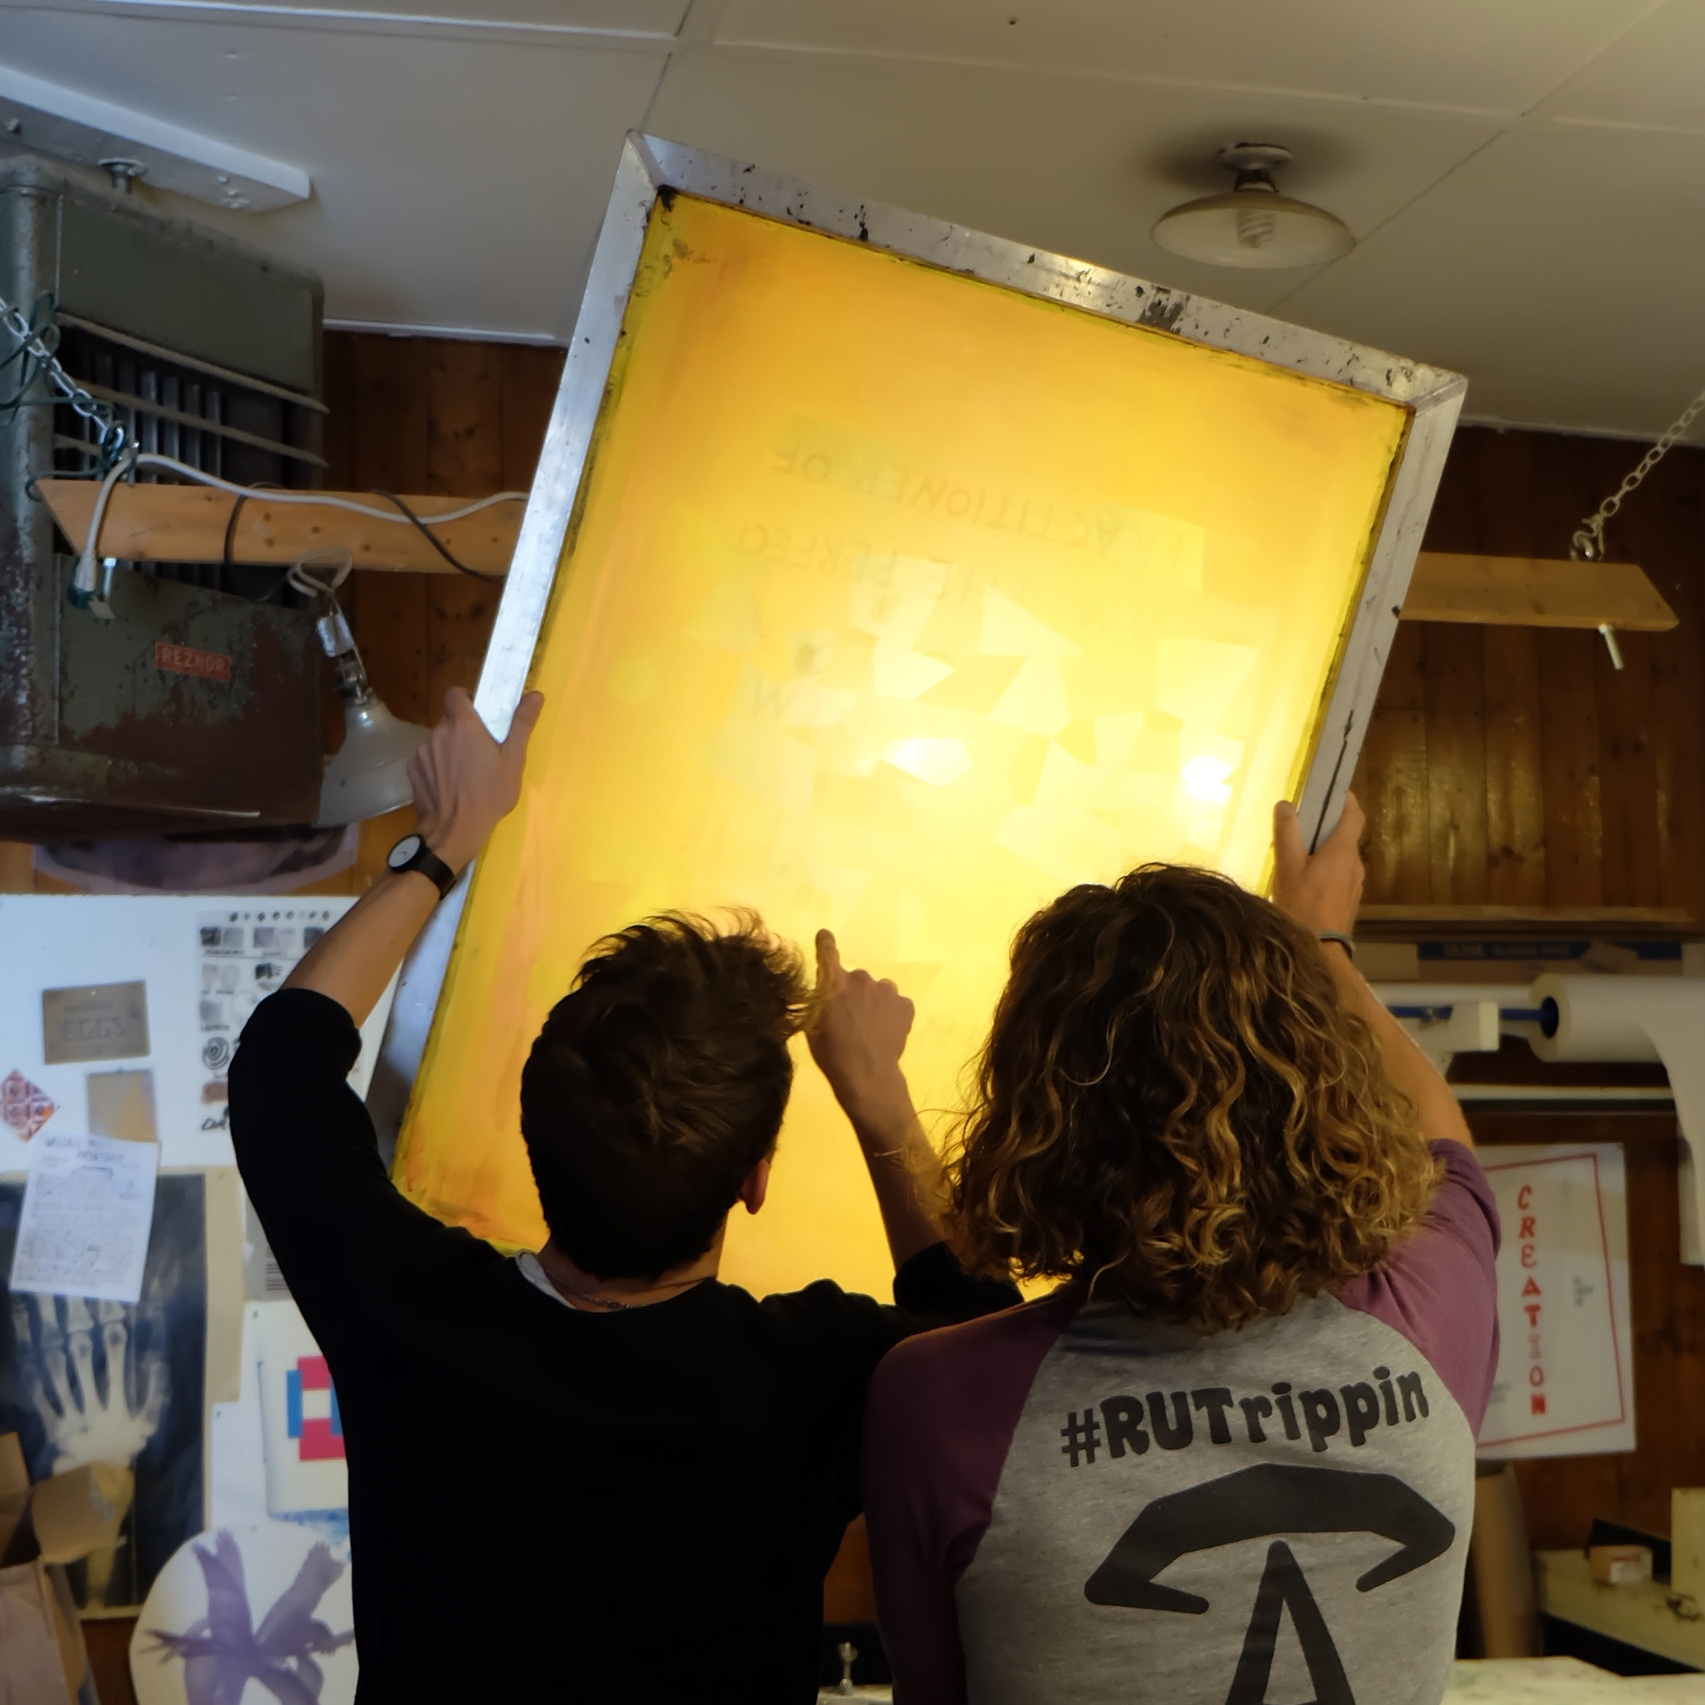
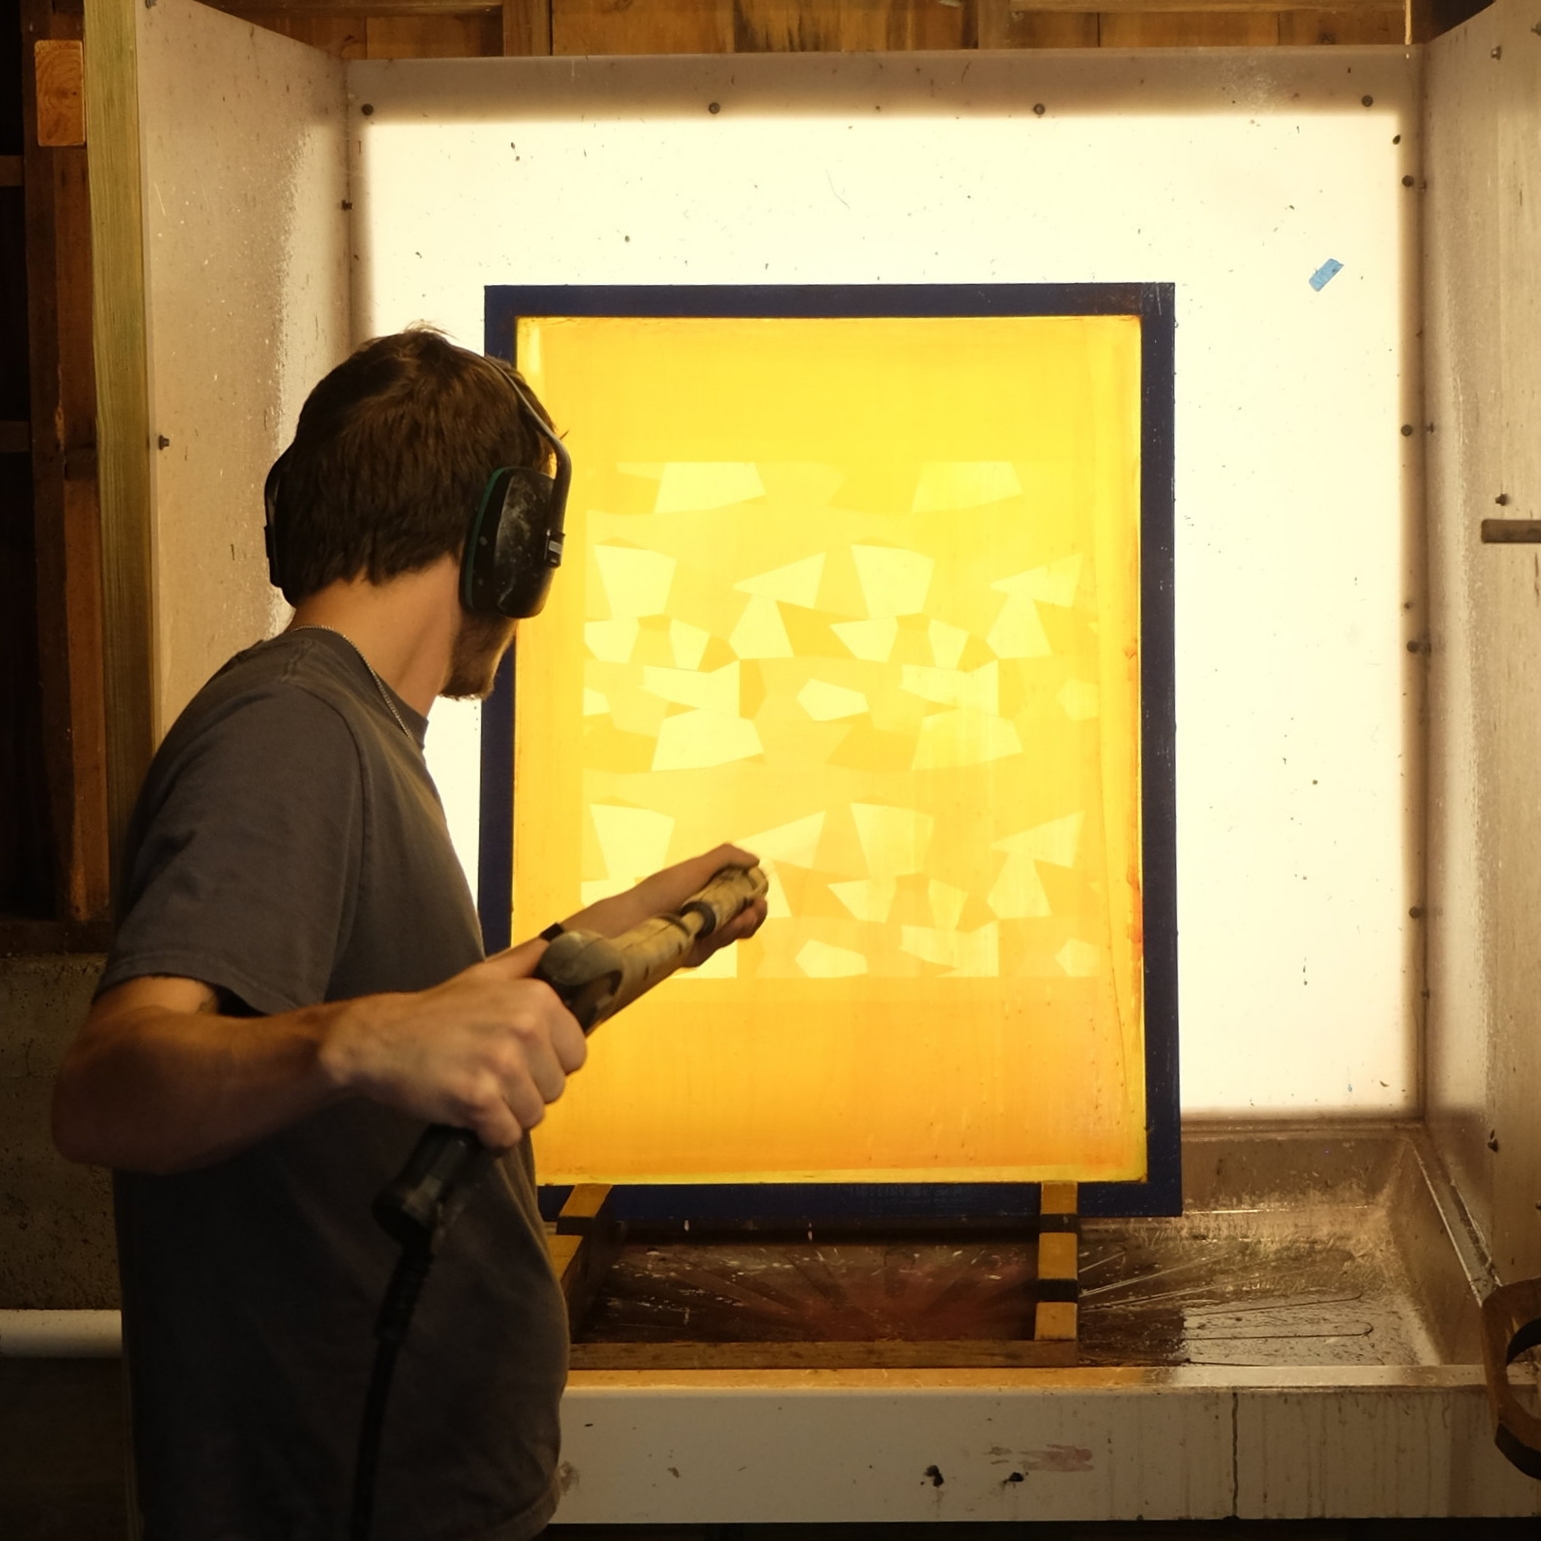
It was wet and rainy, but we had momentum. The night before Zack had printed our films on the large format printer, first thing he exposed the screen to UV light on the light table using the film positive to block the light from the parts of the screen we wanted to print yellow. We reviewed the mesh of the screen to make sure it washed out correctly and we were printing. It was going so smoothly, we would learn that this screen would be our lucky screen.
Besides some typical issues the yellow looked great. Silkscreen can look like a very precise industrial process, but there are so many factors that can affect the quality of the print and sometimes you cannot explain what contributes to the success or failure of a certain step in the process. After the yellow Zack had several screens that were prepped to expose the cyan film. For whatever reason they all failed. The emulsion was over exposing and sticking in the mesh. At one point we thought we had it, but I discovered a small section of the screen that was blocked and it was not usable.
Zack had the good idea to go ahead and print a proof using this screen even though it was not perfect so I could use it to finish painting the magenta film. By laying the magenta film from the printer on top of the yellow and cyan printed proof I could see the edges of where I would need to paint my textures for the magenta layer so we would be ready to move forward the next day.


Day four: cyan and magenta
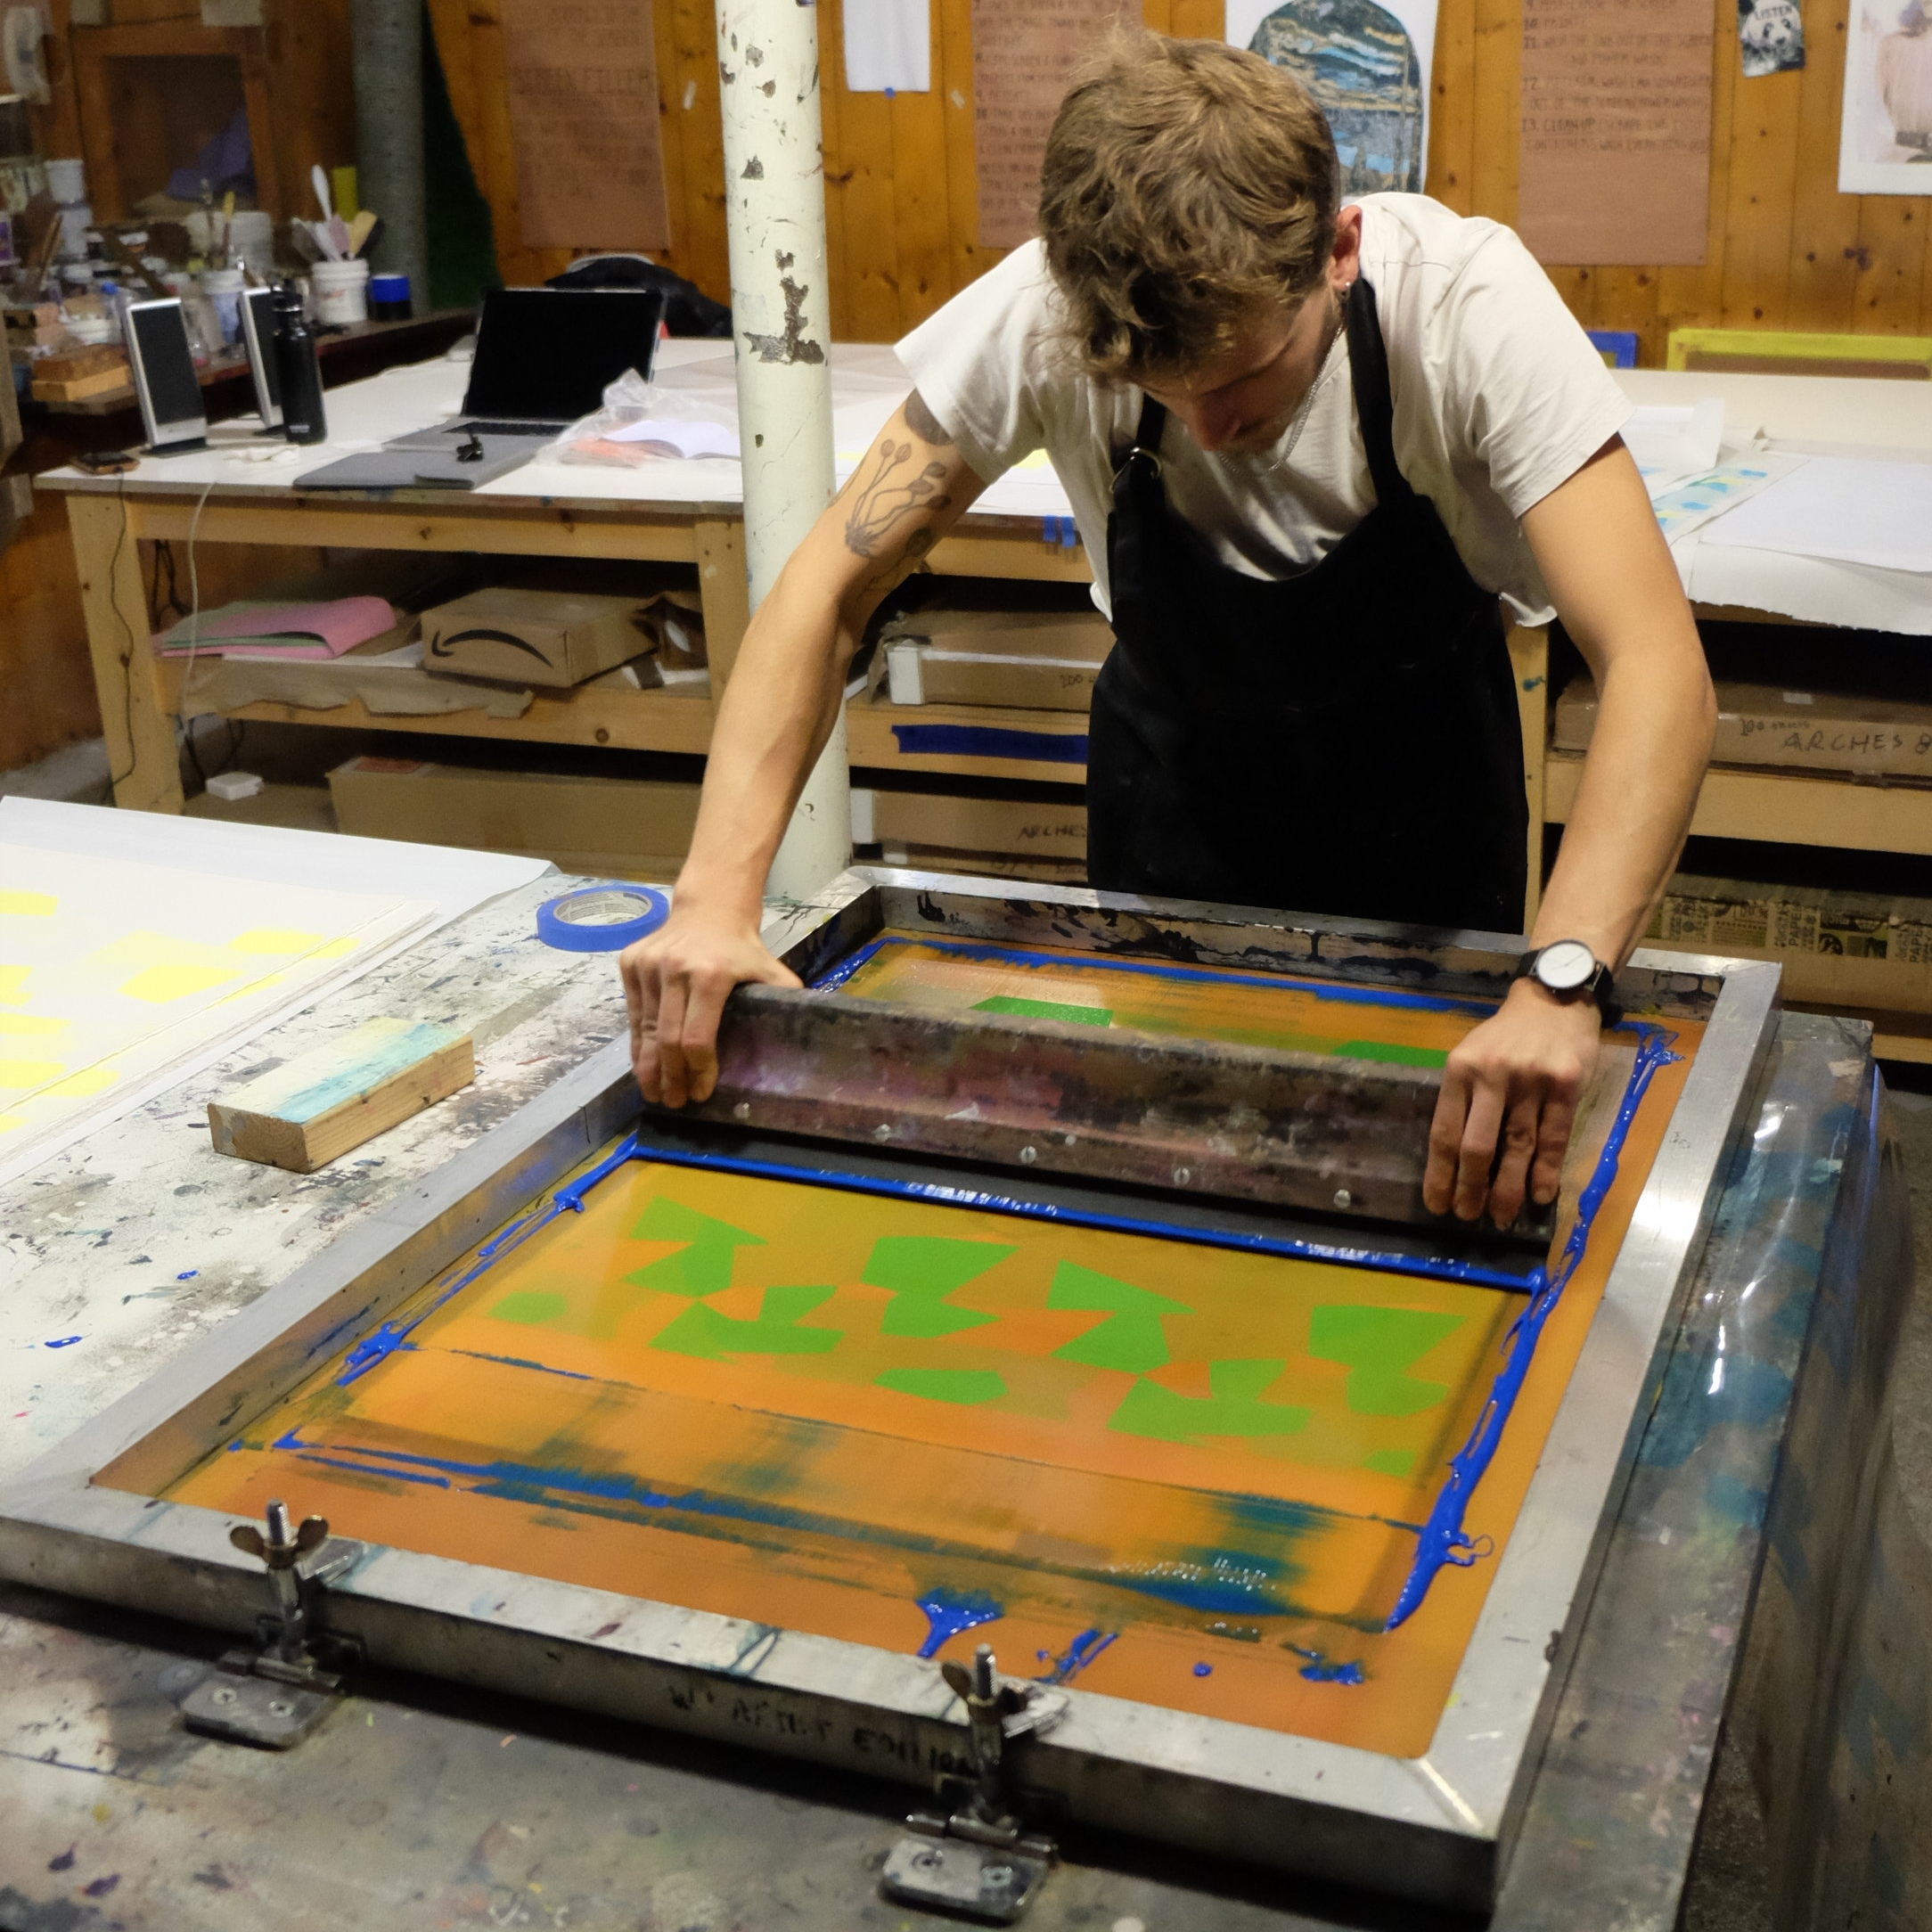
As far as a timeline goes we wanted to have all the colors printed so that our last day could be spent curating the edition, but it would not work out this way. The day before there had been trouble shooting the cyan screen and it only got worse from there.
The cold and rainy conditions were making it hard to predict how long to expose the screen and no matter what Zack did the cyan would not wash out correctly. After three exposures with no luck he recoated all three screens and we waited for them to dry. After the second round of exposing all three screens it was already late afternoon and we were getting demoralized. He recoated the screens and using an extremely low exposure time on our lucky screen he got it to work. It seemed like we had done so much and yet we were just printing our second color!
When it was time to expose the magenta screen I was super nervous because the metallic pen I had used to paint it was smudging really easily. Zack had done a test to make sure it would go smoothly but I was skeptical after how many times the cyan took to turn out properly. If the film got damaged in the exposure and we had to do it again I would have to repaint the whole thing by hand. Zack went straight to the lucky screen and she did not disappoint us by exposing perfectly on the first try. Working in a barn is charming and rustic, but also tests your perseverance. We tore through the magenta finishing around 7pm.
Final day: key (black) and edition curating
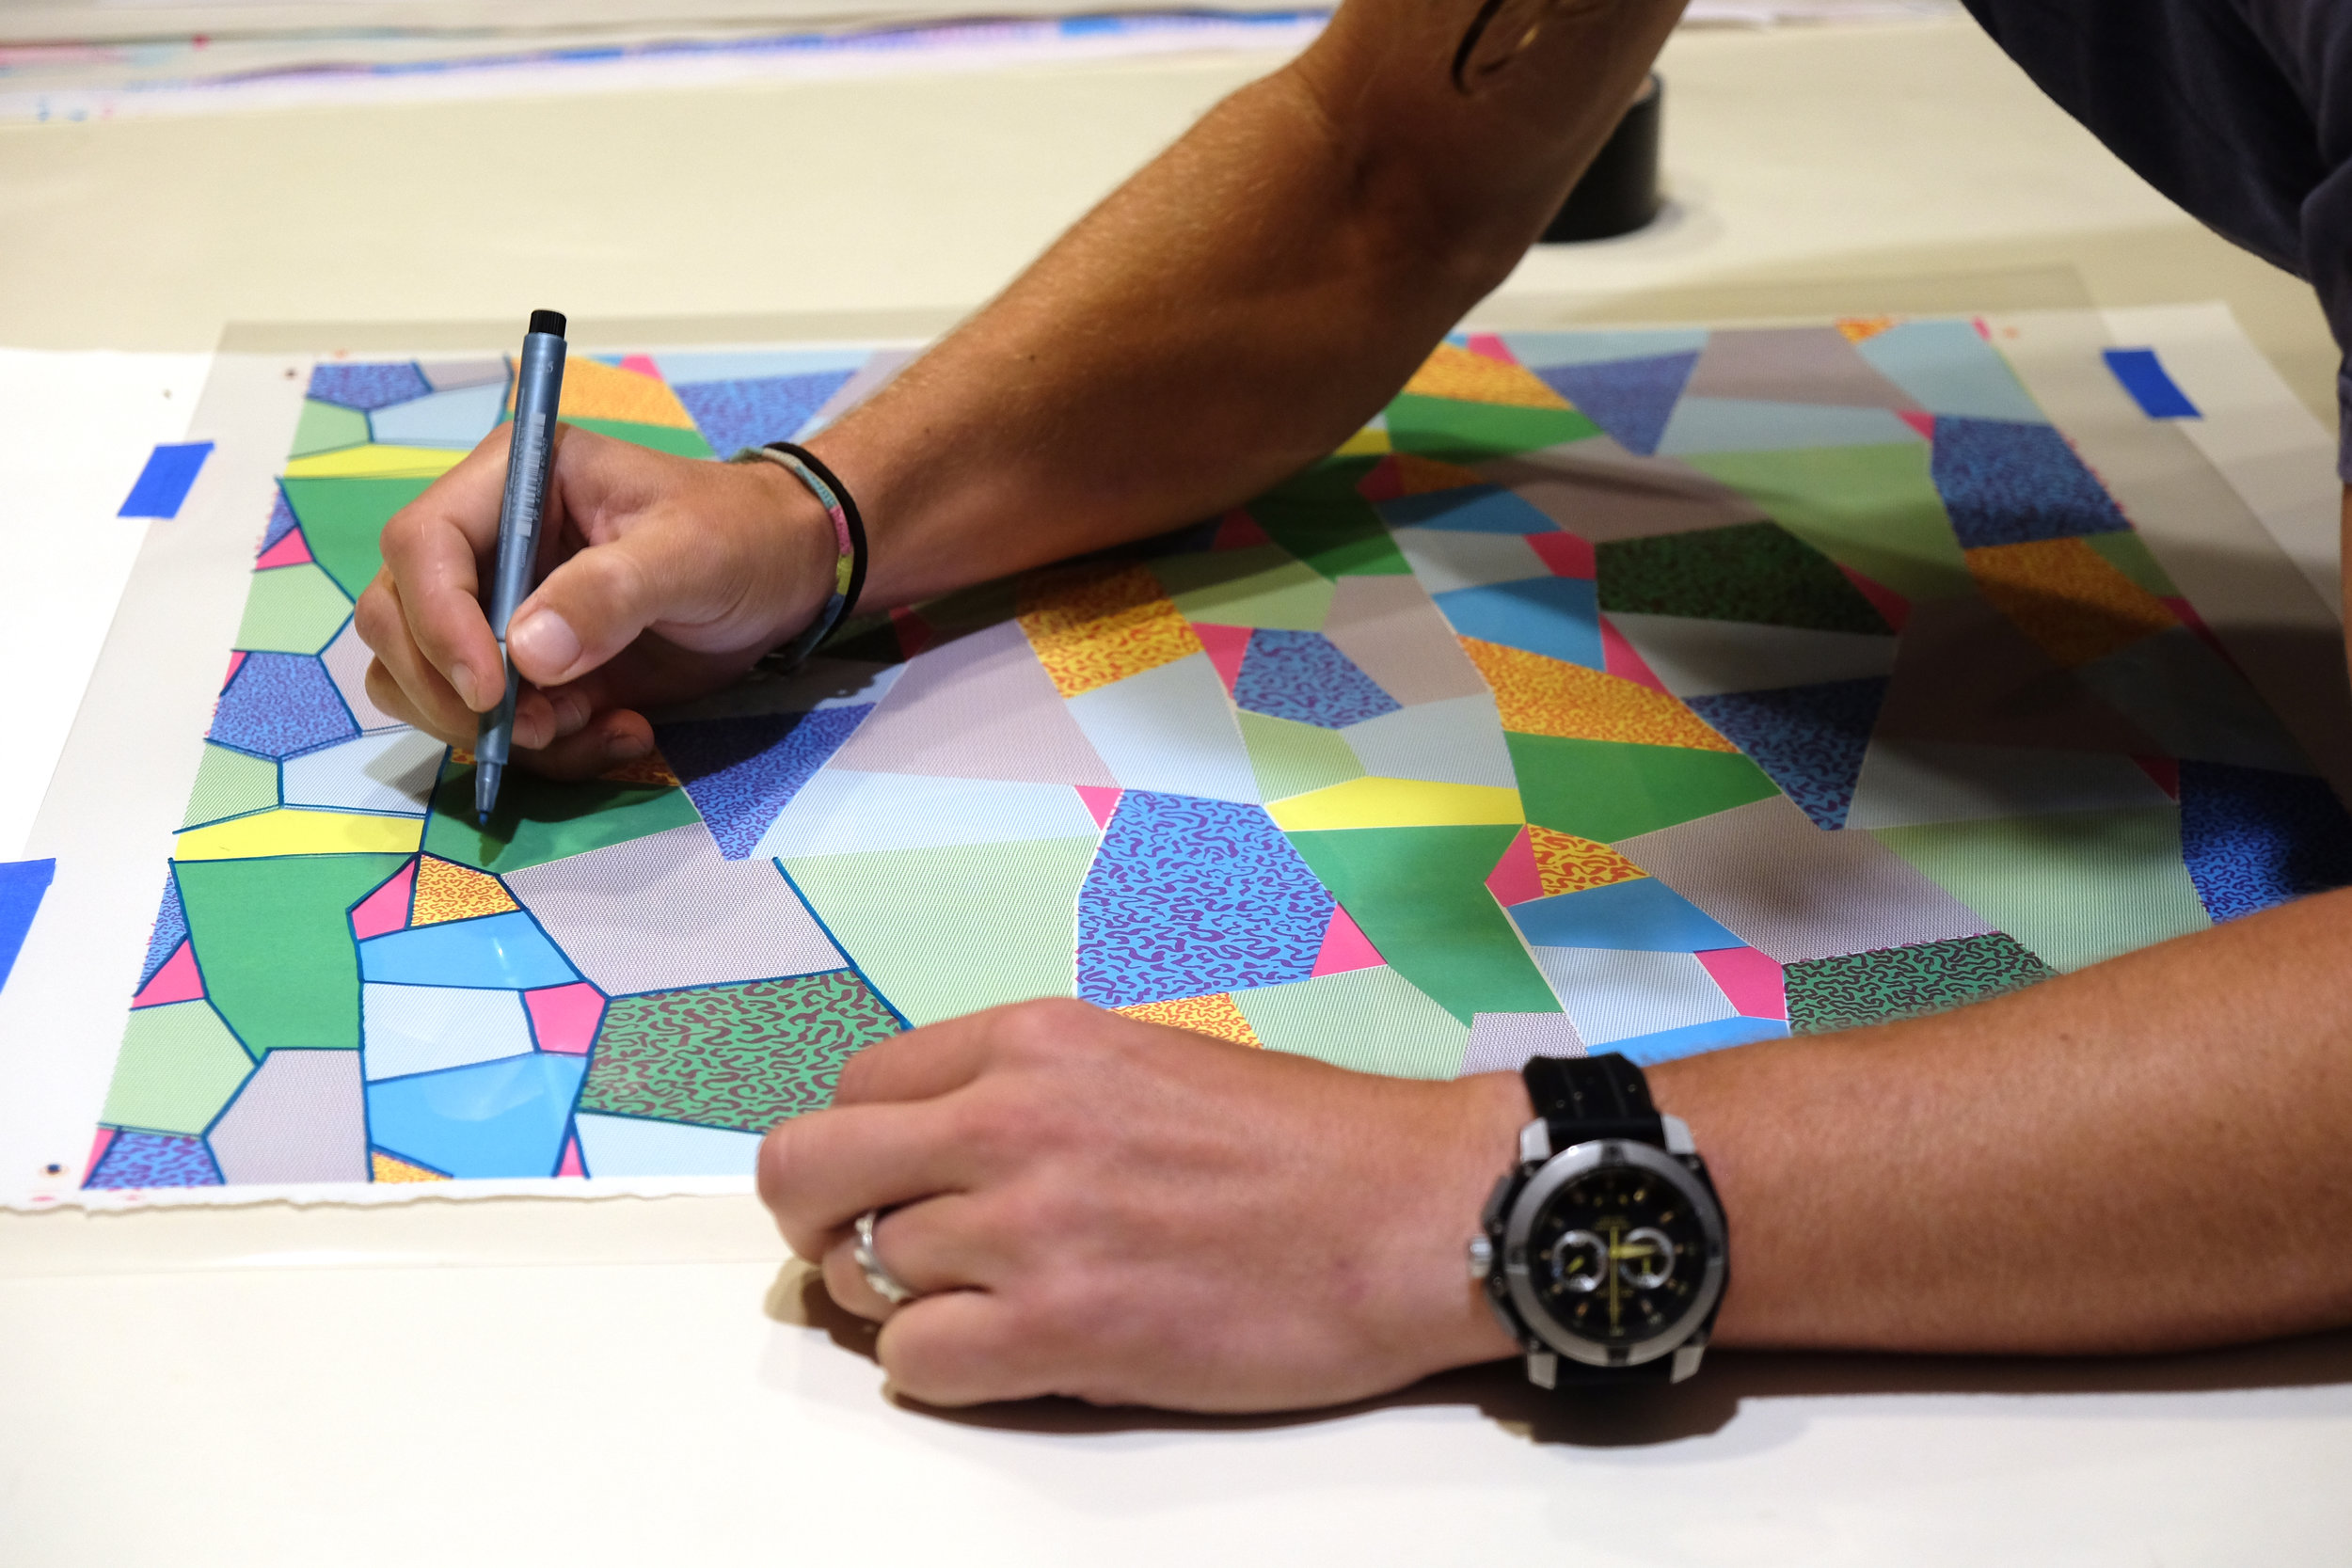
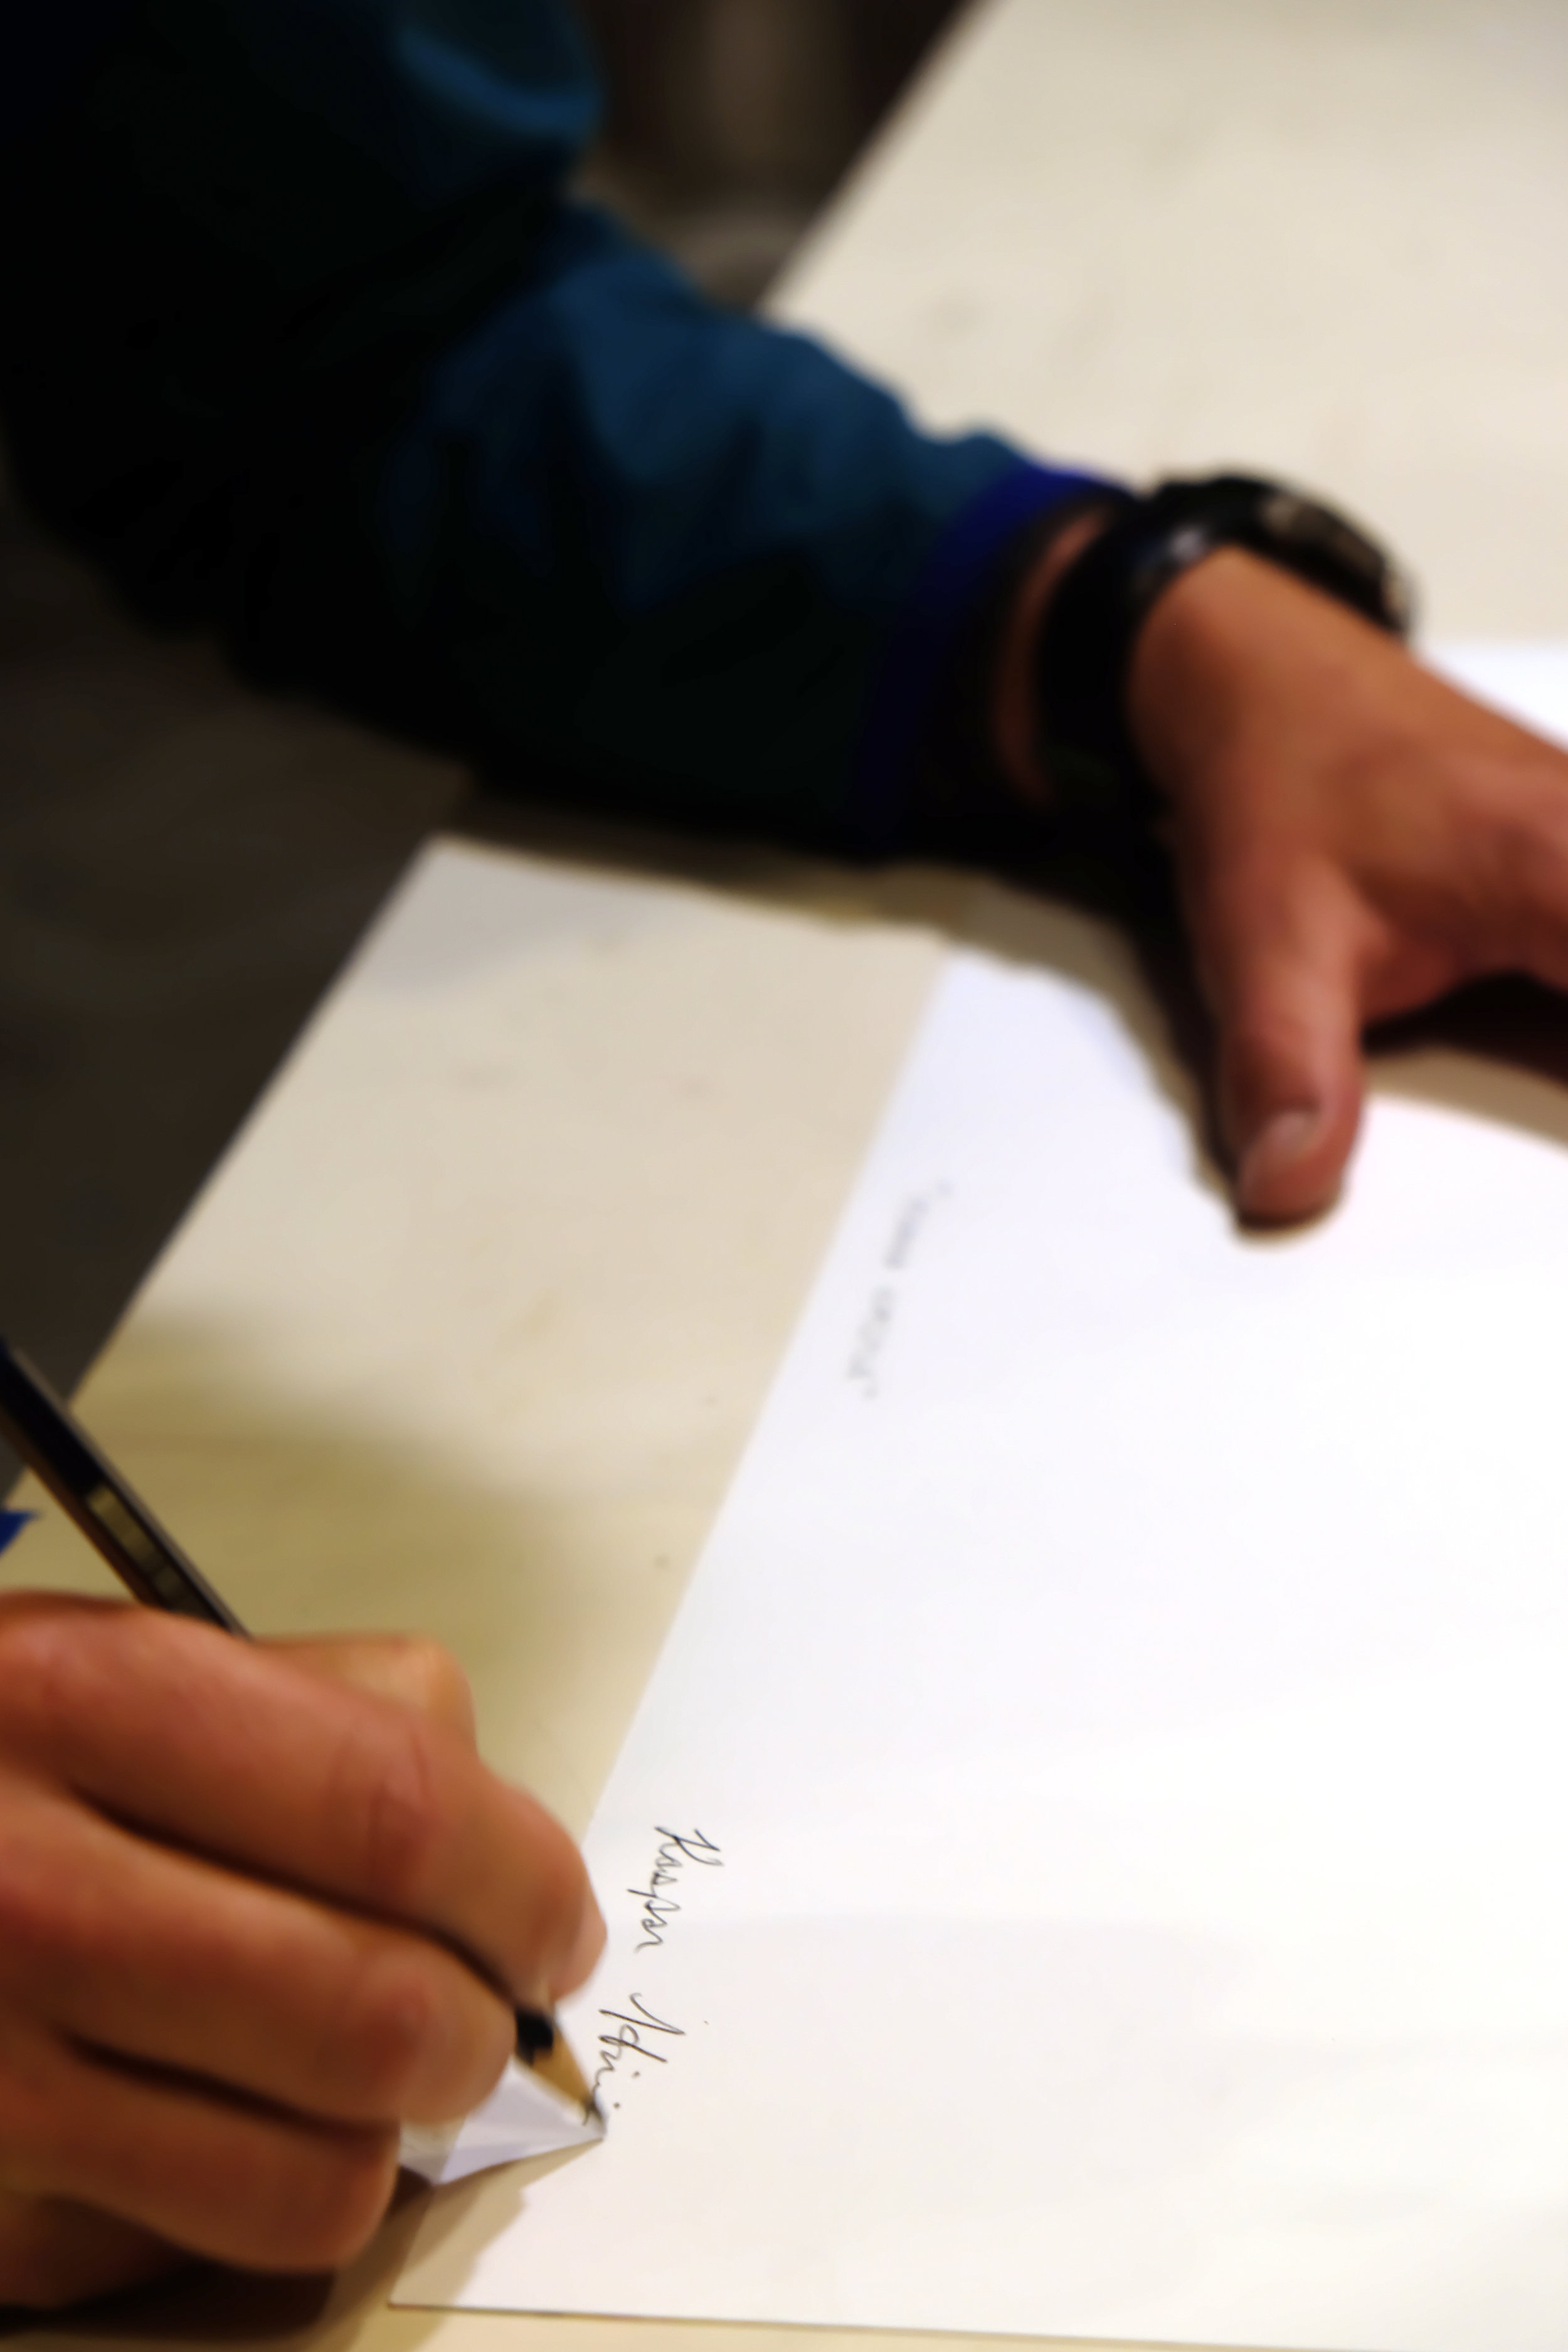

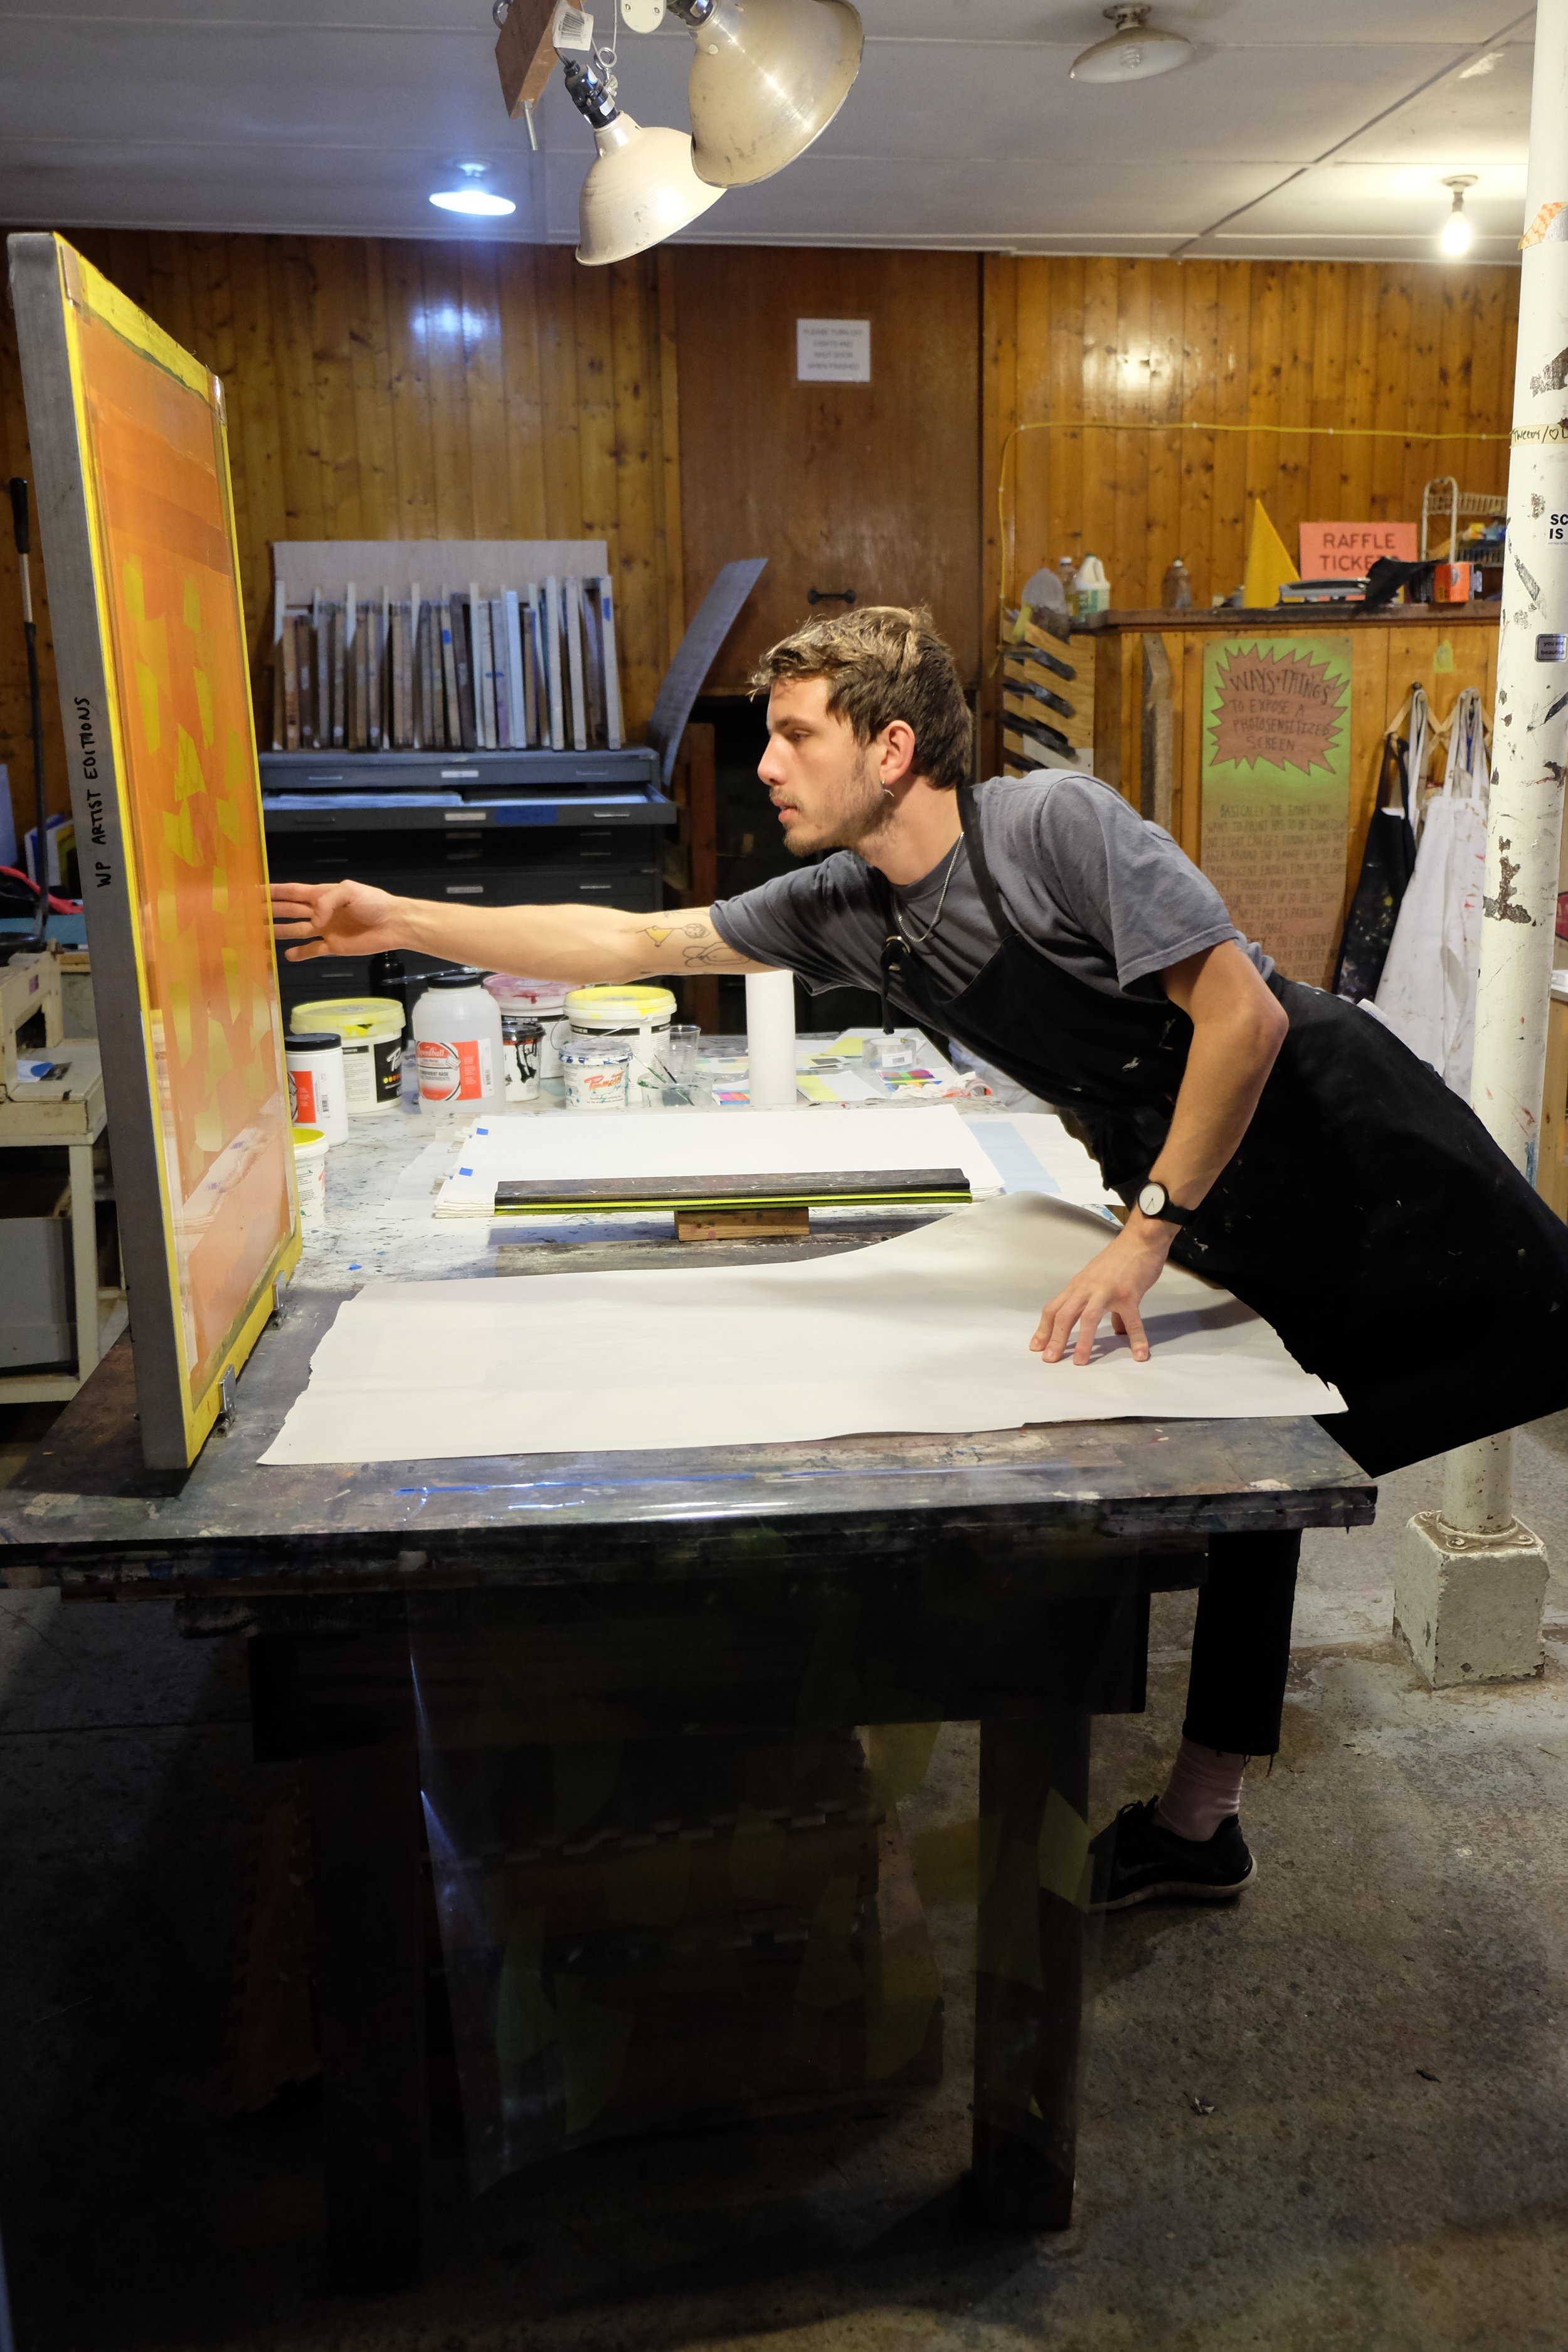
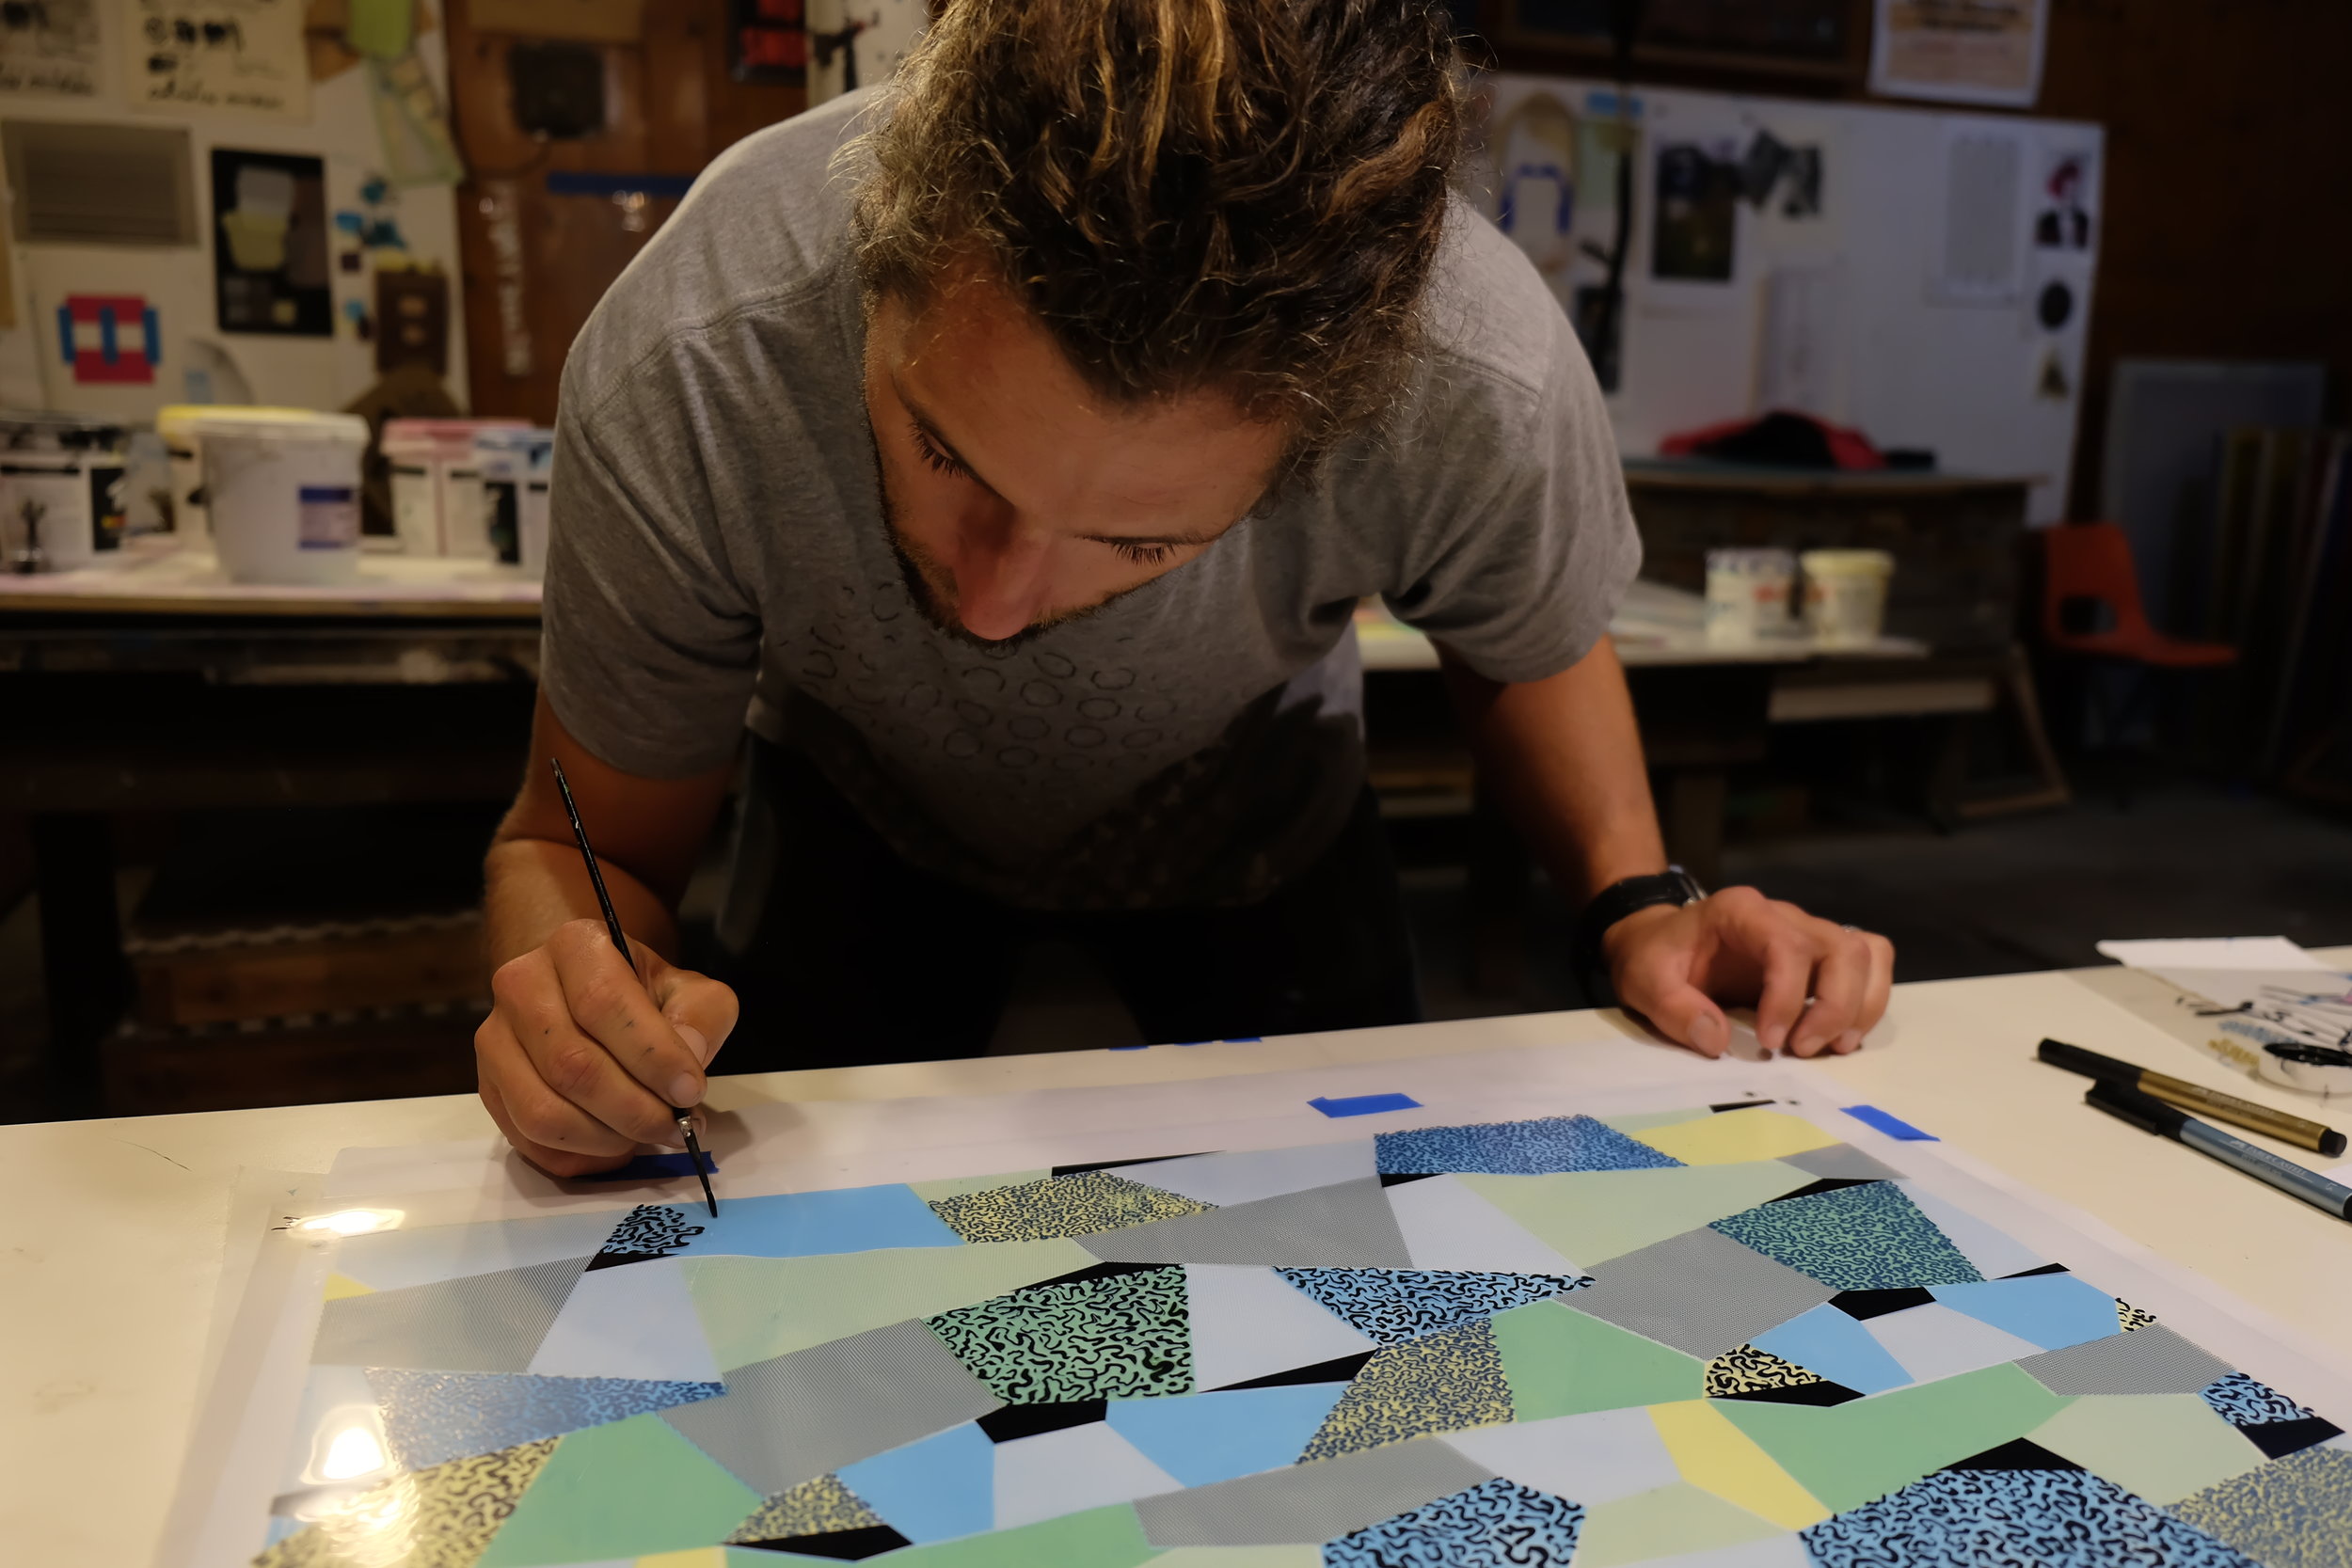
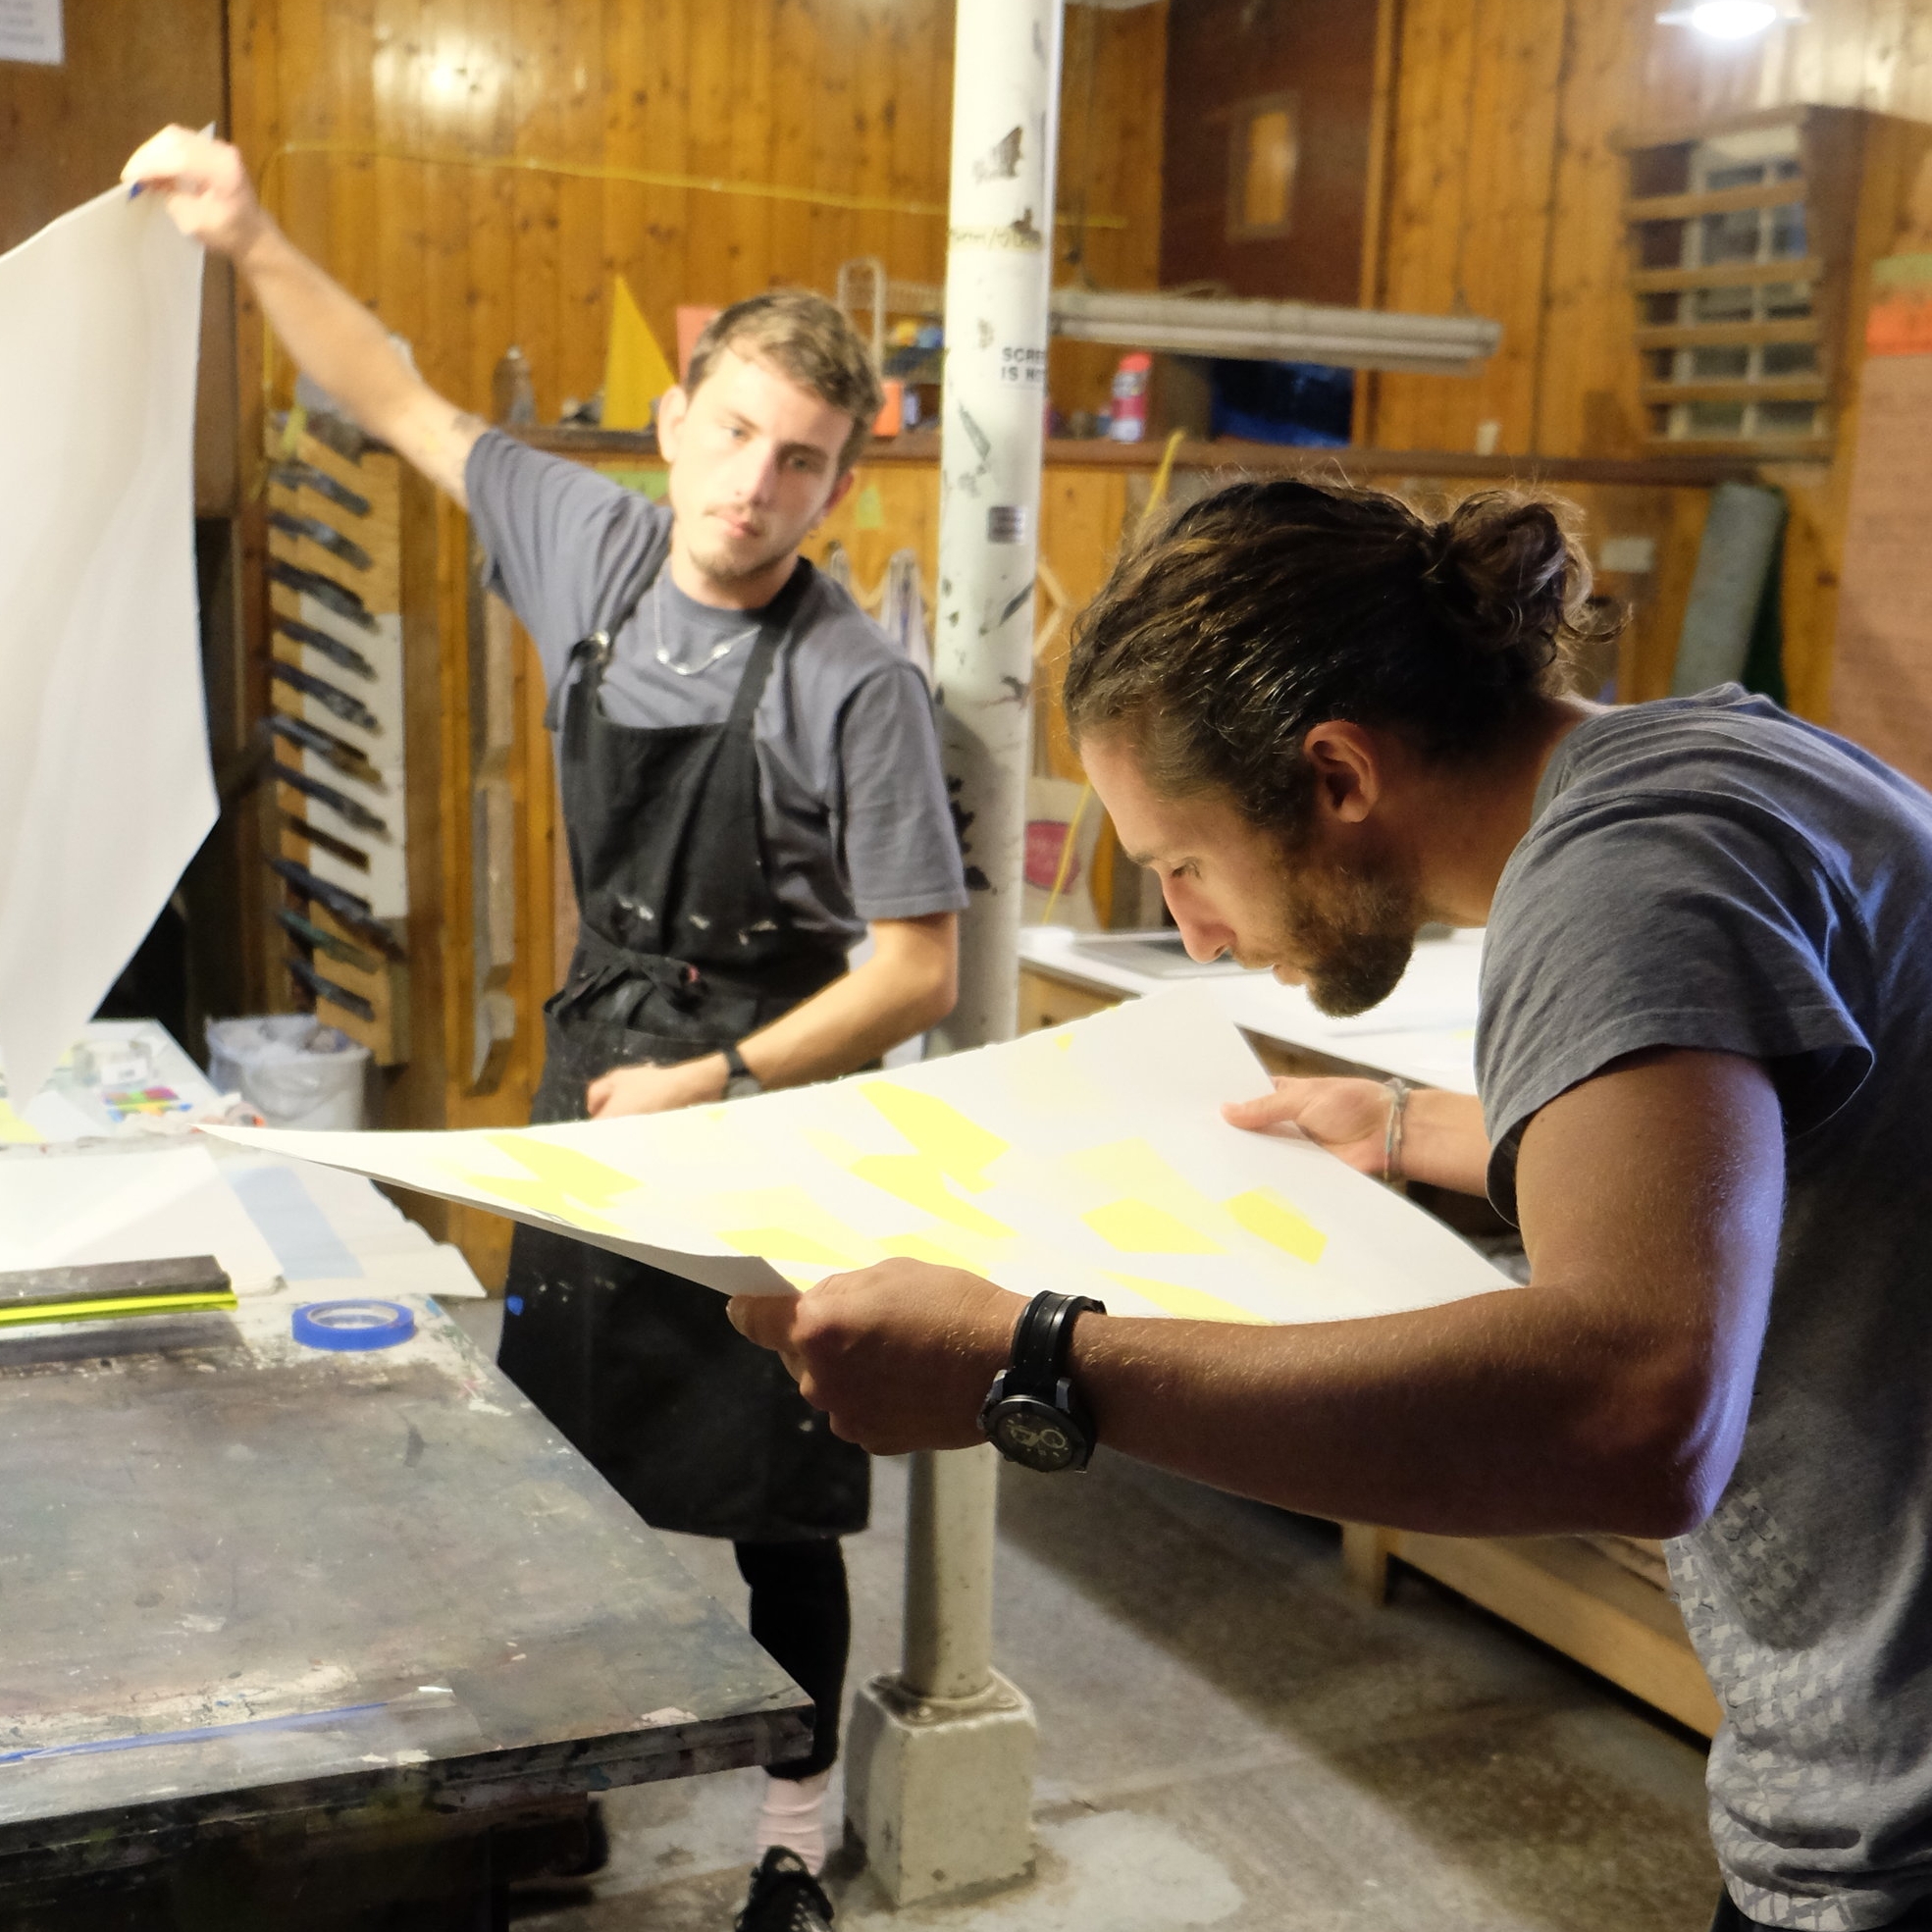
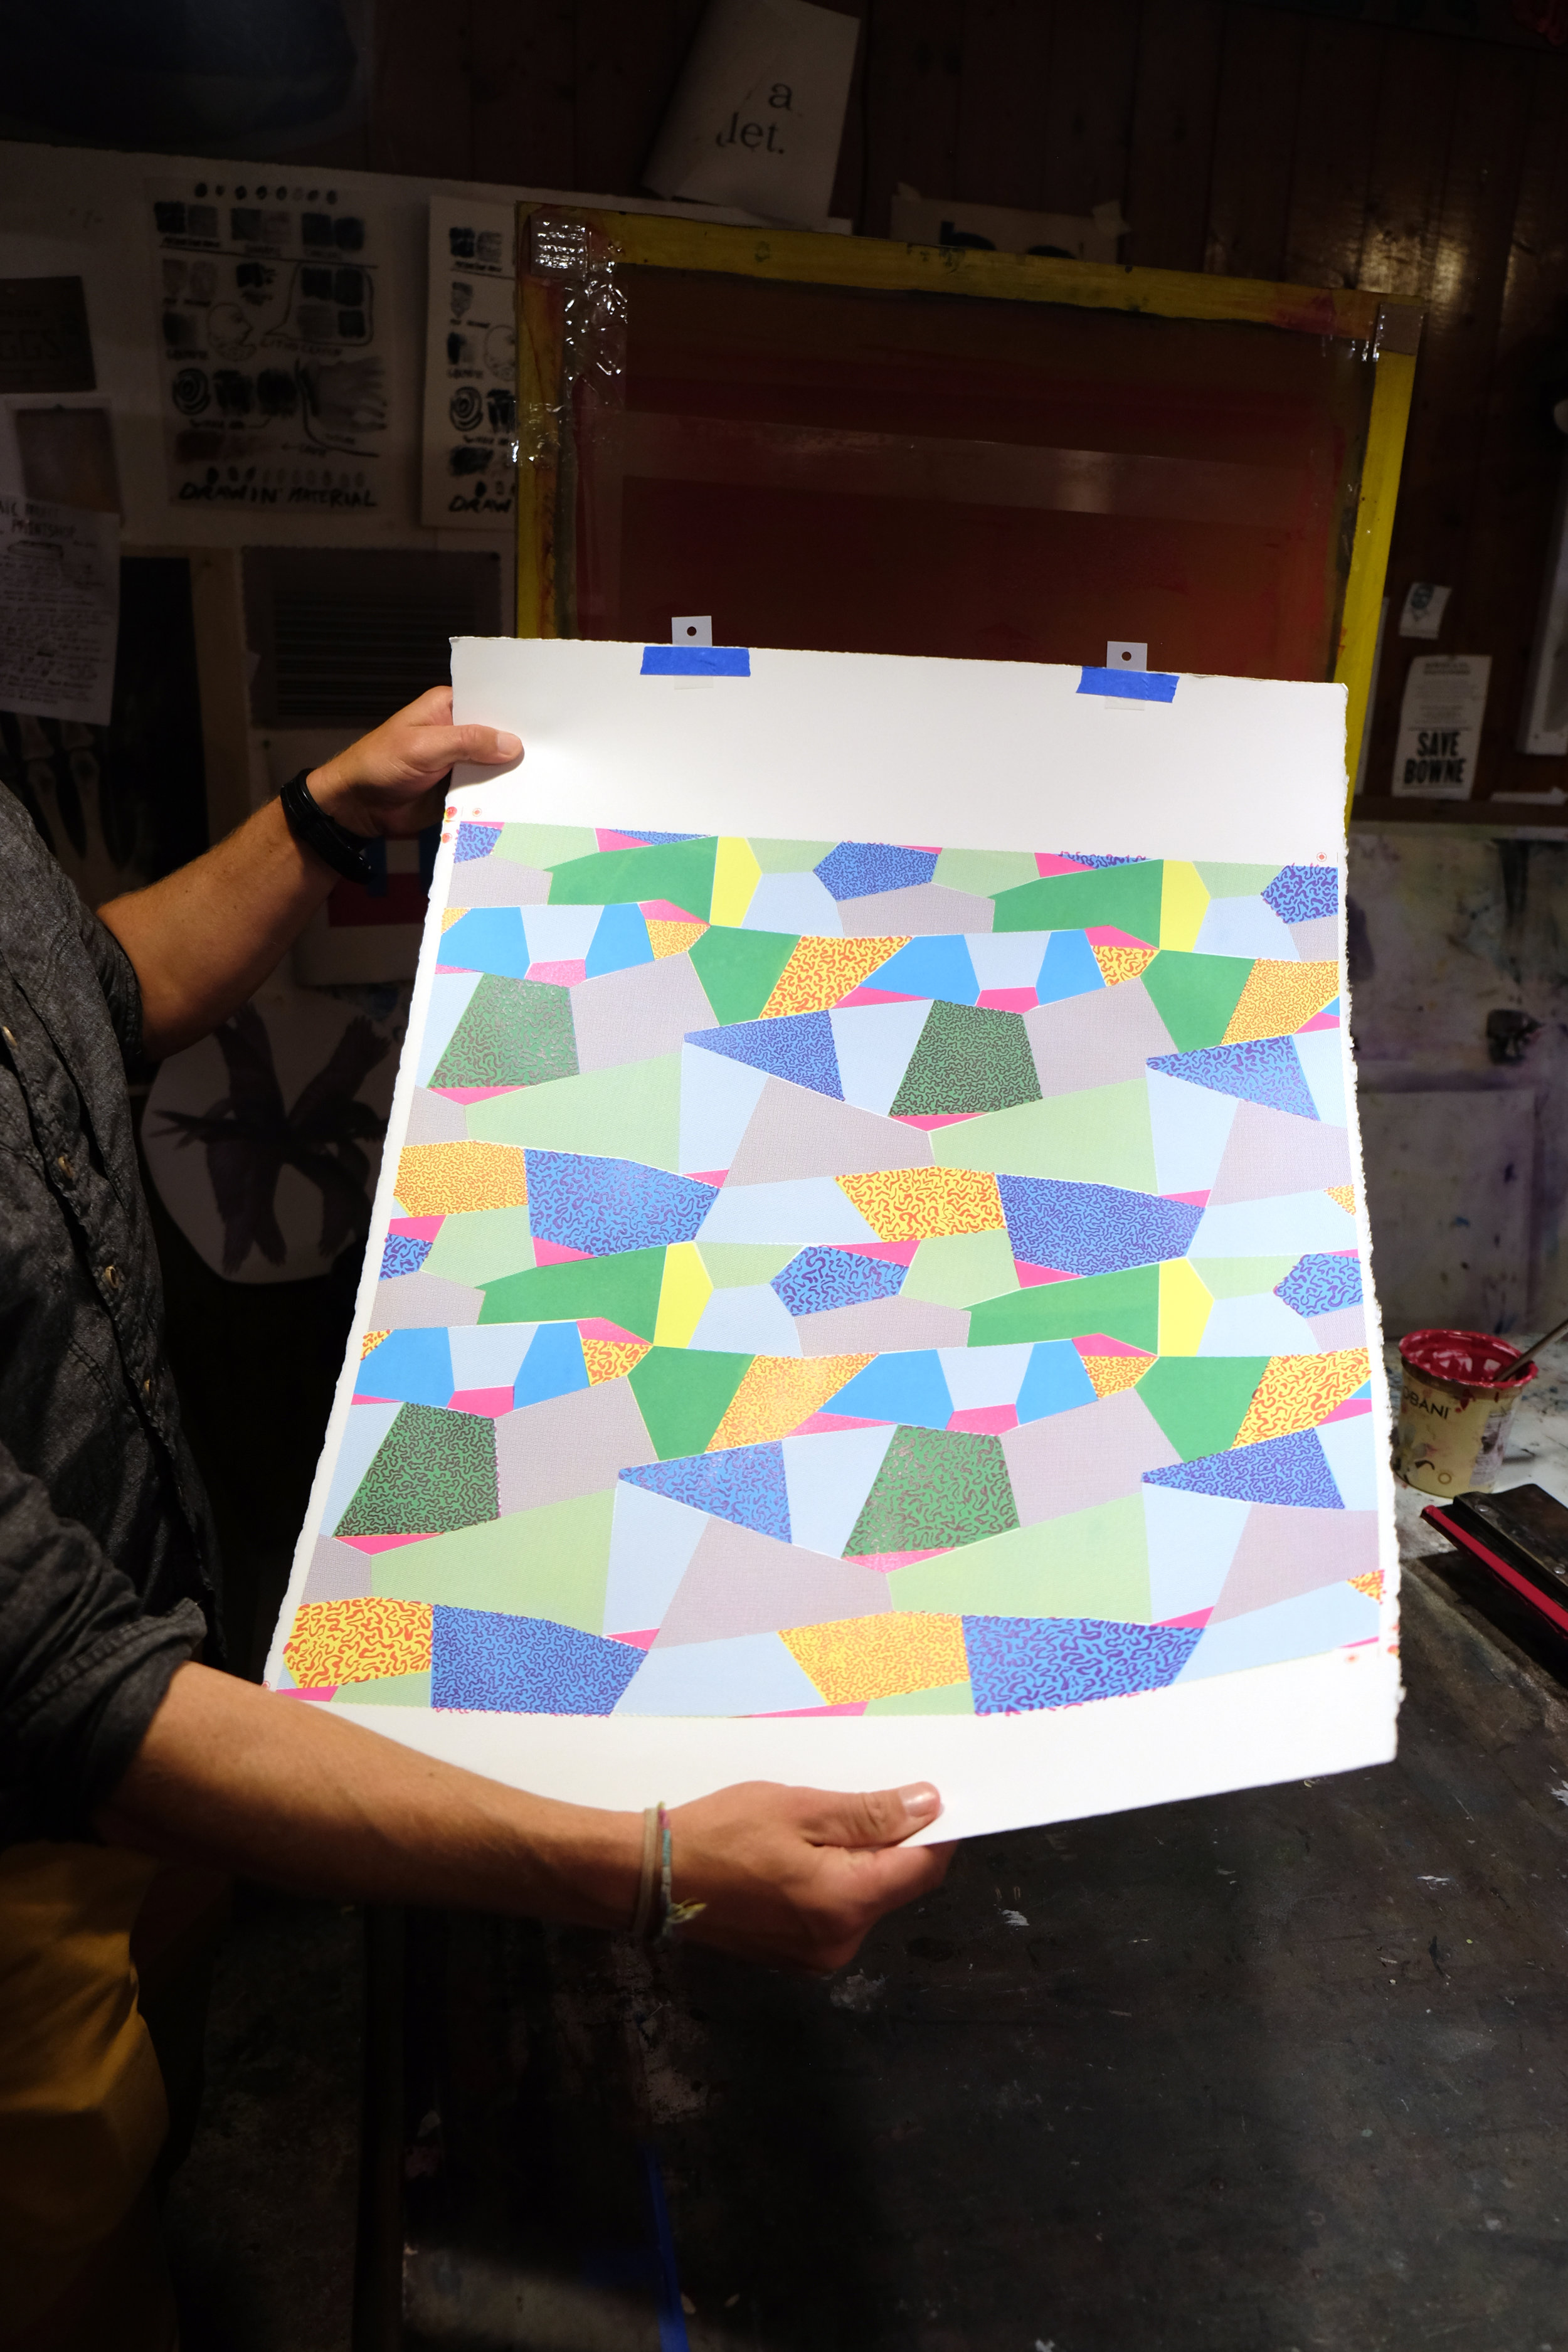
I came in at 8am to draw with metallic pens on the clear acetate film by laying it over the print of the previous 3 layers as a guide. The idea was to give clear definition to the edges of the shapes without it looking too perfect like it came from a computer. The shapes purposefully had disjointed edges from how I cut them out in the computer. By using the metallic pen it created a nice opaque thick line, but with some of the texture on the edges and variation in line weight that reflects the hand drawing.
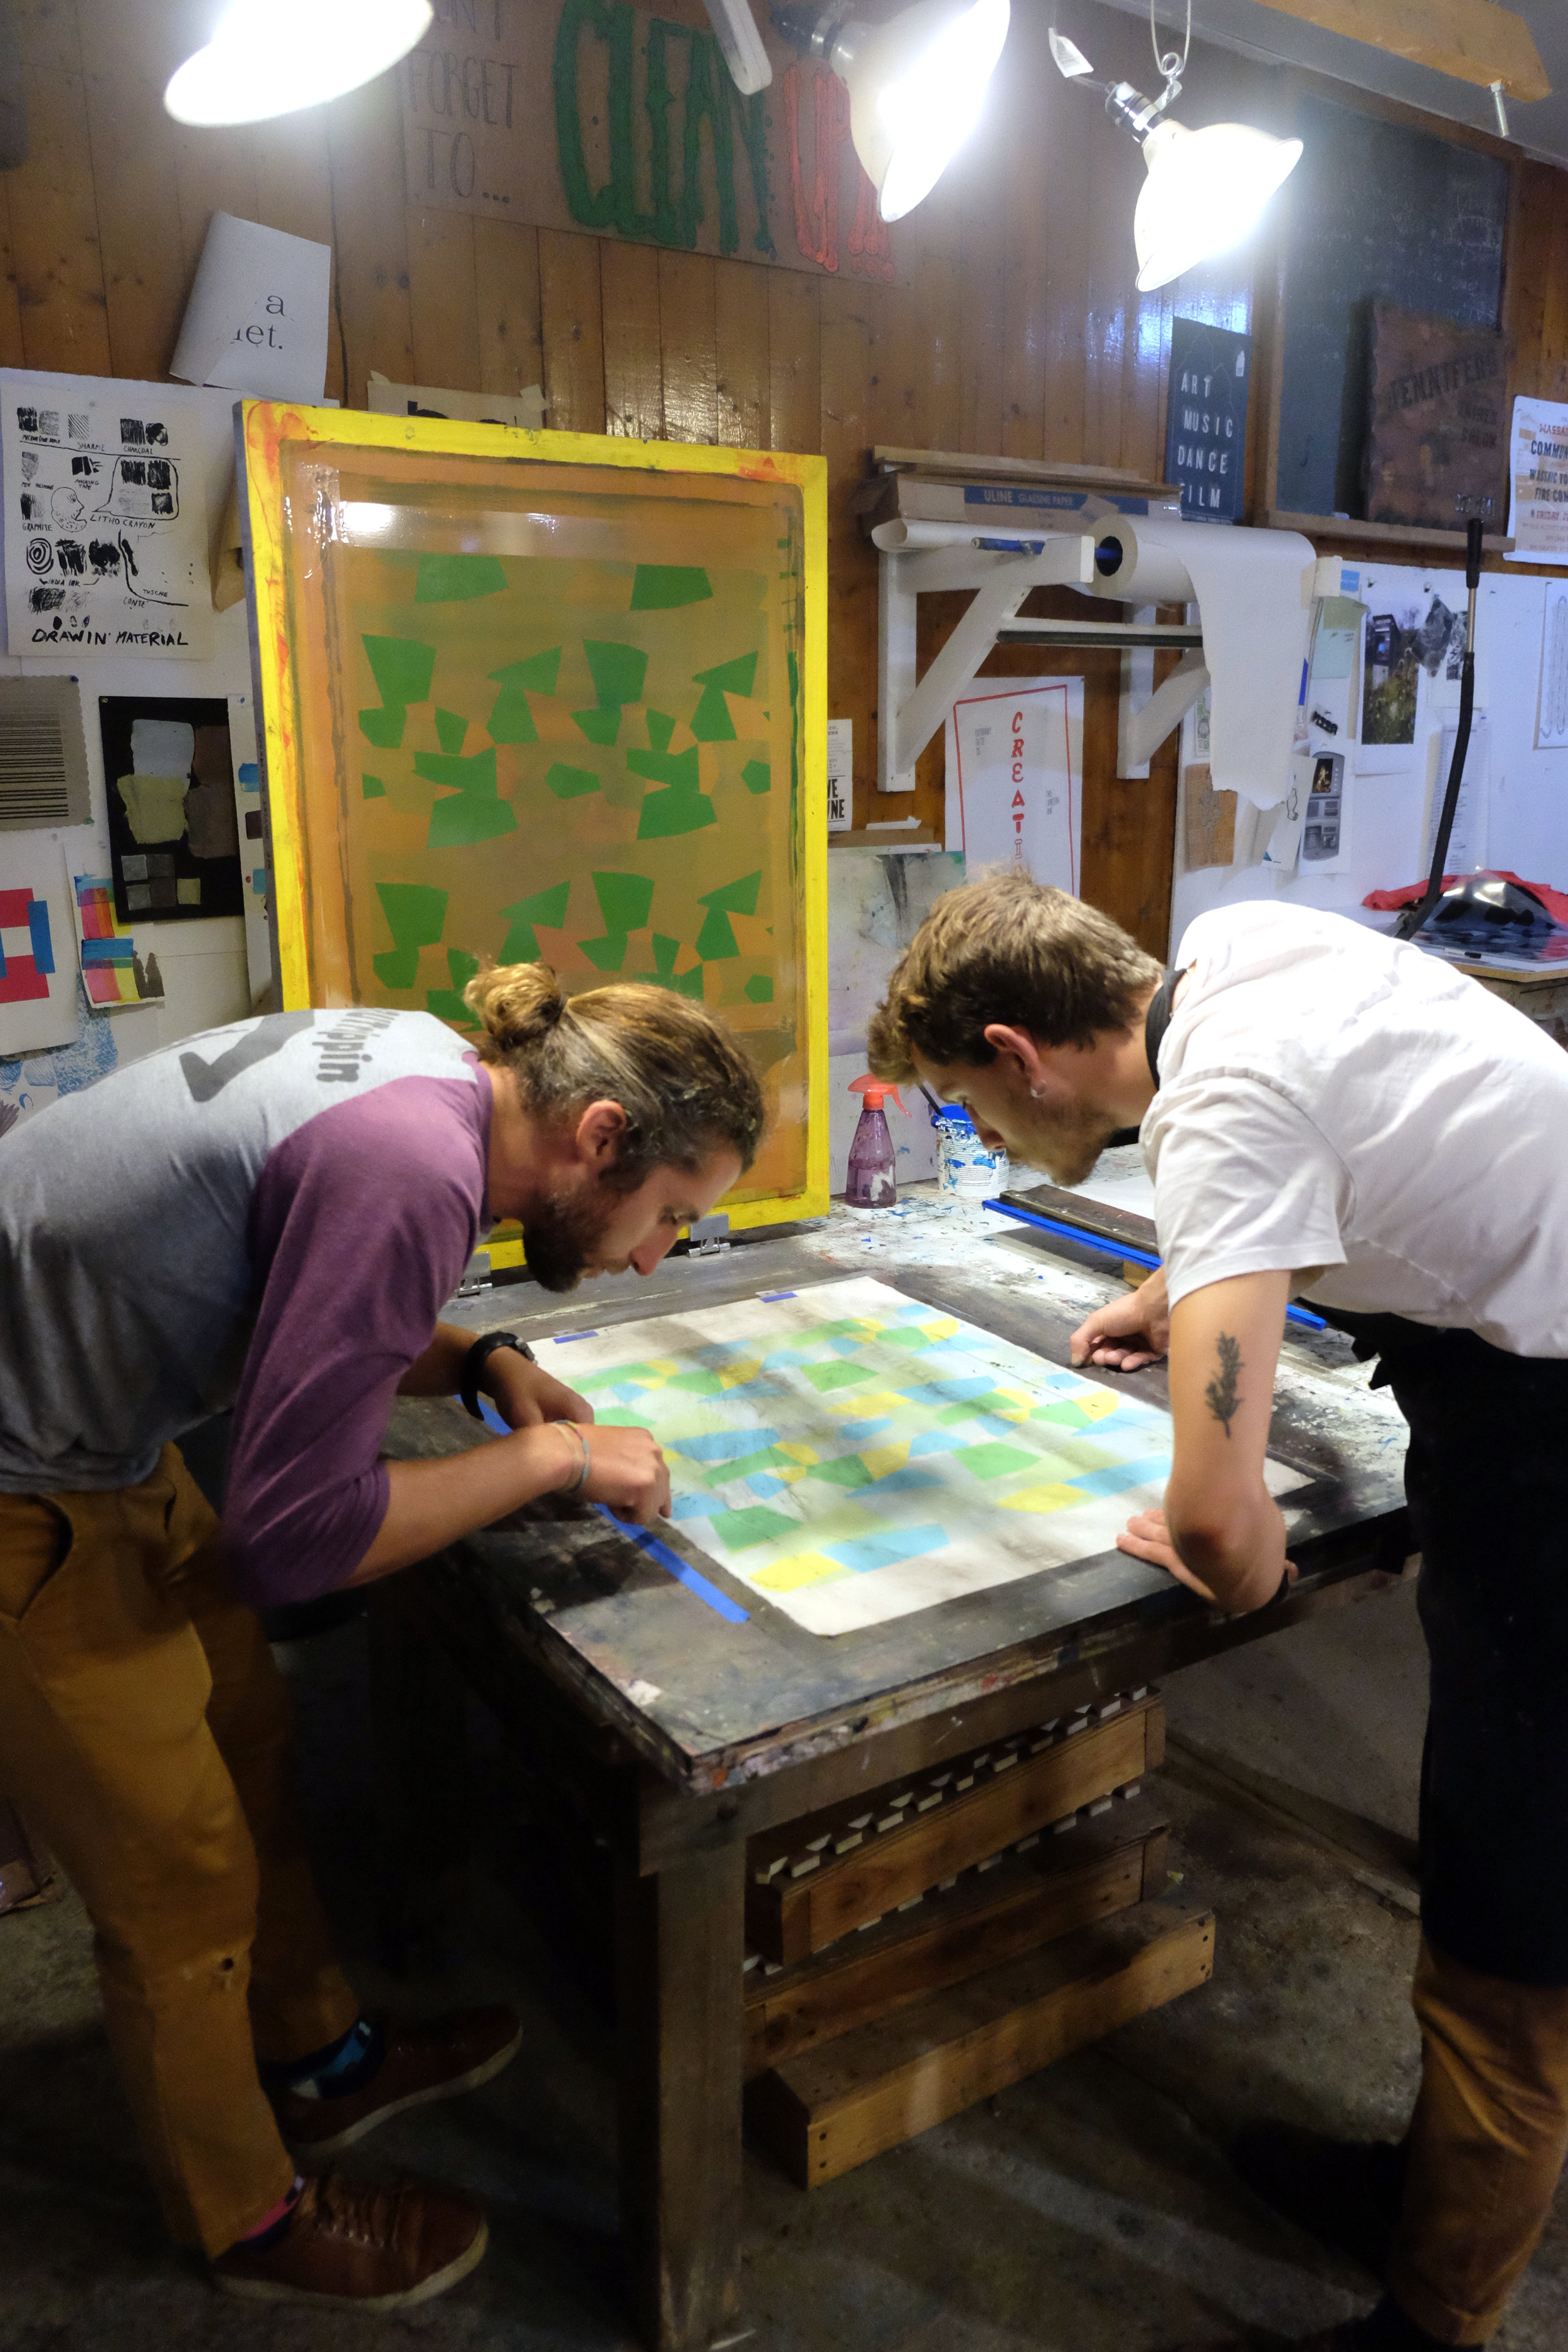
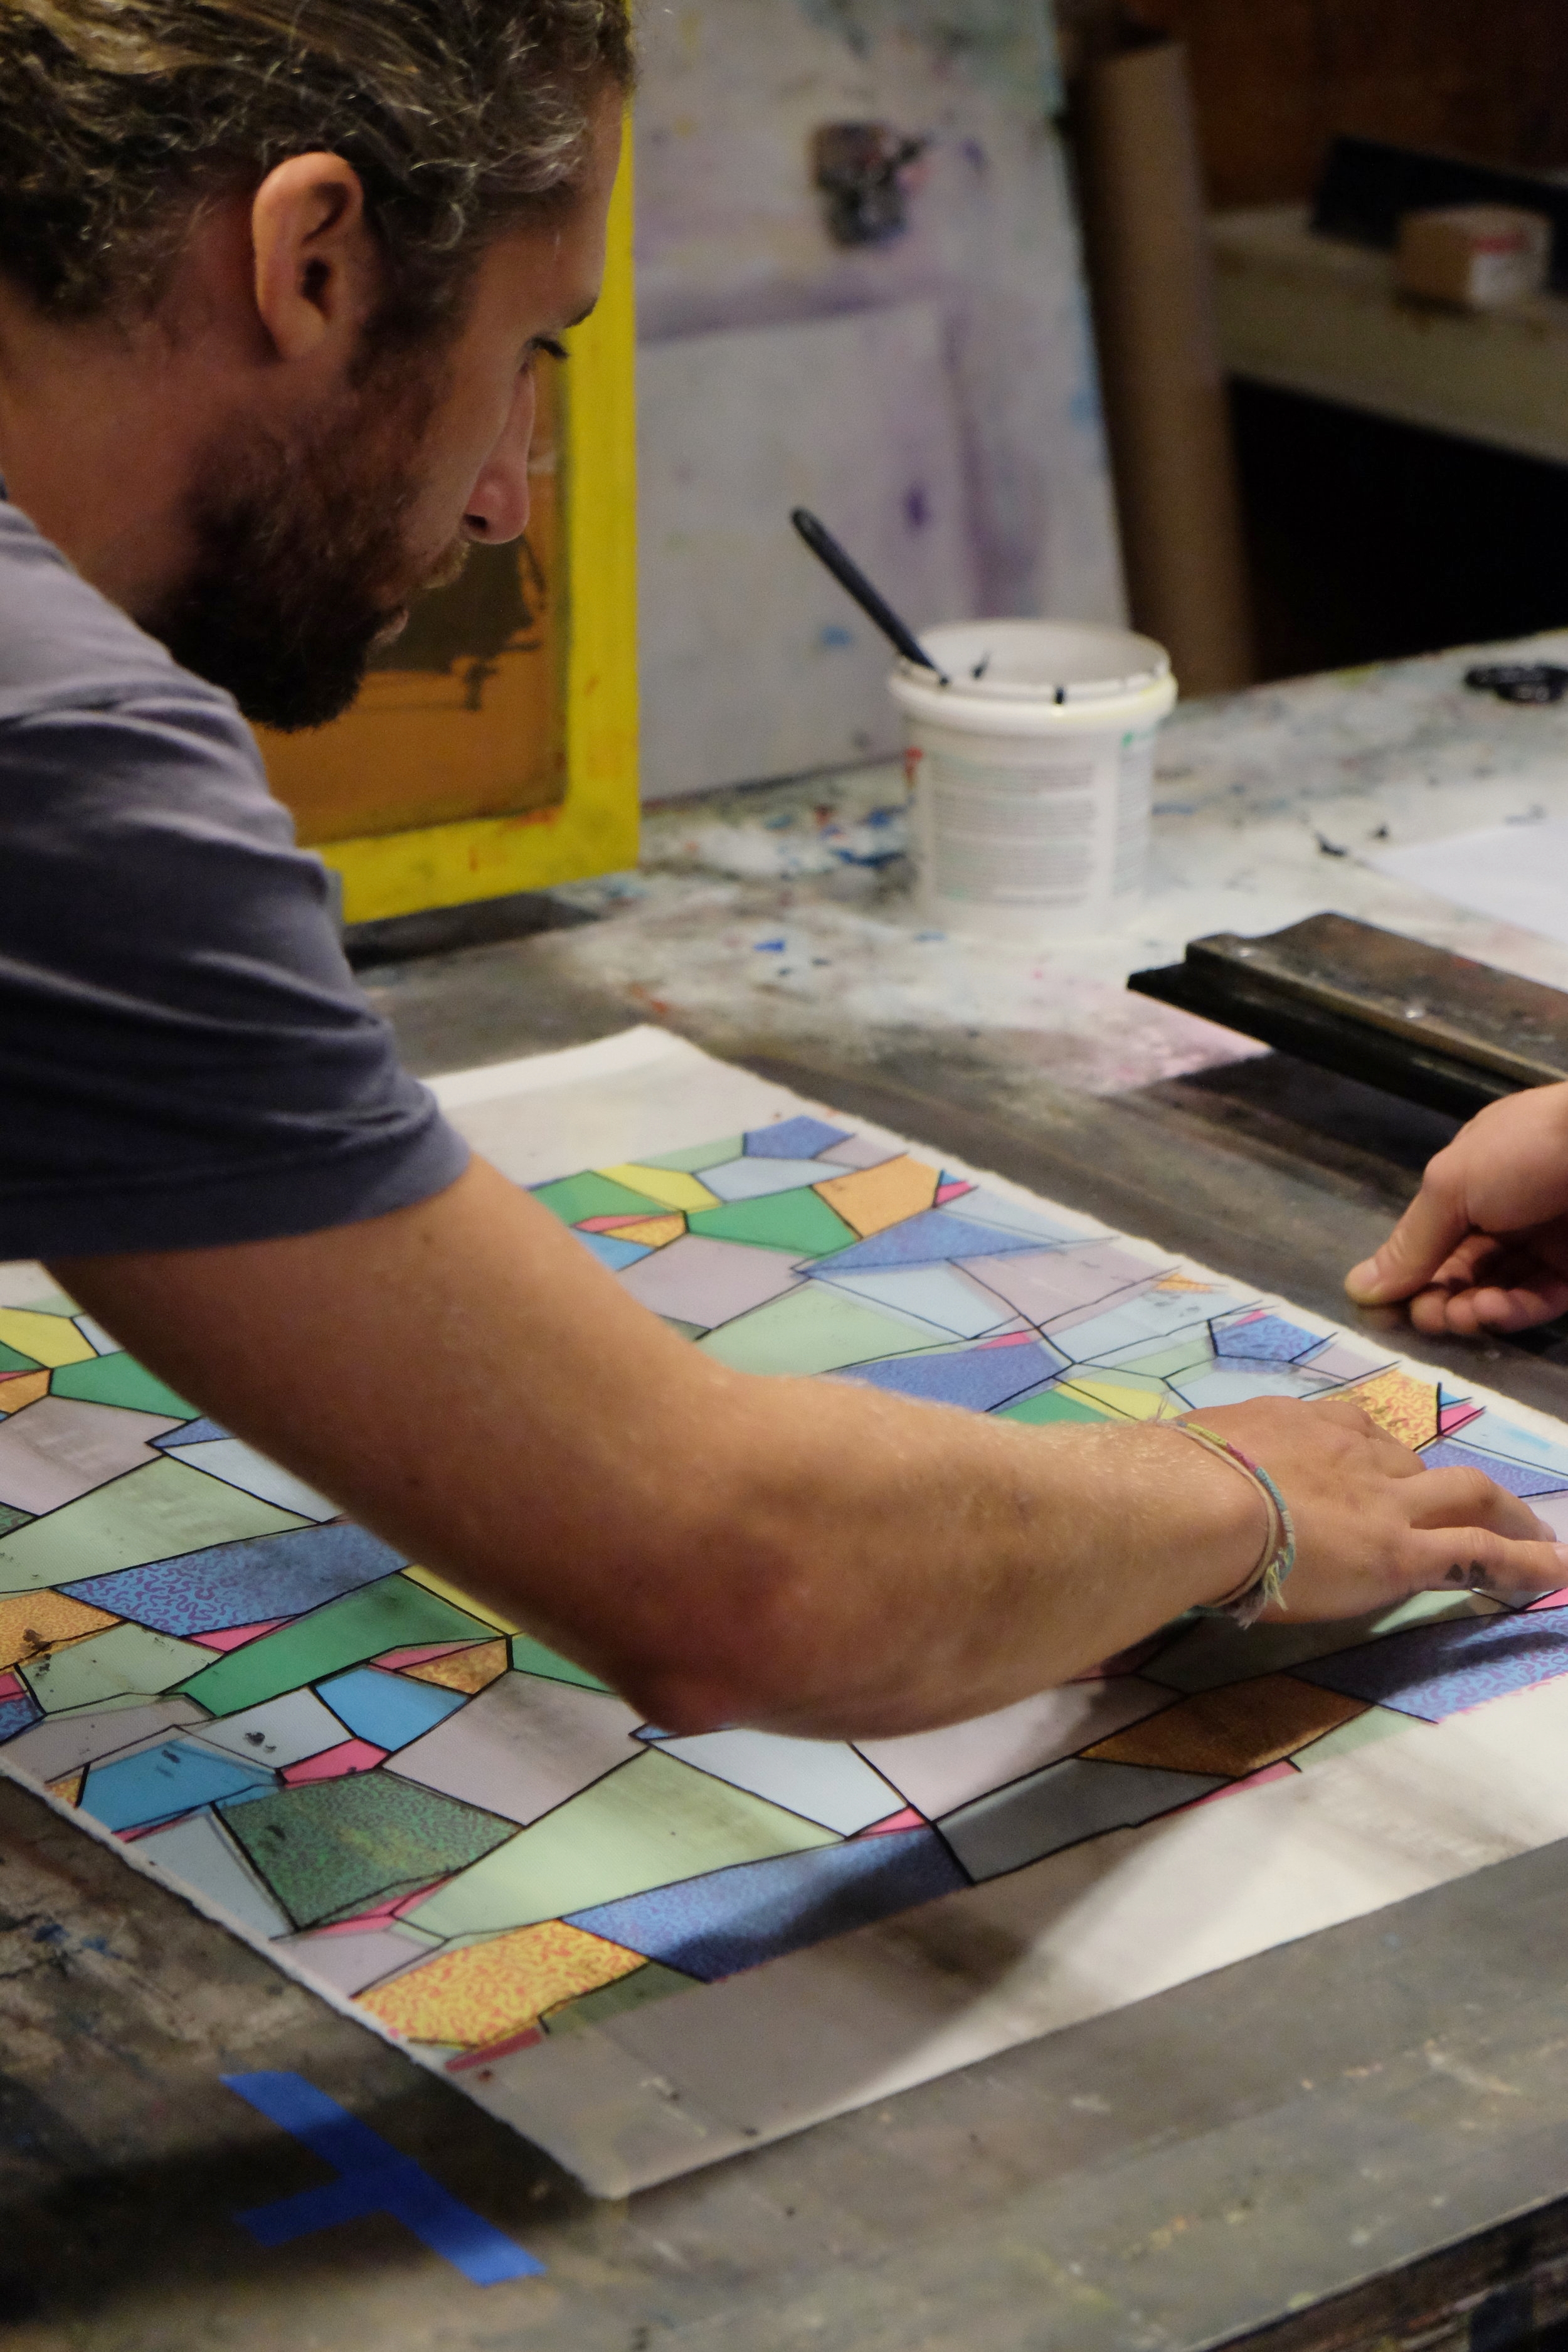
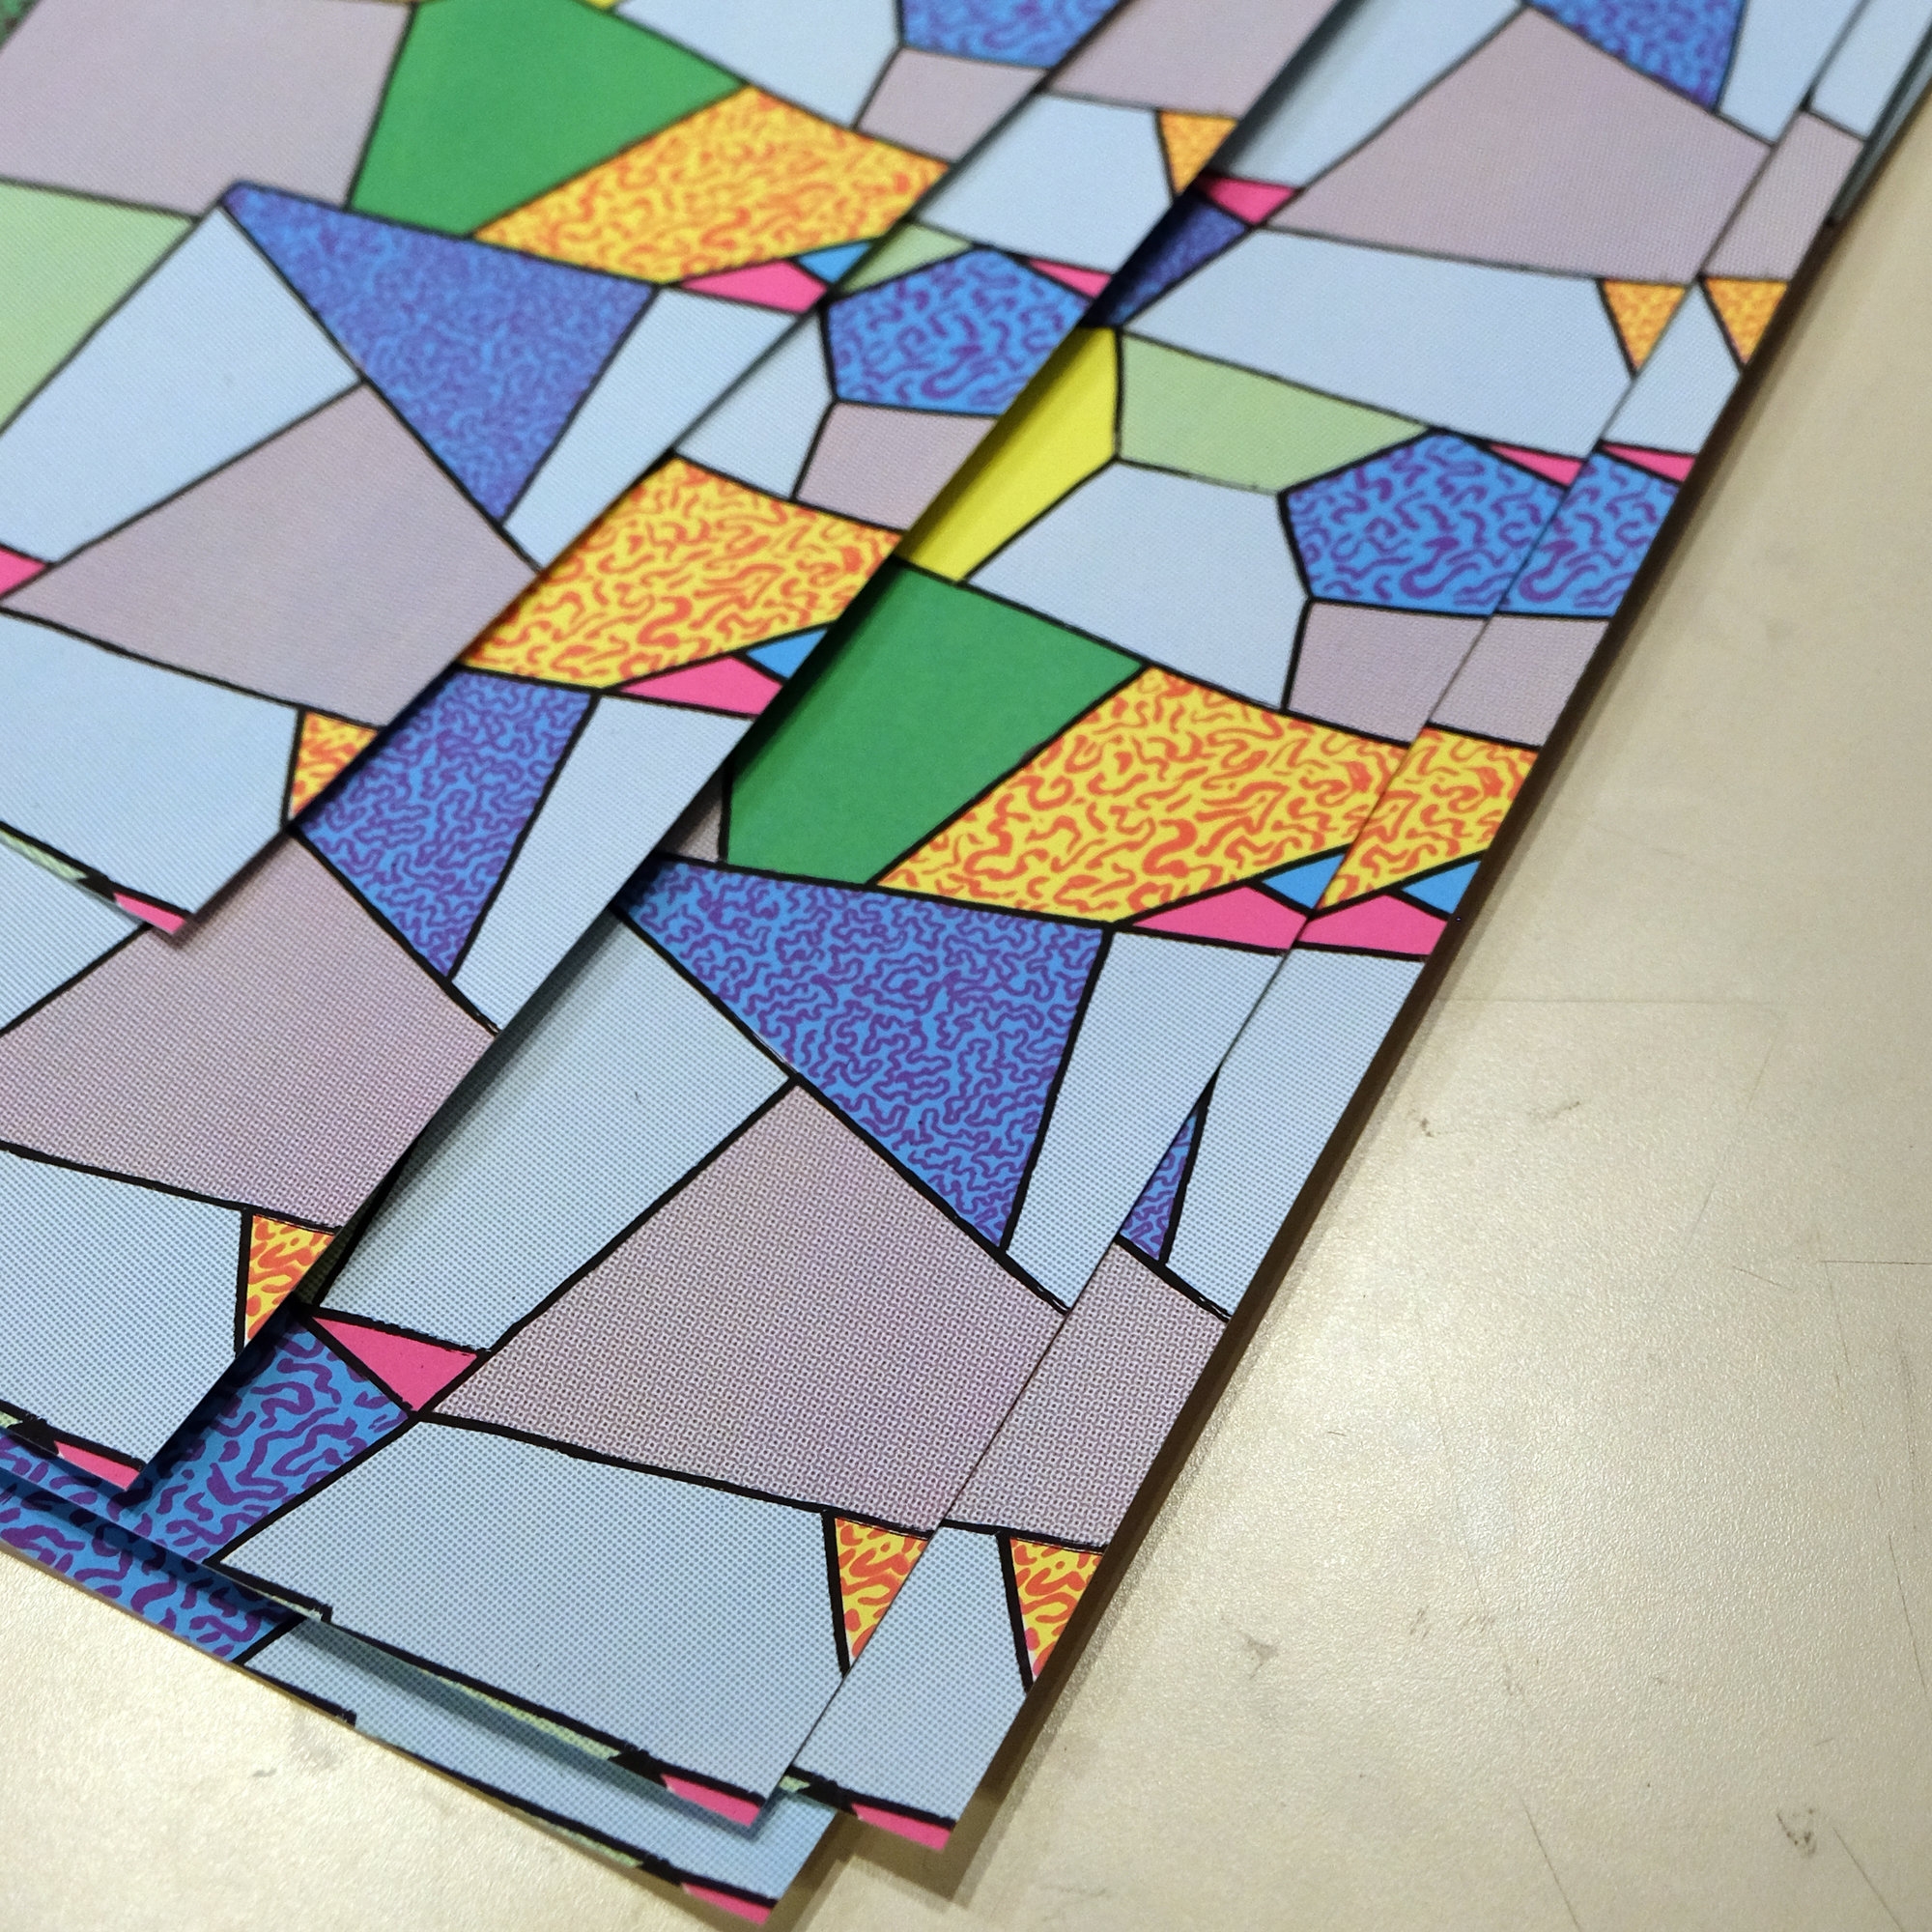
Once again Zack exposed this film on the one lucky screen and it shot perfectly for the first try. The registration lined up the black lines to cover the edges of the colorful shapes to make the colors pop, but it retains a rough hand made feel. After cranking through the rest of the edition and taking a lunch brake we were ready to trim the paper and curate the edition.
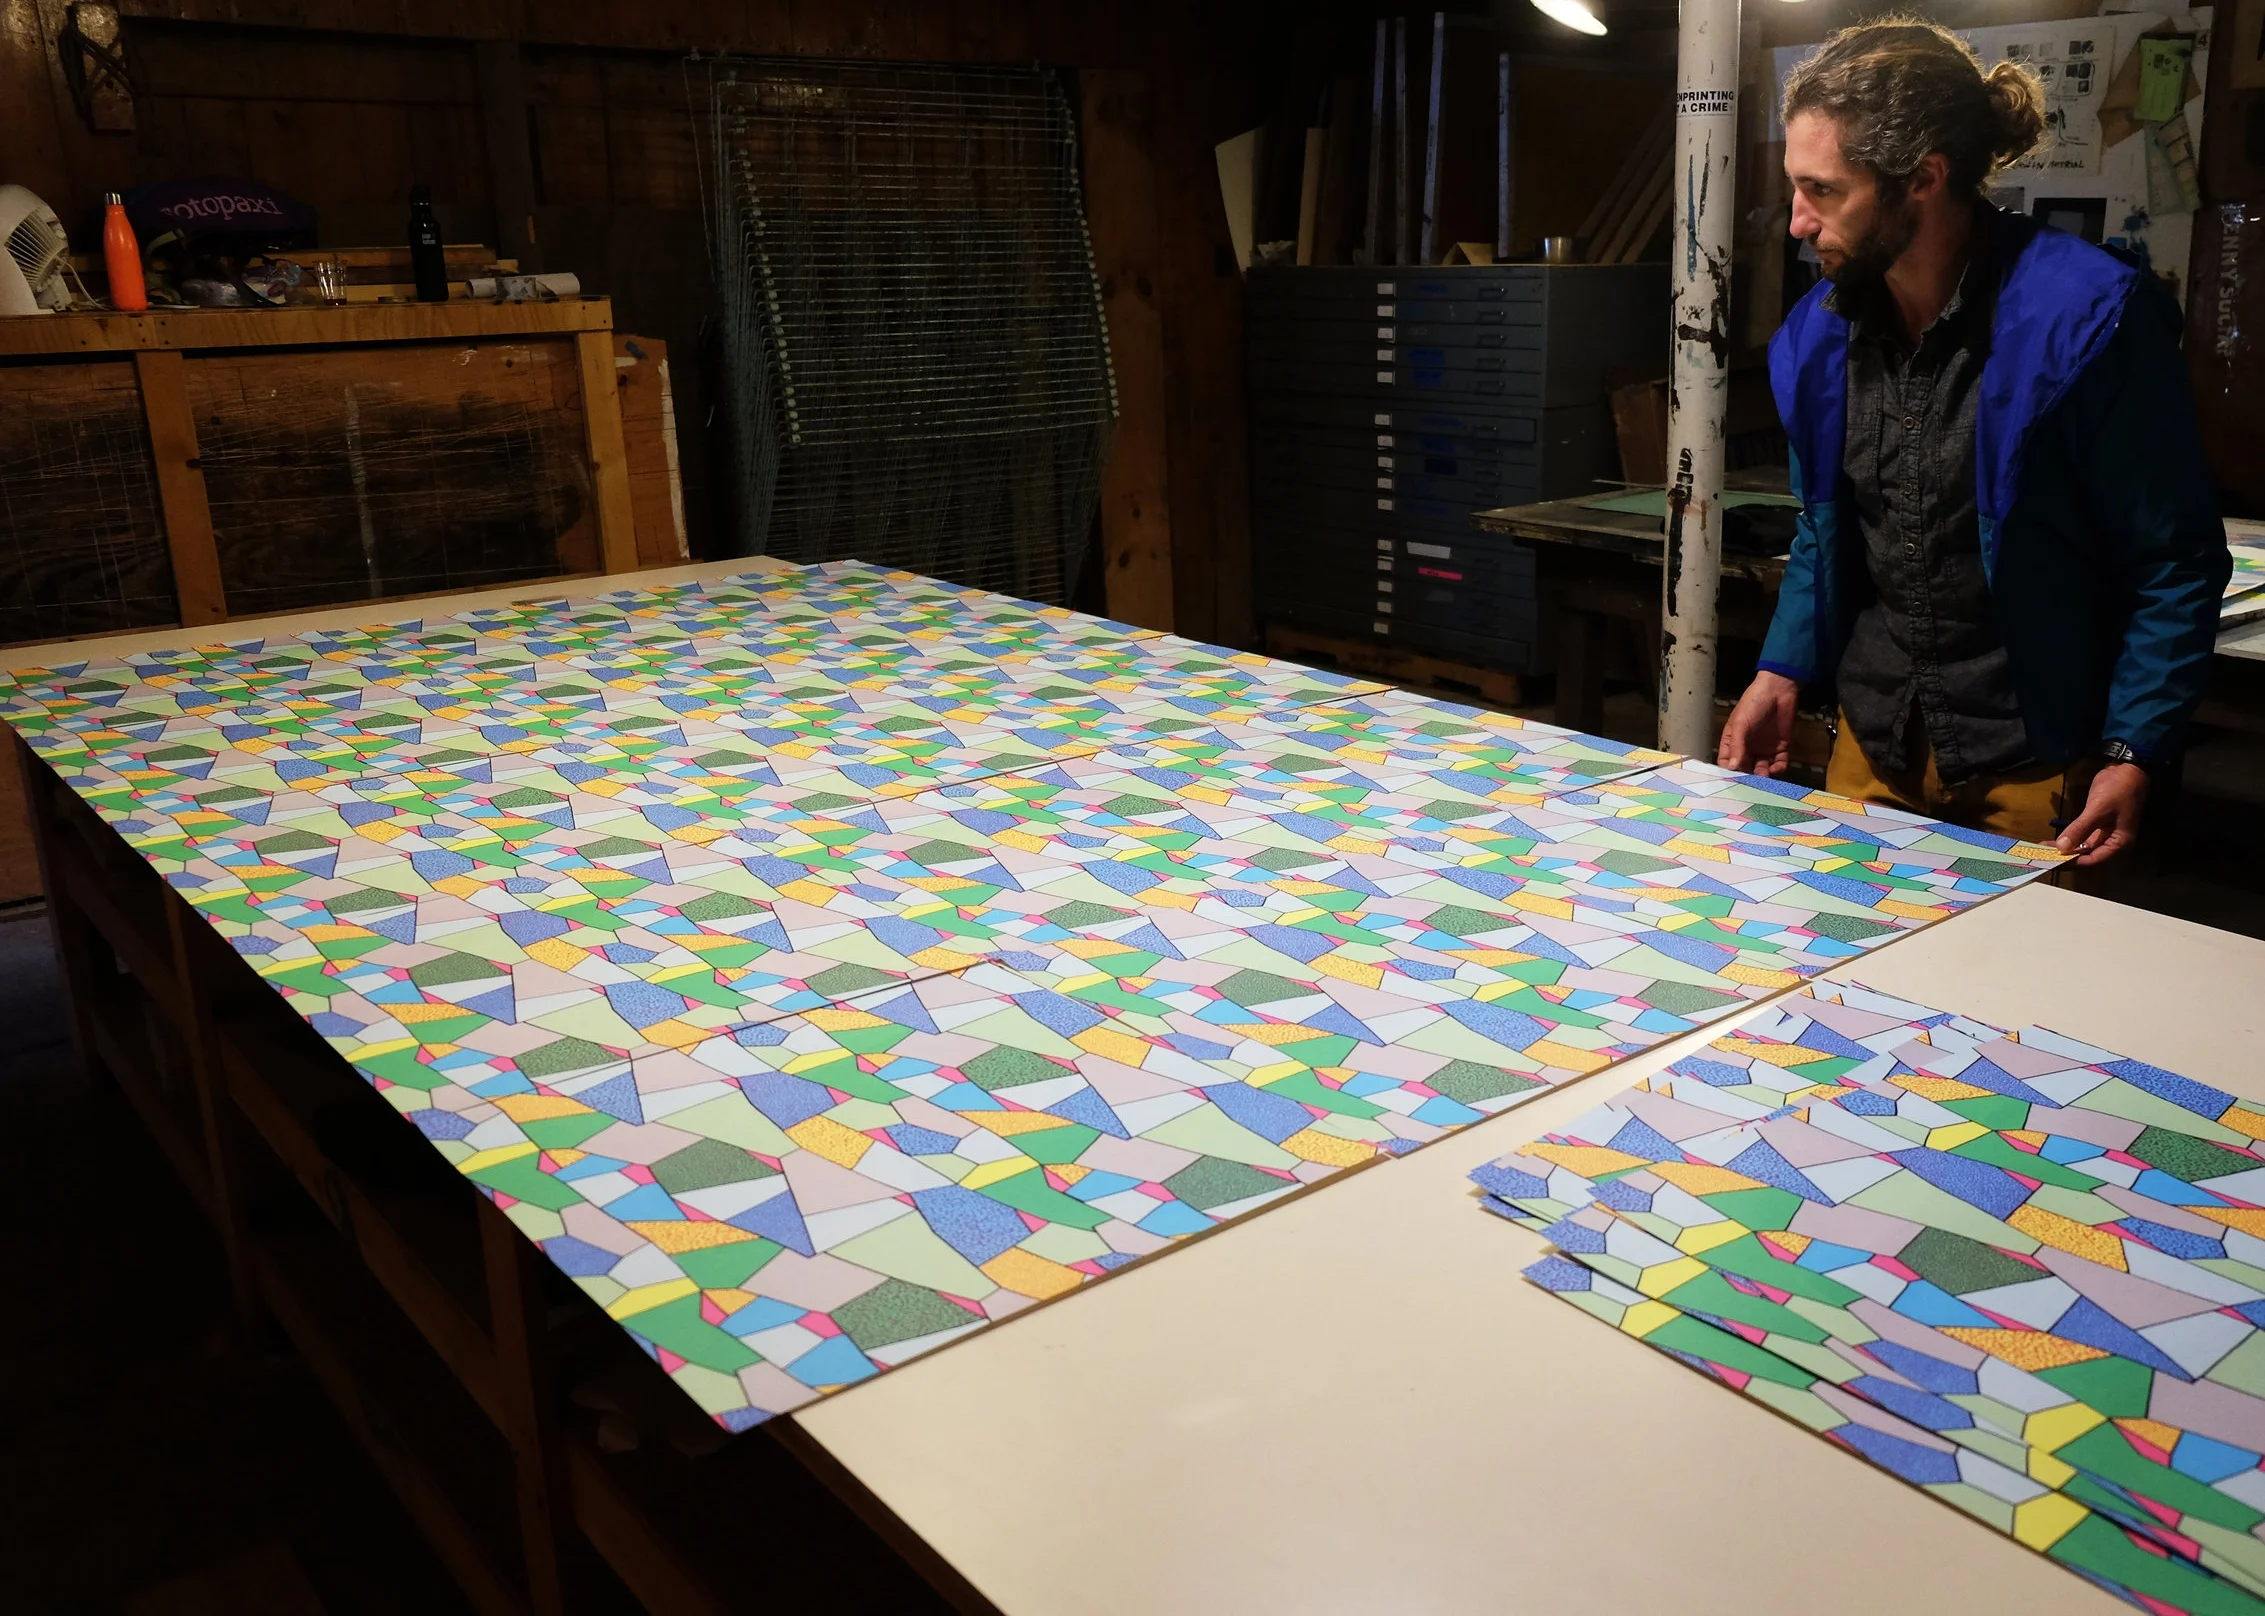
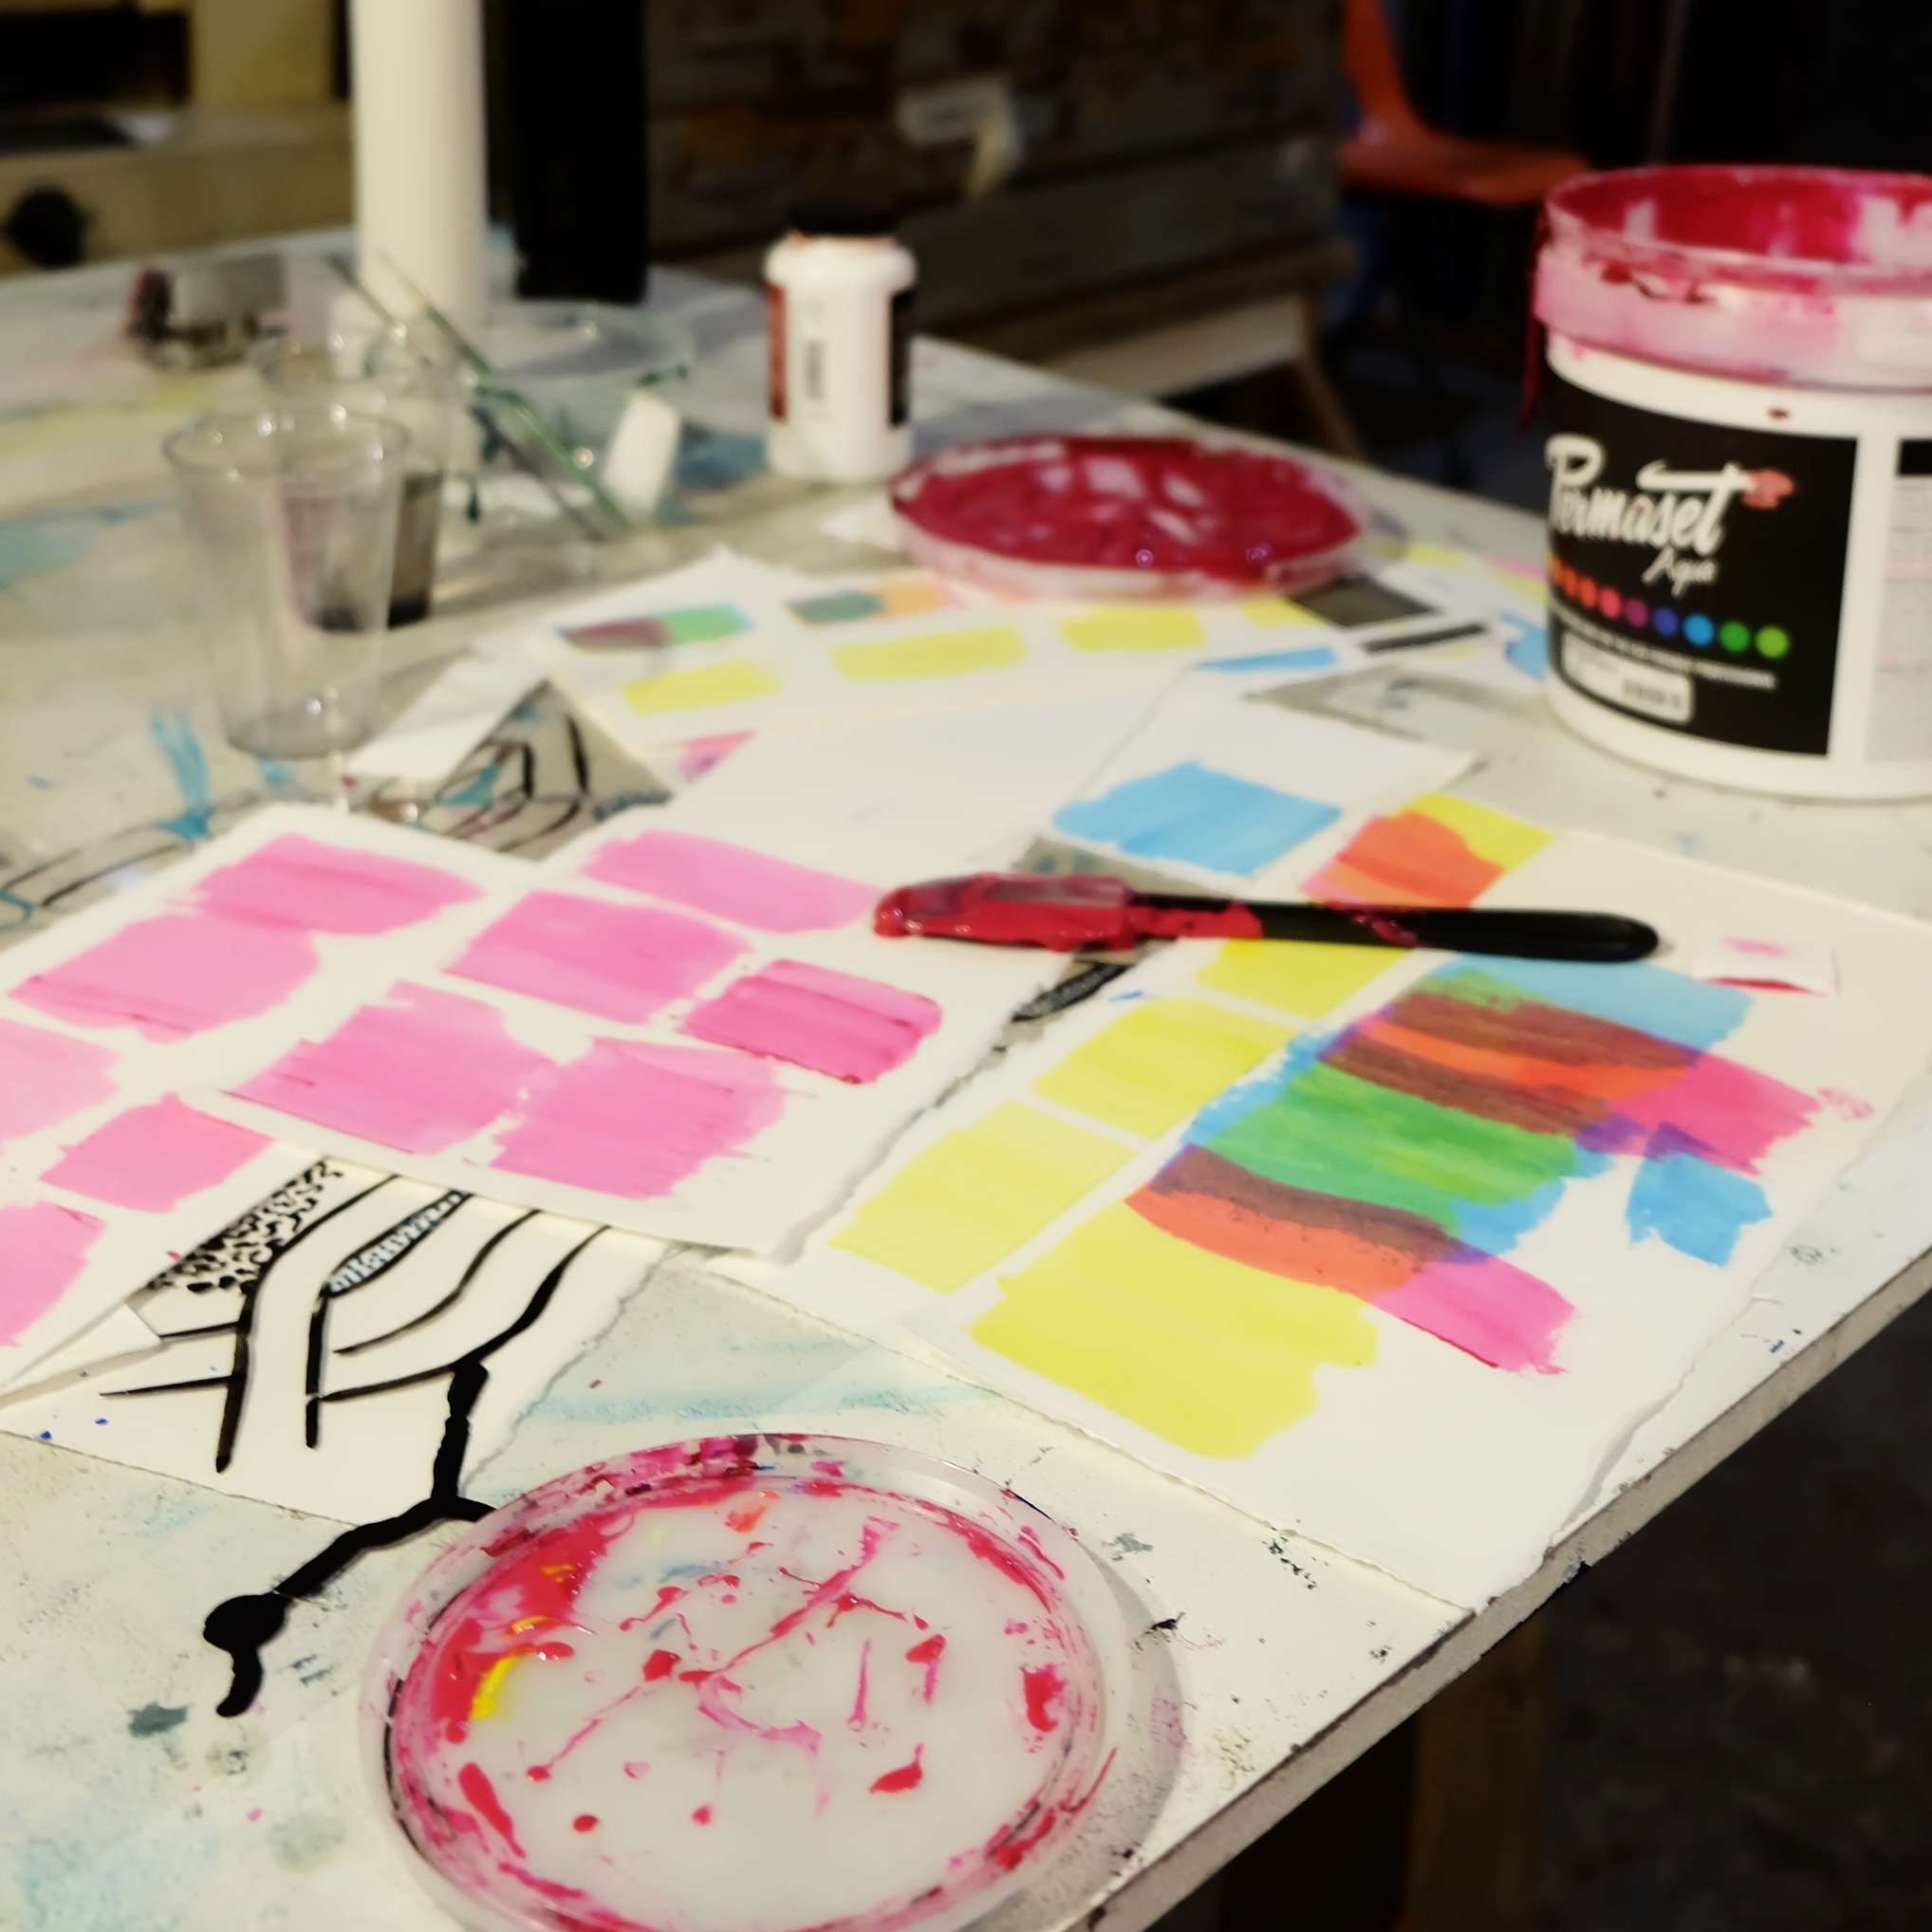
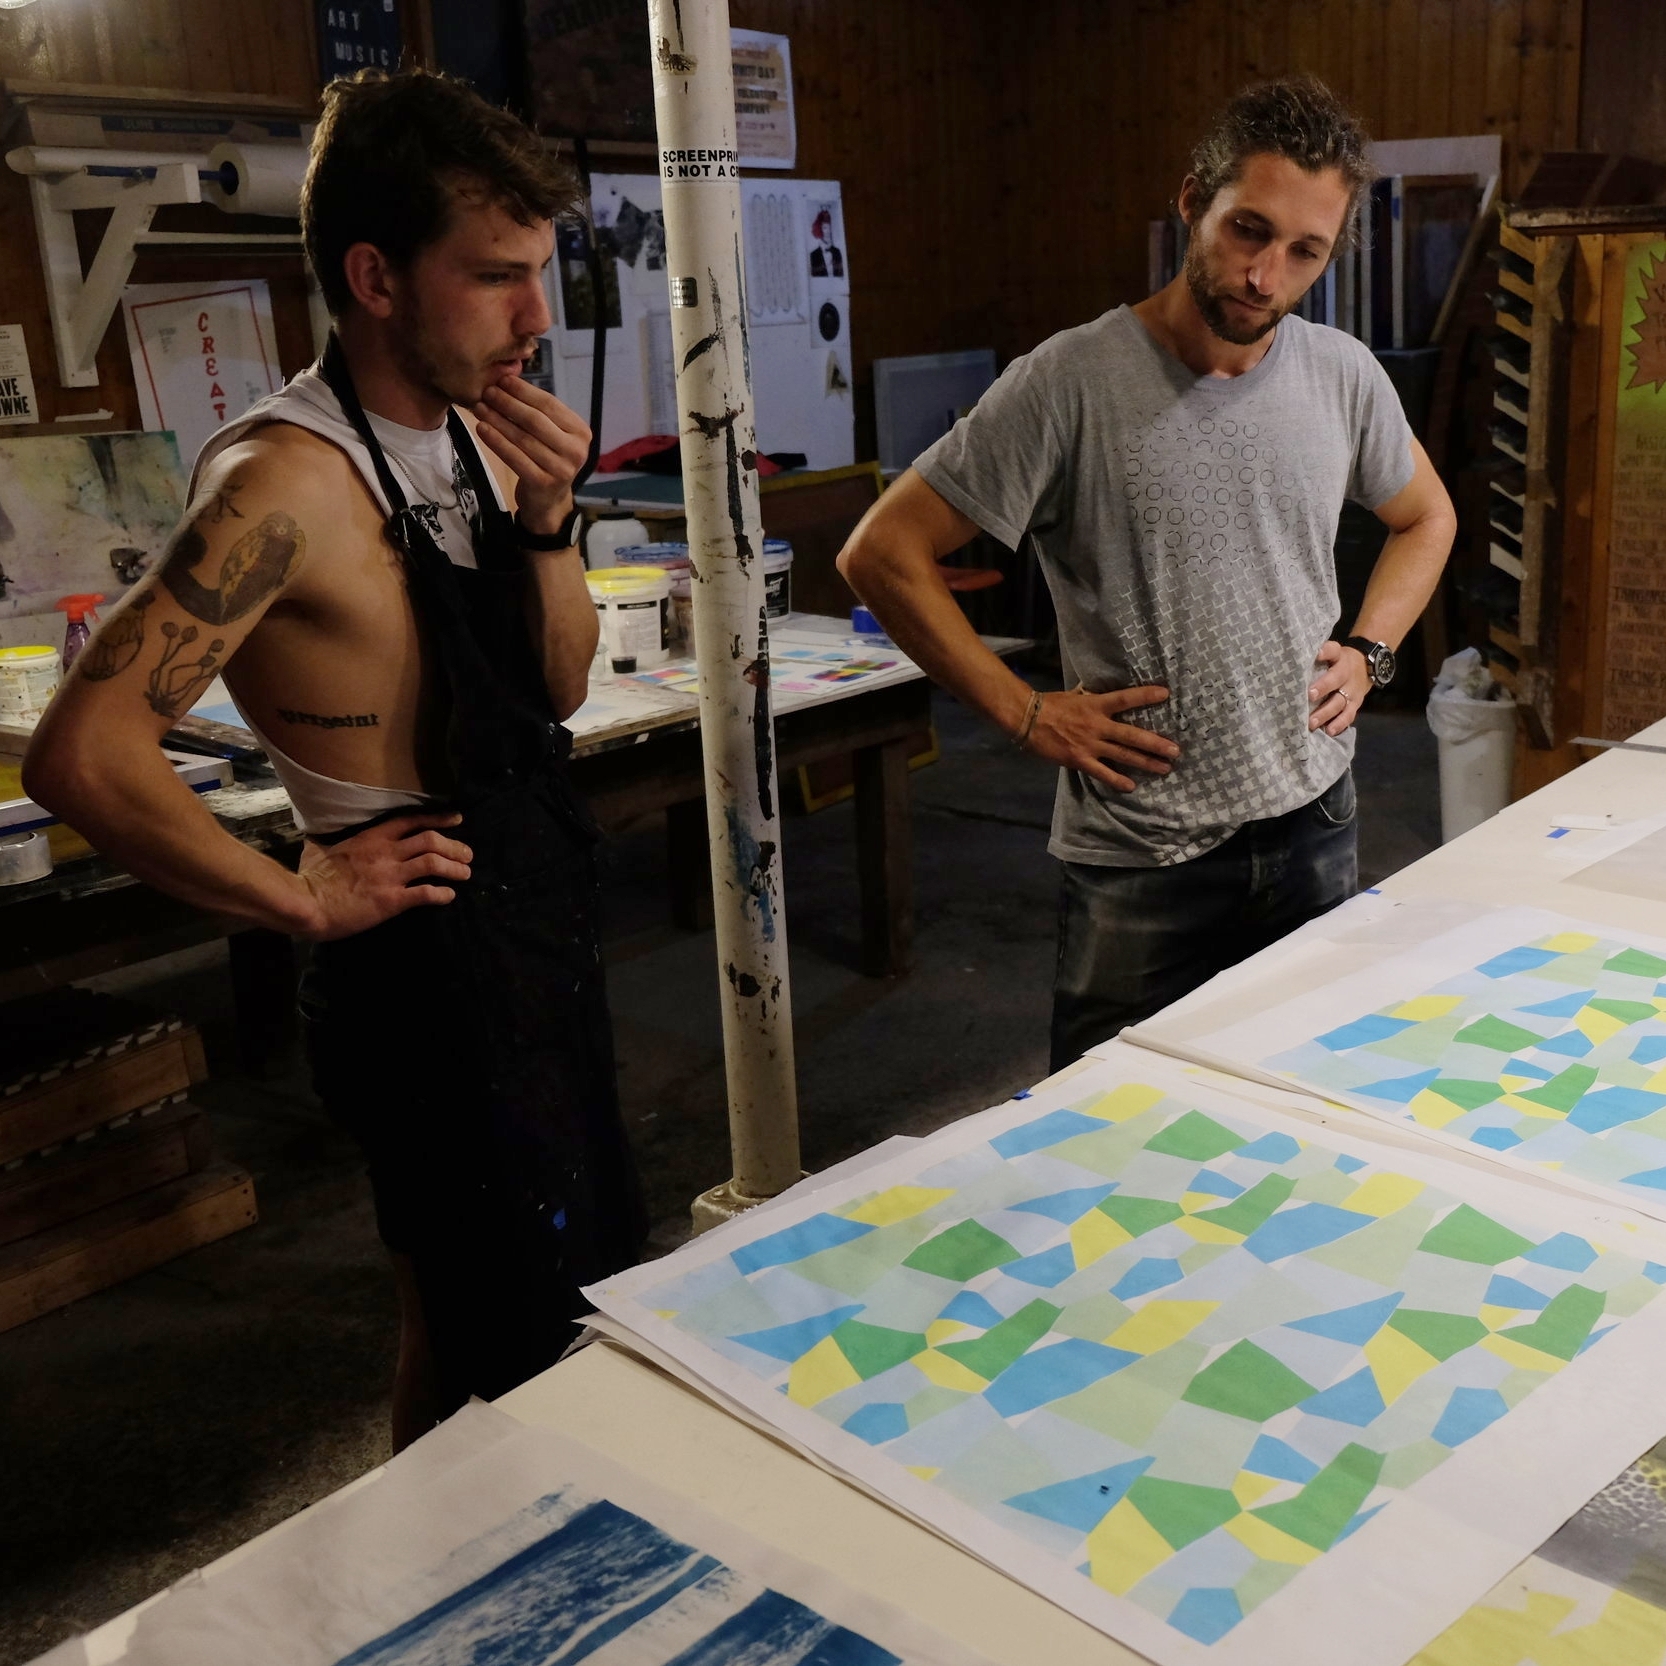
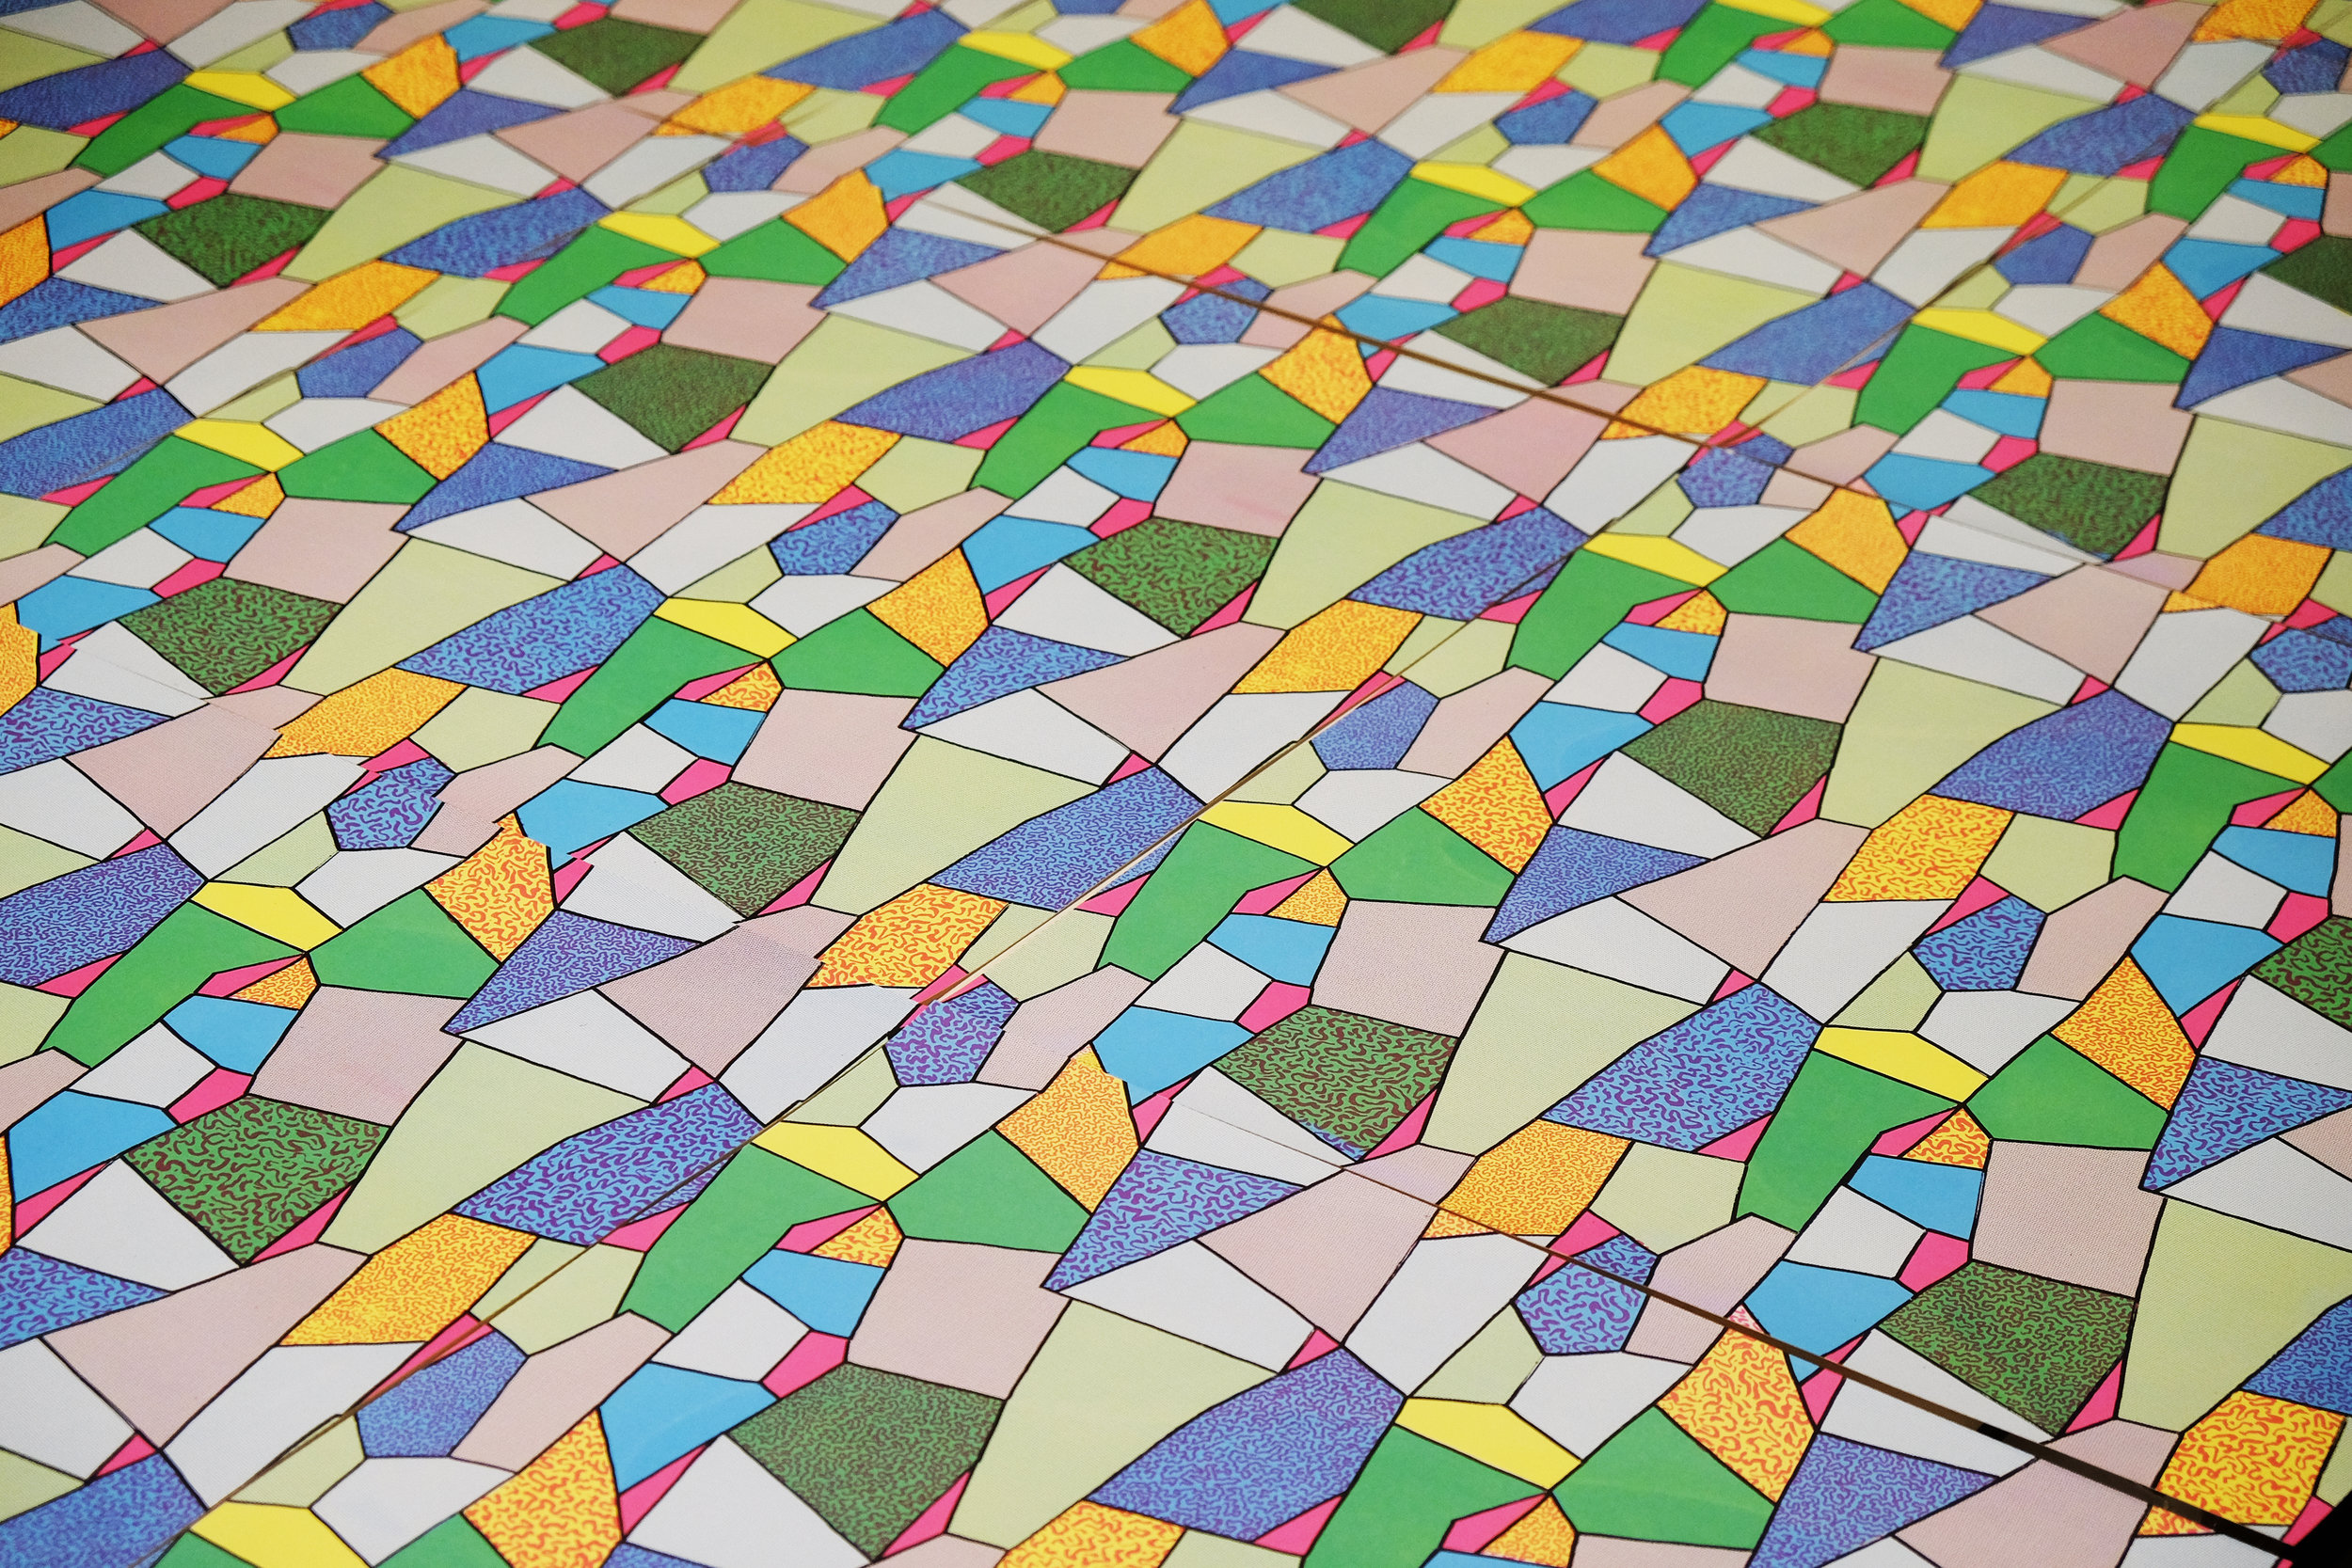
Curating was the part I had never done and is one of the most critical parts of the process. Inherent in the printing process are minor inconsistencies, slight variations in registration of the layers and minor changes in the screen over time. Some prints get eliminated from the edition early based on major errors, but others just have minor variations or a combination of subtle differences. The curating process culls down the pile into prints that get included in the final edition, which in this case ended up being 26 that were of superior quality. The reason for this number is that they could be displayed edge to edge in a 4x6 repeating patterned rectangle. The rest were separated into printers proofs (a reference of the print for Zack to keep) and artist proofs (for me to have a record of our imperfections).
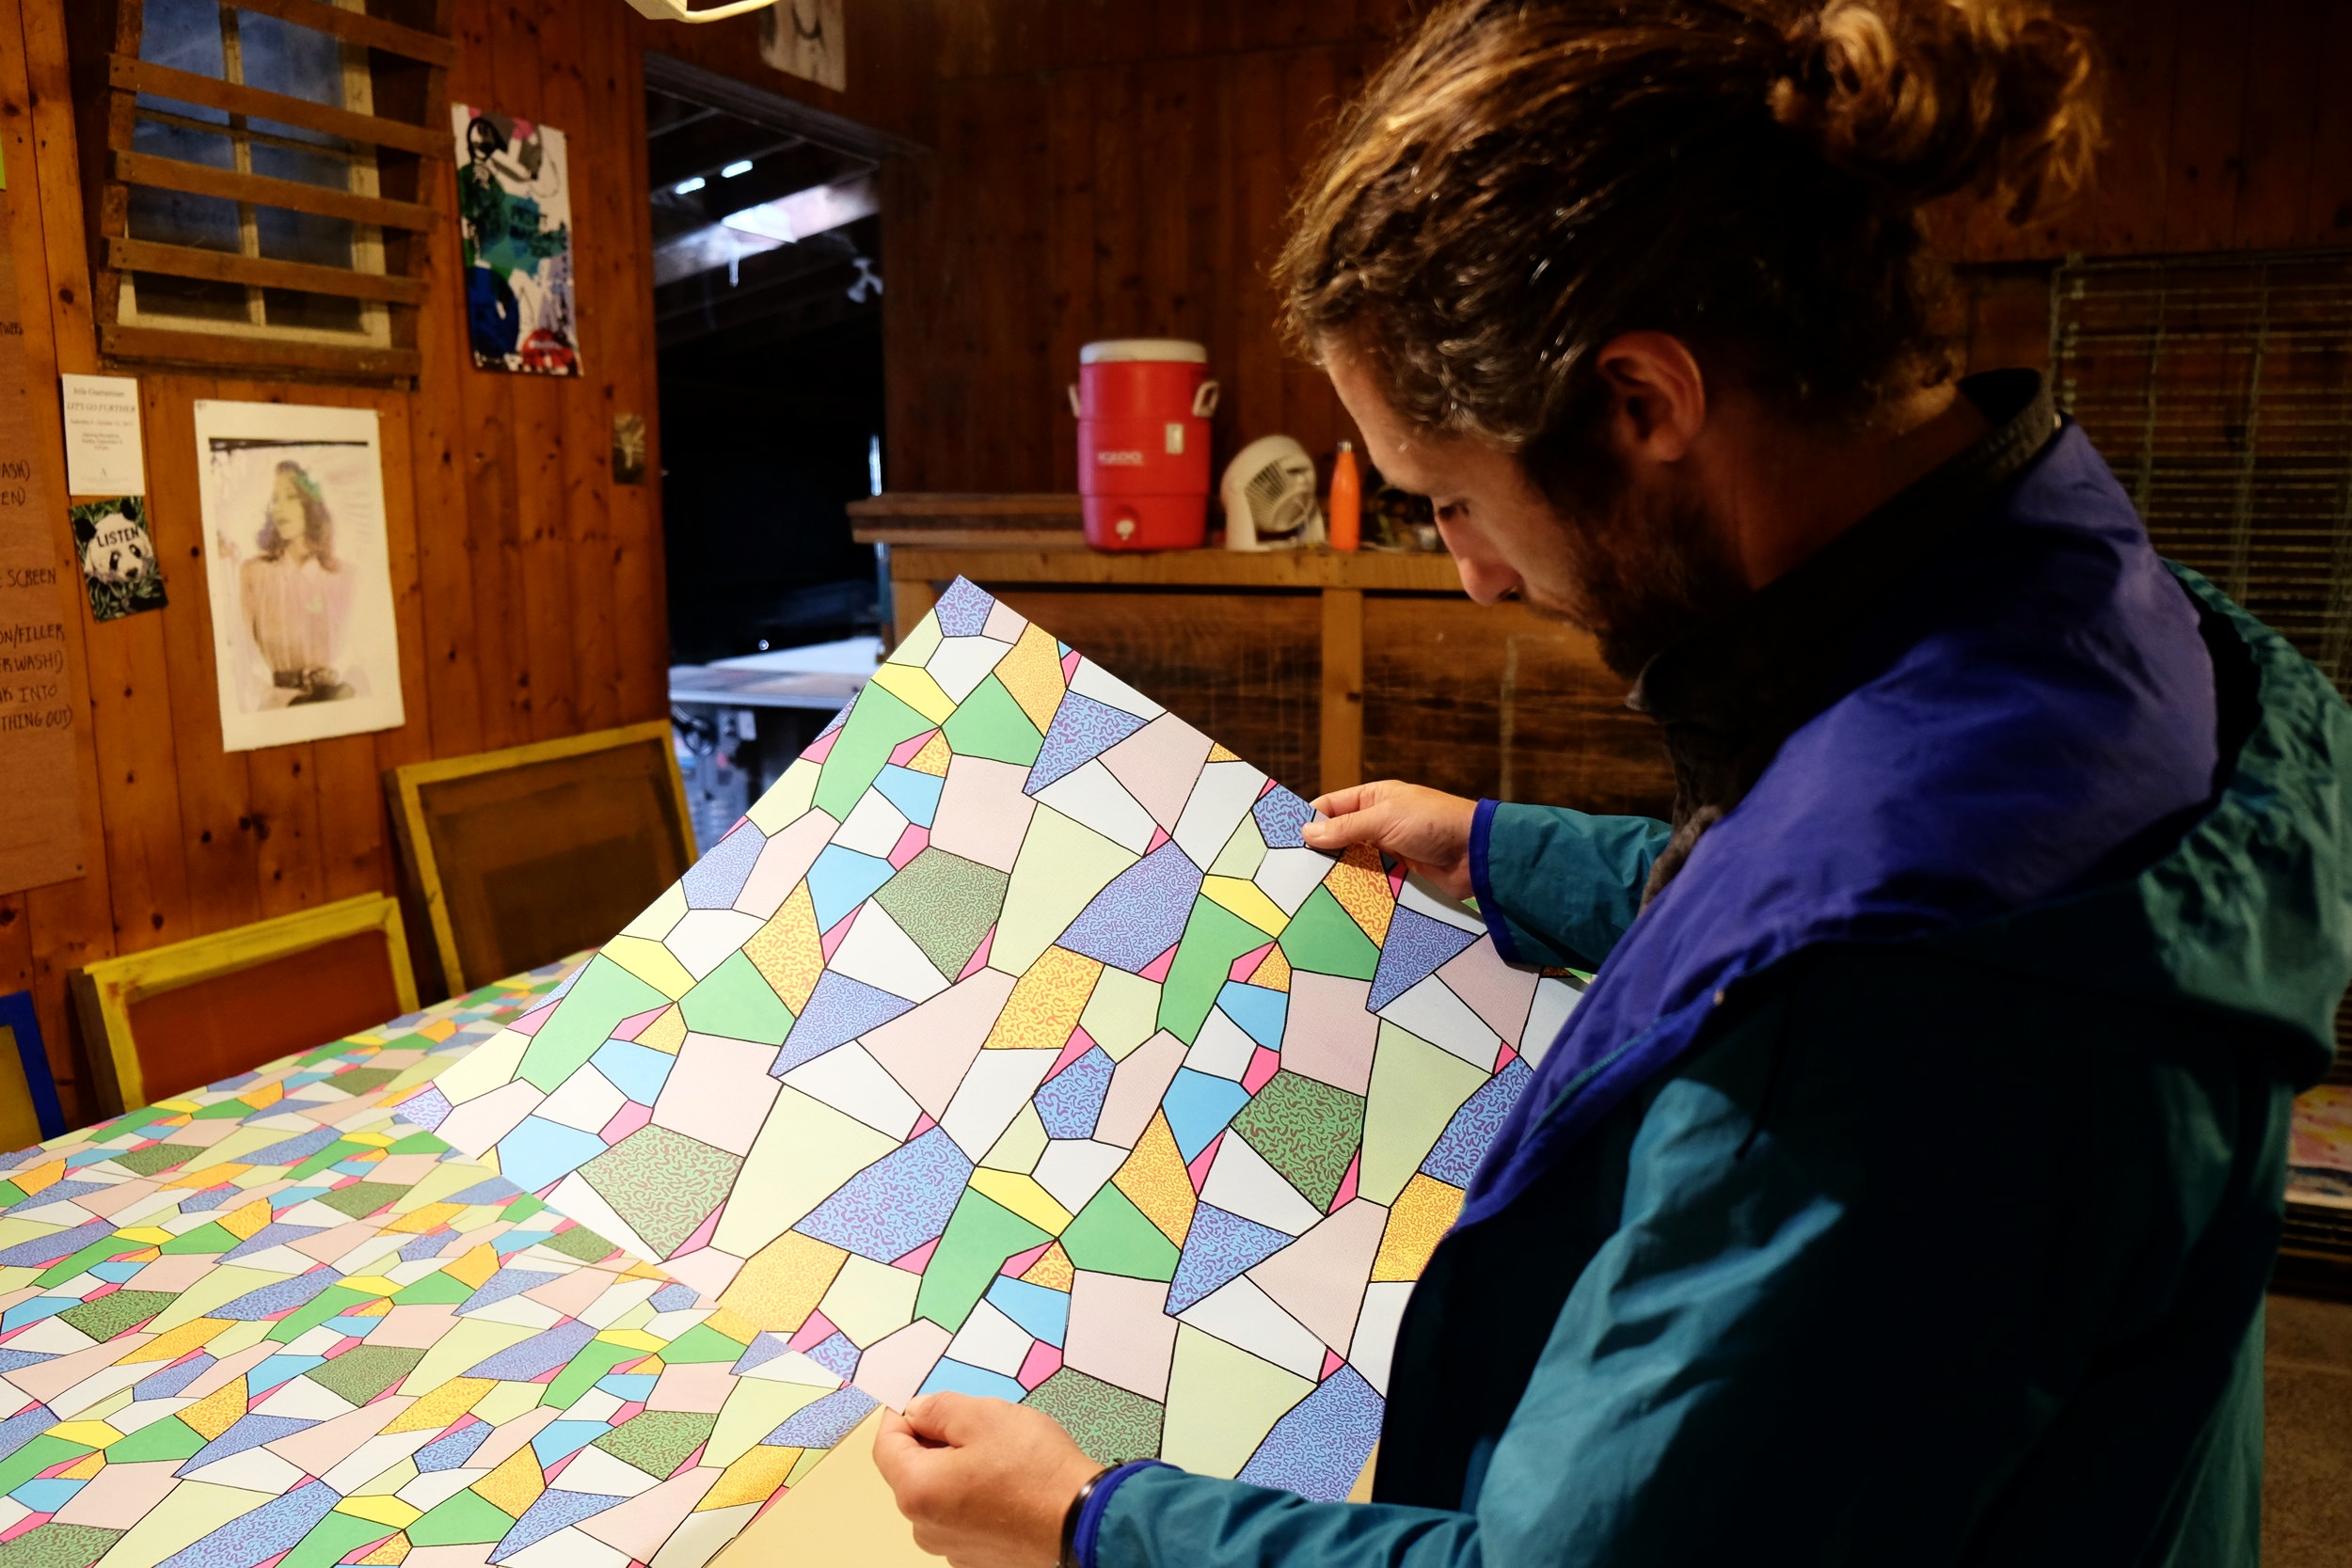
Even though I plan my patterns as repeats, it was Zack who suggested trimming them to the edge and laying them out edge to edge to get the “wallpaper” effect when we were finished. All along the way there was an interplay between my vision and Zack’s knowledge. It is the collaborative aspect to this printmaking process that made it successful. To celebrate the end of this arduous process we had a sip of bourbon and marveled at the sea of repeating colors laid out before us. You can click HERE to see the edition available in our store.

Follow us @treibdesign #treibtravel
ARCHIVE

12 MONTHS OF WANDER
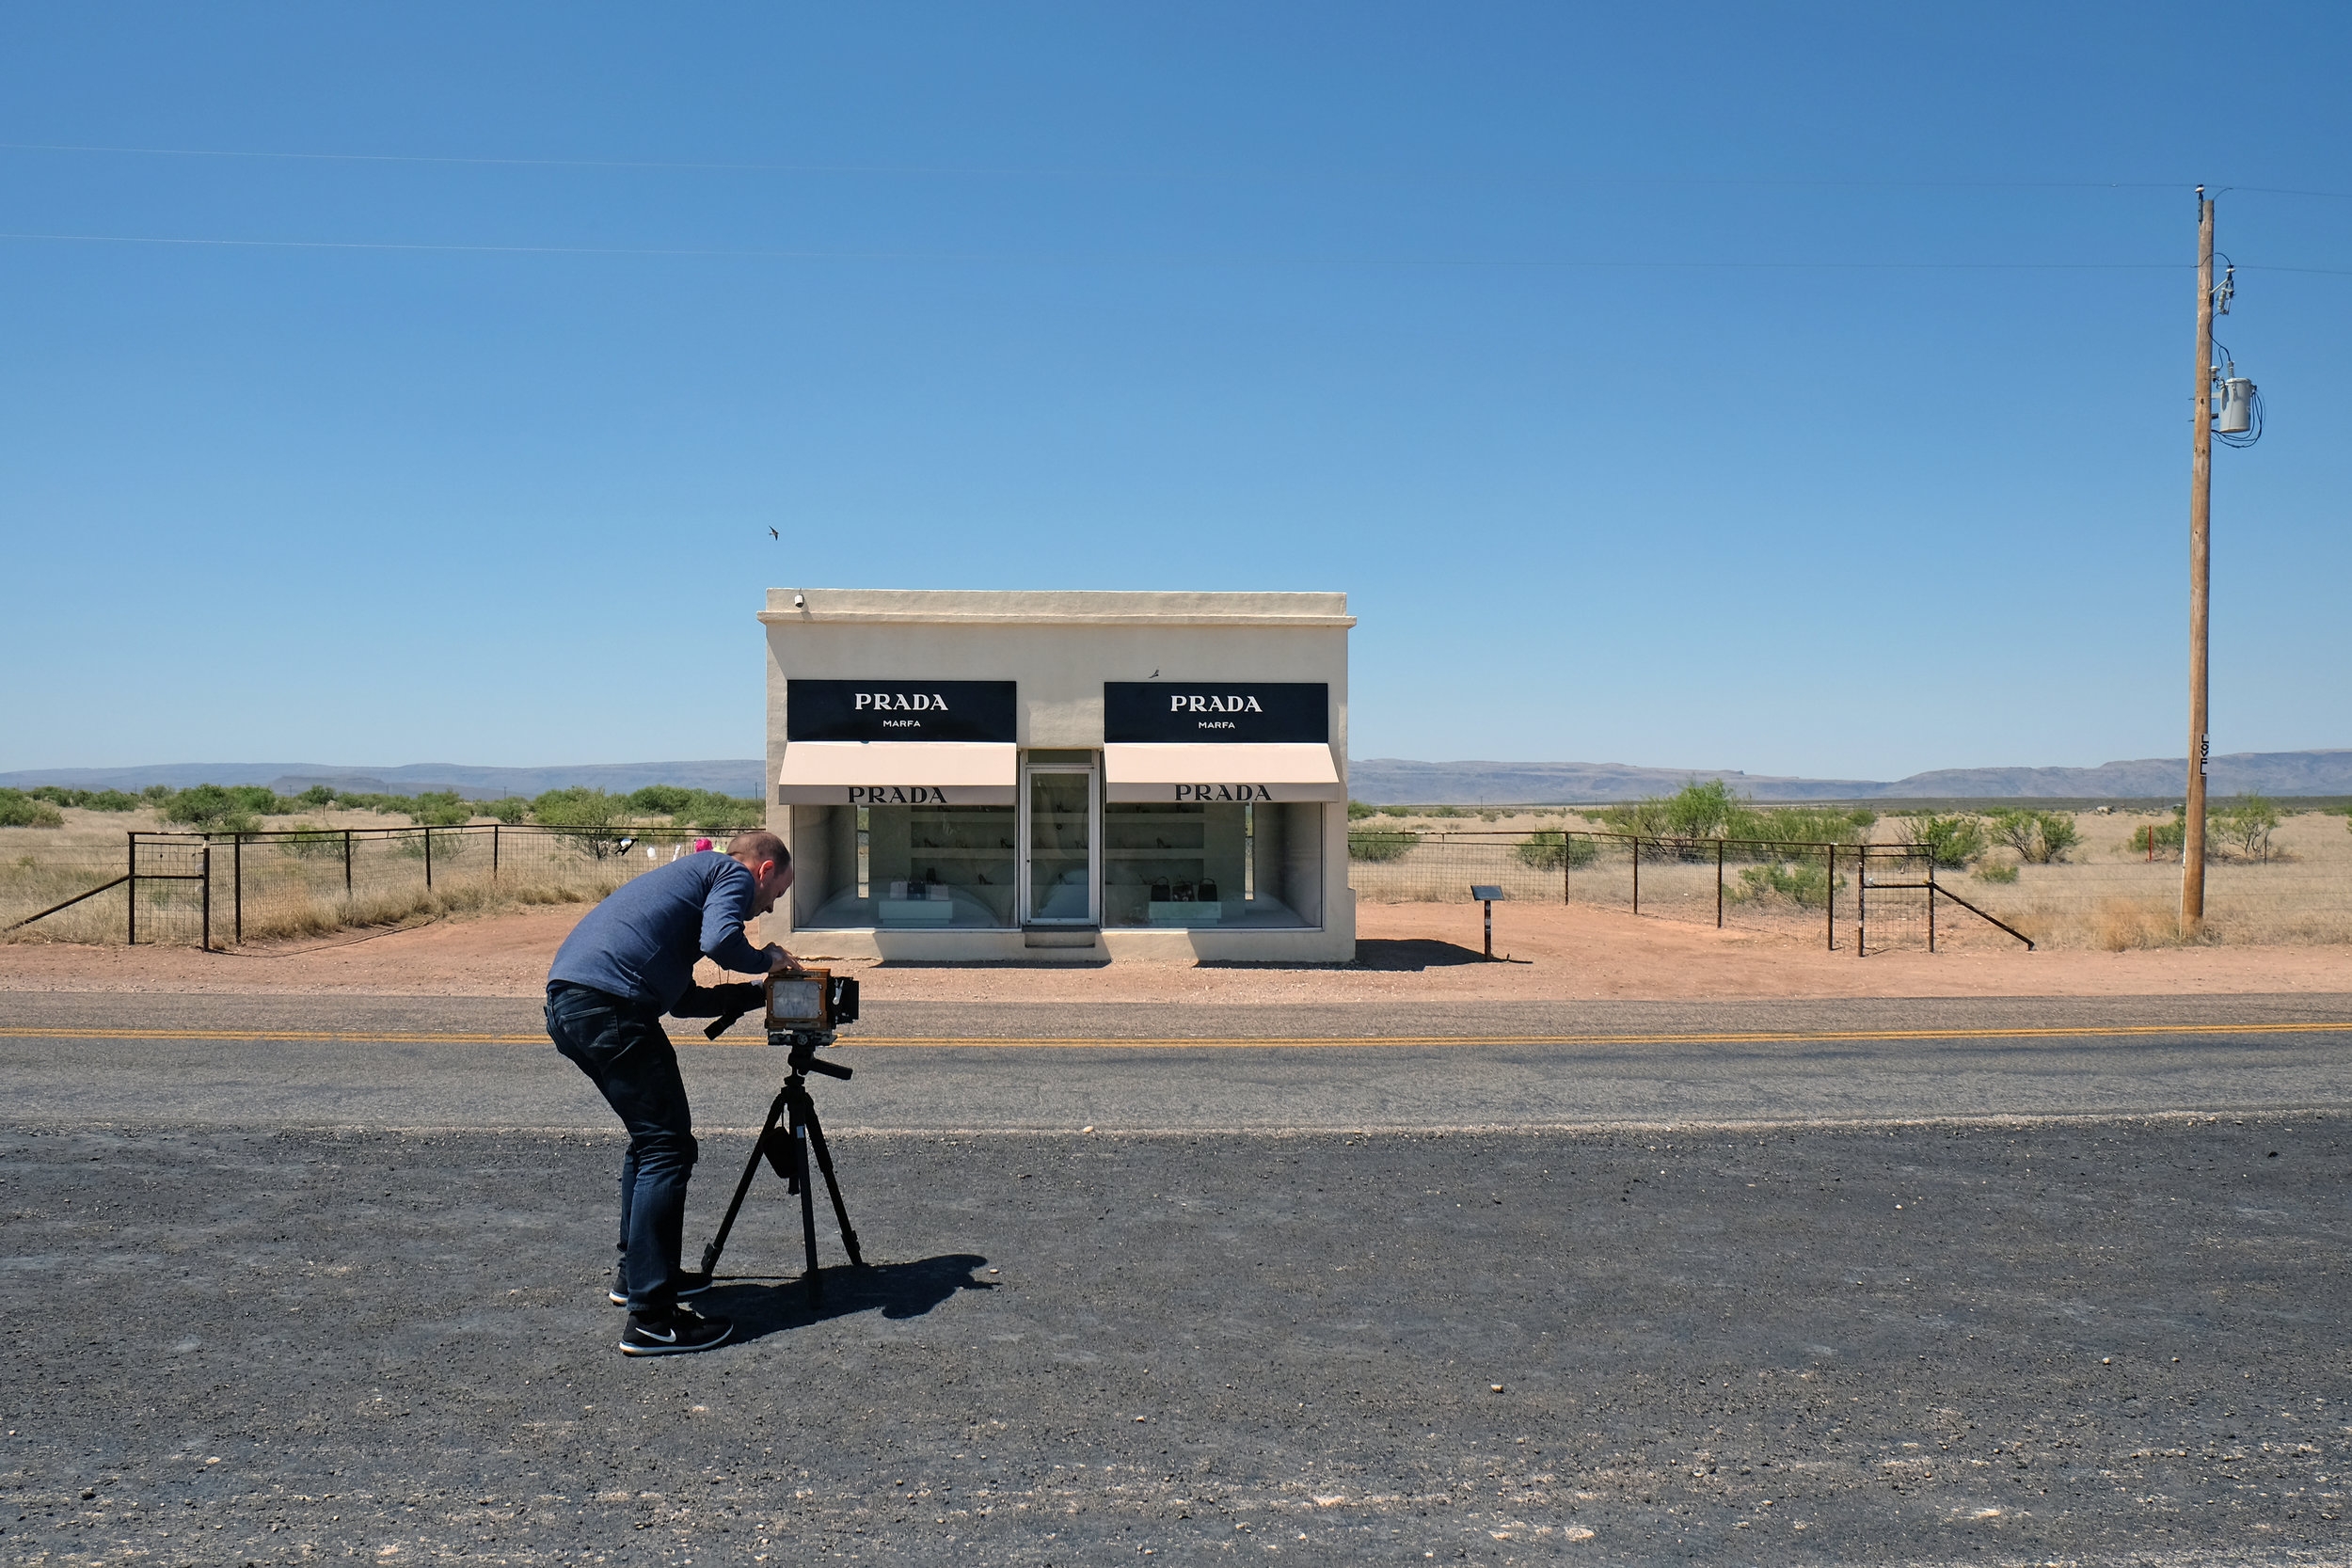
Dallas > Marfa >Rosarito > San Diego > LA > Santa Cruz > San Francisco > Oregon Coast > Portland > Seattle > Orcas Island > Vancouver > Leavenworth > Maryhill > Bend > Hood River > White Salmon > Eugene >-----> Amagansett >----:----- > Indonesia > Vietnam > Cambodia > Thailand > Bhutan > Nepal > Philippines > Hong Kong > Japan > South Korea > India > Sri Lanka > Morocco > Spain > France > Portugal > Austria > Sweden > Latvia